
Introduction
A hissing noise coming from your refrigerator can be concerning, especially if it’s a new sound. It often indicates that something is not working as it should within the cooling system. While it might not always signal a major problem, ignoring it can lead to reduced cooling efficiency, increased energy bills, or even a complete refrigerator failure. This guide will help you understand the common causes of a refrigerator hissing noise and provide step-by-step instructions on how to troubleshoot and potentially fix the issue yourself.
💡 Technical Key Takeaways:
- Core Focus: Diagnostic schematic and terminal connection layout for Refrigerator Hissing Noise.
- Target Scope: Field technicians, automotive DIYers, and residential/commercial electricians.
- Safety Rule: Always disconnect the primary power source/battery terminal and verify zero voltage with a multimeter before touching wires.
Common Causes of Refrigerator Hissing Noise
Here are some of the most frequent reasons why your refrigerator might be hissing:
- Refrigerant Flow: Refrigerant flowing through the evaporator coils is a common source of a hissing sound, especially during and after the compressor runs. This is usually normal.
- Defrost Cycle: During the automatic defrost cycle, melting ice can create a hissing or sizzling sound as water drips onto the hot defrost heater.
- Water Inlet Valve: If your refrigerator has an ice maker or water dispenser, a faulty water inlet valve can cause a hissing sound as it regulates water flow.
- Leaking Door Seals: Damaged or improperly sealed door gaskets allow warm air to enter the refrigerator, causing the compressor to work harder and potentially creating hissing noises.
- Condenser Fan Motor: A failing condenser fan motor can produce a hissing or buzzing sound, especially when the motor is struggling to turn.
- Evaporator Fan Motor: Similar to the condenser fan, a malfunctioning evaporator fan inside the freezer compartment can also generate unusual noises.
- Ice Maker Operation: When the ice maker fills with water or releases ice, it can make hissing and other noises.
- Blocked Air Vents: Restricted airflow inside the refrigerator or freezer can cause temperature imbalances and increase the likelihood of unusual sounds.
Symptoms Checklist
Use this checklist to better understand the source of the hissing noise:
- Does the hissing noise occur constantly or intermittently?
- Is the noise louder in the refrigerator compartment or the freezer?
- Does the hissing sound change during or after the defrost cycle?
- Does the refrigerator have an ice maker or water dispenser?
- Are the door seals intact and sealing properly?
- Is the back of the refrigerator clean and free of dust?
- Is the refrigerator cooling properly?
- Are there any visible signs of frost buildup inside the freezer?
How to Fix Refrigerator Hissing Noise Step-by-Step Guide
Follow these steps to troubleshoot the hissing noise:
- Unplug the Refrigerator: For safety, disconnect the refrigerator from the power outlet before beginning any troubleshooting.
- Listen Carefully: Try to pinpoint the exact location of the hissing sound. Is it coming from inside the refrigerator, the freezer, or the back of the unit?
- Inspect the Door Seals: Check the door seals (gaskets) for any damage, cracks, or gaps. Clean them with a damp cloth and mild detergent.
- Check the Condenser Coils: Locate the condenser coils, usually at the back of the refrigerator or underneath it. Clean them thoroughly with a vacuum cleaner brush attachment. Dust buildup can reduce cooling efficiency.
- Observe the Defrost Cycle: Note if the hissing noise is most prominent during or after the defrost cycle. This might indicate normal operation.
- Examine the Water Inlet Valve (If Applicable): If you have an ice maker or water dispenser, check the water inlet valve for leaks or damage. It’s usually located at the back of the refrigerator near the water supply line.
- Inspect the Condenser Fan: Locate the condenser fan (usually near the compressor at the back). Ensure it’s free from obstructions and spinning smoothly. If it’s noisy or not turning, it may need attention.
- Inspect the Evaporator Fan: Locate the evaporator fan inside the freezer compartment. Check for ice buildup or obstructions that might be causing the noise.
- Check for Ice Buildup: Excessive ice buildup in the freezer can restrict airflow and cause hissing sounds. Defrost the freezer manually if necessary.
- Verify Proper Ventilation: Ensure that the air vents inside the refrigerator and freezer are not blocked by food items.
- Listen to the Compressor: The compressor is typically located at the back of the refrigerator. Listen to it carefully. A hissing noise directly from the compressor might indicate a refrigerant leak.
- Check the Drain Pan: Locate the drain pan (usually under the refrigerator). Ensure it’s properly positioned and not overflowing.
- Plug the Refrigerator Back In: After completing the above checks, plug the refrigerator back into the power outlet.
- Monitor for Improvements: Observe the refrigerator for a few hours to see if the hissing noise has diminished or disappeared.
Fix the Issue Without Buying Parts
Often, you can resolve the hissing noise without replacing any parts:
- Reset the Refrigerator: Unplugging the refrigerator for 10-15 minutes can sometimes reset the system and resolve minor issues.
- Clean the Condenser Coils Regularly: Regular cleaning prevents dust buildup and ensures efficient cooling.
- Ensure Proper Airflow: Arrange food items to allow for proper airflow inside the refrigerator and freezer.
- Level the Refrigerator: An uneven refrigerator can cause stress on the components and lead to unusual noises. Adjust the leveling feet as needed.
- Regular Maintenance: Following a regular cleaning and maintenance schedule can prevent many common problems.
When Replacement Might Be Necessary
If the hissing noise persists after performing the above troubleshooting steps, and especially if you suspect a refrigerant leak (which requires professional handling), you might need to consider replacing a part. Common failing parts include the water inlet valve (around $50-$100), the condenser fan motor (around $40-$80), or the evaporator fan motor (around $30-$70). Refrigerant leaks requires a professional to fix and refill the refrigerant, which can cost $150-$400+ depending on the appliance type and area.
Safety Warning
Keep these safety precautions in mind:
- Always unplug the refrigerator from the power outlet before performing any troubleshooting or repairs.
- Avoid working on the refrigerator with wet hands or standing on a wet floor.
- If you suspect a refrigerant leak, do not attempt to fix it yourself. Contact a qualified appliance repair technician.
- Be careful when handling sharp tools or components.
Tools You May Need
Here’s a list of tools that might be helpful:
- Screwdrivers (Phillips and flathead)
- Vacuum cleaner with brush attachment
- Damp cloth and mild detergent
- Adjustable wrench
- Multimeter (optional, for testing electrical components)
FAQ
Here are some frequently asked questions:
- Q: Is a hissing noise from my refrigerator always a sign of a problem? A: Not always. It can be a normal sound of refrigerant flowing or the defrost cycle. However, persistent or unusually loud hissing should be investigated.
- Q: How can I tell if the hissing noise is due to a refrigerant leak? A: Refrigerant leaks are often accompanied by poor cooling performance and a distinct chemical odor. If you suspect a leak, contact a professional.
- Q: Can I fix a refrigerant leak myself? A: No. Refrigerant leaks require specialized equipment and knowledge to repair safely and effectively. It’s best to leave it to a qualified technician.
- Q: How often should I clean the condenser coils? A: It’s recommended to clean the condenser coils every 6-12 months, or more frequently if you have pets or live in a dusty environment.
Conclusion
A hissing refrigerator doesn’t always mean disaster. By following this troubleshooting guide, you can often identify and resolve the issue yourself, saving time and money. Remember to prioritize safety and, if you’re unsure about any step, don’t hesitate to call a qualified appliance repair technician. Good luck!
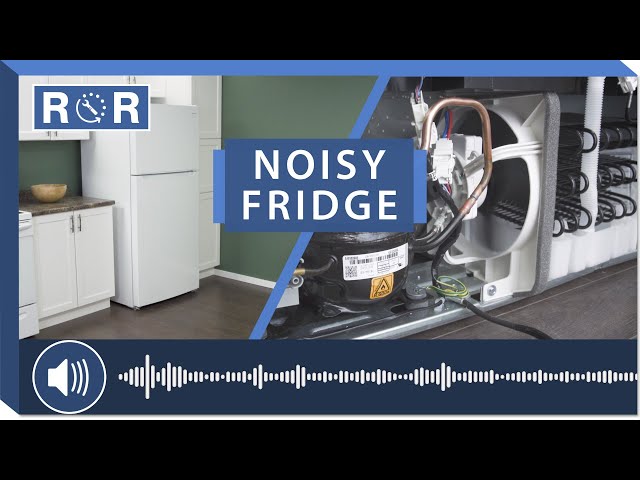
Youtube Video:
Quick Wiring Specifications & Terminal Guide
| Component / Circuit | Standard Wire Gauge | Recommended Protection |
|---|---|---|
| Control & Trigger Signals | 18 – 20 AWG | 5A – 7.5A Inline Fuse |
| Standard Auxiliary Load | 14 – 16 AWG | 15A – 20A Circuit Breaker |
| Main Power Feed / Supply | 10 – 12 AWG | 30A – 40A Heavy-Duty Relay |
Images References
Looking for more diagnostic guides? Explore our complete Refrigerator Problems 4 section for step-by-step troubleshooting solutions.
