
Introduction
A noisy drum in your washing machine can be incredibly annoying. This often sounds like banging, grinding, squealing, or a loud rumbling during the wash or spin cycles. Not only is it irritating, but it can also indicate a problem that, if left unaddressed, could lead to further damage to your appliance and potentially costly repairs. Addressing the issue quickly is vital to avoid making the problem worse. This guide will help you identify the likely causes and walk you through the steps to fix it without needing to call a technician right away.
💡 Technical Key Takeaways:
- Core Focus: Diagnostic schematic and terminal connection layout for Noisy Drum In Washing Machine.
- Target Scope: Field technicians, automotive DIYers, and residential/commercial electricians.
- Safety Rule: Always disconnect the primary power source/battery terminal and verify zero voltage with a multimeter before touching wires.
Common Causes of Noisy Drum in Washing Machine
Here are some common reasons why your washing machine drum might be making unusual noises:
- Loose Objects: Coins, buttons, or other small items trapped between the drum and the outer tub.
- Overloading: Putting too many clothes in the washer can strain the drum and cause noises.
- Unbalanced Load: Clothes bunched on one side of the drum can cause excessive vibration and noise.
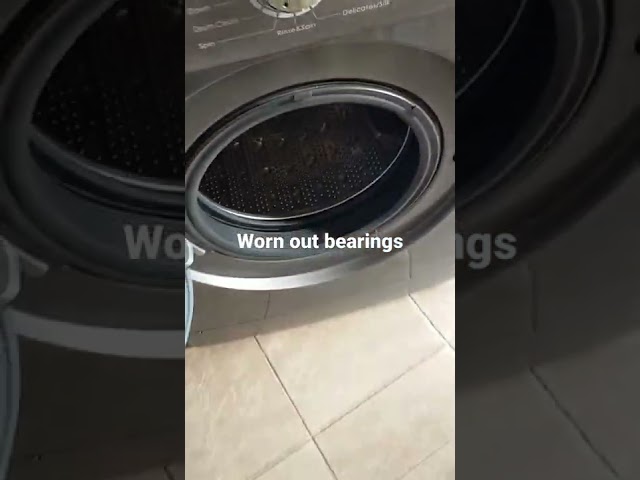
- Worn Drum Bearings: These bearings allow the drum to spin smoothly. When they wear out, they can create a grinding or rumbling sound.
- Damaged Drum Spider: The spider is a support arm connecting the drum to the motor shaft. Cracks or breaks in this part can cause a loud banging noise.
- Worn Drive Belt: (For belt-driven machines) A loose or worn belt can slip and create a squealing or flapping noise.
- Faulty Shock Absorbers/Snubbers: These components help dampen vibrations during the spin cycle. If they fail, the machine will shake violently and create loud noises.
- Stuck Pump: Something stuck inside the drain pump can make grinding or whirring sounds.
Symptoms Checklist
Check these indicators to help pinpoint the problem:
- Loud banging or thumping during the spin cycle.
- Grinding or rumbling sounds, especially when the drum rotates.
- Squealing or screeching noises.
- Excessive vibration or shaking of the washing machine.
- The drum is difficult to turn by hand.
- Visible signs of wear and tear on belts or other components.
- Water leaking from the bottom of the machine.
How to Fix Noisy Drum in Washing Machine Step-by-Step Guide
Follow these steps to troubleshoot and fix the problem:
- Safety First: Unplug the washing machine from the power outlet. This is crucial to prevent electric shock.
- Check for Loose Objects: Open the washing machine door and carefully inspect the drum for any loose items like coins, buttons, or small toys. Also check the rubber seal around the door.
- Remove Trapped Objects: If you find anything, carefully remove it. Sometimes, these items can get stuck between the inner drum and the outer tub, requiring some patience to dislodge.
- Inspect the Drum for Damage: Check for any cracks, dents, or signs of wear and tear on the drum itself.
- Check the Drum’s Movement: Manually rotate the drum by hand. Listen for any grinding or scraping noises. If it’s difficult to turn or makes a lot of noise, the bearings might be the issue.
- Inspect the Drive Belt (If Applicable): For belt-driven machines, locate the drive belt at the back of the washer (you may need to remove an access panel). Check for cracks, fraying, or looseness.
- Test the Shock Absorbers/Snubbers: These are usually located at the bottom of the washing machine. Press down firmly on the drum and observe how it bounces. If it bounces excessively or feels very loose, the shock absorbers might be faulty.
- Check the Drain Pump: Locate the drain pump (usually at the bottom front or back of the machine). Open the drain pump access panel and check for any obstructions like hair, lint, or small objects. Remove any debris you find.
- Level the Washing Machine: Ensure the washing machine is level. Use a bubble level to check. Adjust the feet at the bottom of the machine until it’s perfectly level.
- Run a Test Cycle: After making these checks, plug the washing machine back in and run a small test cycle with a few old towels. Observe if the noise has decreased or disappeared.
- Listen Carefully: During the test cycle, try to pinpoint the exact location and type of noise to help identify the source of the problem.
- Check Water Supply Hoses: Make sure water supply hoses are not vibrating against the washing machine cabinet and secured properly.
Fix the Issue Without Buying Parts
Here are some things you can try before considering replacing parts:
- Reset the Washing Machine: Unplug the washer for 1-2 minutes, then plug it back in. This can sometimes reset the electronic controls and resolve minor issues.
- Clean the Washing Machine: Run an empty cycle with a washing machine cleaner to remove any buildup of soap scum or mildew.
- Ensure Correct Loading: Avoid overloading the machine and distribute clothes evenly in the drum to prevent unbalanced loads.
- Inspect the Suspension Springs: Check for loose or damaged suspension springs (if your machine has them). These springs help support the drum.
- Maintenance: Wipe down the door seal after each use to prevent mildew growth. Regularly clean the lint filter.
When Replacement Might Be Necessary
If the noise persists after trying the above steps, you might need to replace some parts. Here are some possibilities:. For more related activities, check out our Washer Making Loud Noise During Wash Cycle.
- Drum Bearings: If the drum is difficult to turn and makes a grinding noise, replacing the bearings is often necessary. Cost: $50 – $150 (parts and labor).
- Drum Spider: If the spider is cracked or broken, it will need replacement. Cost: $80 – $200 (parts and labor).
- Drive Belt: A worn or broken belt can be replaced relatively easily and inexpensively. Cost: $15 – $40 (parts only).
- Shock Absorbers/Snubbers: Replacing worn shock absorbers can significantly reduce vibration and noise. Cost: $30 – $80 (parts only).
- Drain Pump: If the pump is damaged or clogged beyond repair, replace it. Cost: $40 – $100 (parts only).
Safety Warning
- Always unplug the washing machine before performing any repairs.
- Be careful when working with electrical components and water.
- If you’re not comfortable performing repairs yourself, consult a qualified technician.
- Avoid working on the washing machine if the floor is wet.
- Be careful lifting heavy parts to prevent injury.
Tools You May Need
- Screwdrivers (Phillips and flathead)
- Pliers
- Wrench set
- Bubble level
- Gloves
- Flashlight
FAQ
Q: Why is my washing machine so loud during the spin cycle?
A: This is often due to an unbalanced load, worn drum bearings, or faulty shock absorbers.
Q: Can I fix a noisy washing machine myself?
A: Yes, many simple issues like loose objects or unbalanced loads can be easily fixed. For more complex problems, you may need professional assistance.
Q: How do I know if the drum bearings are bad?
A: If the drum makes a grinding noise when you spin it by hand, or if it’s difficult to turn, the bearings are likely worn.
Q: Is it safe to use a noisy washing machine?
A: It’s generally safe for a short period if the noise is minor. However, it’s best to address the issue promptly to prevent further damage and potential hazards.
Conclusion
Don’t let a noisy washing machine disrupt your peace! By following this guide, you can diagnose and potentially fix the problem yourself, saving you time and money. If the problem persists after trying these steps, it might be time to call a qualified appliance repair technician. Remember, safety is always the top priority.
Youtube Video:
Quick Wiring Specifications & Terminal Guide
| Component / Circuit | Standard Wire Gauge | Recommended Protection |
|---|---|---|
| Control & Trigger Signals | 18 – 20 AWG | 5A – 7.5A Inline Fuse |
| Standard Auxiliary Load | 14 – 16 AWG | 15A – 20A Circuit Breaker |
| Main Power Feed / Supply | 10 – 12 AWG | 30A – 40A Heavy-Duty Relay |
Images References
Looking for more diagnostic guides? Explore our complete Washing Machine Problems 5 section for step-by-step troubleshooting solutions.
