
Introduction
A Nest thermostat is designed to make home climate control easy and efficient. But what happens when your Nest says it’s cooling, but your house remains stubbornly warm? This frustrating situation can happen for various reasons, and it’s crucial to address it quickly to avoid discomfort and potential energy waste. Plus, letting the problem linger could put unnecessary strain on your AC system, leading to more costly repairs down the line. Don’t sweat it! This guide will walk you through the common causes and how to troubleshoot the issue yourself.
💡 Technical Key Takeaways:
- Core Focus: Diagnostic schematic and terminal connection layout for Nest Not Cooling House.
- Target Scope: Field technicians, automotive DIYers, and residential/commercial electricians.
- Safety Rule: Always disconnect the primary power source/battery terminal and verify zero voltage with a multimeter before touching wires.
Common Causes of Nest Not Cooling House
Here are some of the most frequent reasons why your Nest might not be cooling your home:
- Incorrect Nest Configuration: The initial setup might not have been completed correctly, or the wiring might be mismatched.
- Wi-Fi Connectivity Issues: If your Nest loses its Wi-Fi connection, it might not be able to receive or implement temperature settings.
- Low Thermostat Battery: A low battery can cause the Nest to malfunction and prevent it from communicating with your AC system.
- Incorrect Wiring: If you recently installed or moved your Nest, there might be a wiring error preventing it from communicating properly with your HVAC system.
- Dirty Air Filter: A clogged air filter restricts airflow, making it difficult for your AC to cool efficiently.
- Tripped Circuit Breaker: The circuit breaker powering your AC unit might have tripped, cutting off power.
- HVAC System Problems: The problem might not be the Nest itself but a malfunction in your air conditioning unit, such as a refrigerant leak or a faulty compressor.
- Nest Schedule Conflicts: The schedule you have programmed may override your current cooling request.
- Emergency Heat is On: If the Emergency Heat setting is enabled, it prevents the AC from cooling.
Symptoms Checklist
Use this checklist to identify the specific issues you’re experiencing:
- The Nest thermostat displays the cooling icon, but the air coming from the vents is warm.
- The AC unit isn’t turning on at all.
- The AC unit turns on, but only blows warm air.
- You receive error messages on the Nest thermostat display.
- The Nest thermostat loses its Wi-Fi connection frequently.
- The Nest thermostat battery is consistently low.
- You hear unusual noises coming from the AC unit.
How to Fix Nest Not Cooling House Step-by-Step Guide
Follow these steps to troubleshoot your Nest thermostat:
- Check the Nest Thermostat Screen: Ensure the thermostat is set to “Cool” mode and the set temperature is lower than the current room temperature.
- Verify Wi-Fi Connection: Make sure your Nest is connected to your home’s Wi-Fi network. Go to Settings > Network and confirm the connection.
- Check the Battery Level: Go to Settings > Technical Info > Power. If the battery level is low, charge the thermostat using a USB cable.
- Restart the Nest Thermostat: A simple restart can resolve minor glitches. Go to Settings > Reset > Restart.
- Inspect the Air Filter: Locate your furnace or air handler and check the air filter. If it’s dirty, replace it with a new one.
- Check the Circuit Breaker: Go to your electrical panel and check the circuit breaker for your AC unit. If it’s tripped, reset it.
- Verify Wiring: Turn off the power to your HVAC system at the breaker. Carefully remove the Nest from the wall plate and ensure the wires are securely connected to the correct terminals. Refer to your Nest installation guide or a wiring diagram online.
- Check Emergency Heat: Make sure emergency heat is not on, as this will prevent the AC from cooling.
- Review Your Schedule: Check the Nest schedule to make sure you haven’t accidentally programmed a higher temperature during the time when you need cooling.
- Test Cooling Manually: Manually set the thermostat to a significantly lower temperature to force the AC to turn on. Observe if the AC unit responds.
- Check Outdoor Unit (If Applicable): If you have a central AC system, check the outdoor unit. Make sure it’s free of debris and that the fan is spinning.
- Reset to Factory Settings: As a last resort, you can reset your Nest to factory settings. Note that this will erase your settings, and you will need to set up your device once again. Go to Settings > Reset > All Settings.
Fix the Issue Without Buying Parts
Before considering replacements, try these free methods:
- Recalibrate: Sometimes, Nest needs to be recalibrated. You can do this by ensuring your time and location settings are correct.
- Clean Around the Unit: Dust and debris around the thermostat can affect its performance. Wipe down the area with a soft, dry cloth.
- Inspect Wiring Connections: Ensure the wires are making solid contact with the terminals. If loose, gently tighten them. (Remember to turn off power at the breaker first!)
- Basic Maintenance: Regular AC maintenance, such as cleaning the outdoor unit and changing the air filter, can prevent cooling issues.
When Replacement Might Be Necessary
If you’ve tried all the troubleshooting steps and your Nest still isn’t cooling, the thermostat or AC unit might need to be replaced. Common parts that fail are the thermostat itself, the AC compressor, or a blower motor. Expect to pay anywhere from $200-$400 for a new Nest thermostat (professional installation adds to this price). AC compressor replacement can range from $800 – $2000 depending on the unit. Consult with an HVAC technician before replacing any major components.
Safety Warning
- Always turn off the power to your HVAC system at the circuit breaker before working on any wiring.
- Avoid touching any exposed wires or electrical components while the power is on.
- If you’re uncomfortable working with electrical wiring, contact a qualified electrician or HVAC technician.
- Keep tools and equipment away from wet surfaces.
Tools You May Need
- Screwdriver (Phillips and Flathead)
- Pliers
- Wire Strippers
- Multimeter (optional, for testing voltage)
- New Air Filter
FAQ
Here are some frequently asked questions:
-
Q: My Nest says it’s cooling, but the air is warm. What could be wrong?
A: This usually indicates an issue with your AC unit itself, such as a refrigerant leak or compressor problem. It could also be a wiring issue between the nest and the unit. -
Q: How do I know if my Nest thermostat is defective?
A: If your Nest consistently malfunctions, loses connection, or displays error messages even after troubleshooting, it might be defective. -
Q: Can a dirty air filter cause my Nest to stop cooling?
A: Yes, a dirty air filter restricts airflow, making it difficult for your AC to cool effectively, which your nest will register as ineffective. -
Q: Why does my Nest keep losing its Wi-Fi connection?
A: Check your Wi-Fi router’s signal strength and ensure it’s not too far from the Nest. Try restarting your router. -
Q: How often should I change my air filter?
A: Typically, air filters should be changed every 1-3 months, depending on usage and air quality.
Conclusion
Troubleshooting a “Nest not cooling house” issue can seem daunting, but by following these steps, you can often resolve the problem yourself. Start with the simple fixes, like checking the settings, air filter, and circuit breaker. If the issue persists after these steps, consult with a qualified HVAC technician. Remember, addressing cooling problems promptly can save you money on energy bills and prevent more significant damage to your AC system. Don’t hesitate to try these DIY solutions firstyou might be surprised at how much you can accomplish!
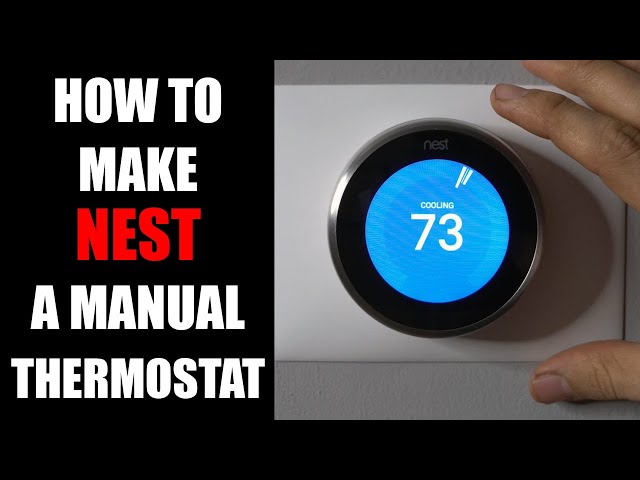
Youtube Video:
Quick Wiring Specifications & Terminal Guide
| Component / Circuit | Standard Wire Gauge | Recommended Protection |
|---|---|---|
| Control & Trigger Signals | 18 – 20 AWG | 5A – 7.5A Inline Fuse |
| Standard Auxiliary Load | 14 – 16 AWG | 15A – 20A Circuit Breaker |
| Main Power Feed / Supply | 10 – 12 AWG | 30A – 40A Heavy-Duty Relay |
Images References
Looking for more diagnostic guides? Explore our complete Air Conditioner Troubleshooting 5 section for step-by-step troubleshooting solutions.
