
Introduction
A grinding noise coming from your LG refrigerator can be concerning. It often indicates that a component within the refrigerator is struggling or failing. Addressing this noise promptly is important. Ignoring it can lead to more significant damage and potentially complete failure of the appliance. While grinding noises can sometimes seem random, they often occur when the compressor cycles on or off, during defrost cycles, or when the refrigerator door is opened or closed. For homeowners, a grinding noise is a signal to investigate and prevent further problems.
💡 Technical Key Takeaways:
- Core Focus: Diagnostic schematic and terminal connection layout for Lg Refrigerator Making Grinding Noise.
- Target Scope: Field technicians, automotive DIYers, and residential/commercial electricians.
- Safety Rule: Always disconnect the primary power source/battery terminal and verify zero voltage with a multimeter before touching wires.
Common Causes of lg refrigerator making grinding noise
Several things can cause a grinding noise in your LG refrigerator. Here are some of the most common culprits:. For more related activities, check out our My Lg Refrigerator Is Not Making Enough Ice.
- Ice Maker: If the ice maker is actively making ice, the noise could be the ice cubes being released into the bin or the ice maker mechanism itself.
- Condenser Fan Motor: This fan cools the compressor. If the motor is failing, or if debris is blocking the fan blades, it can cause a grinding noise.
- Evaporator Fan Motor: Located inside the freezer compartment, this fan circulates cold air. Ice buildup or a failing motor can lead to grinding noises.
- Compressor: The compressor is the heart of your refrigerator. A failing compressor can produce a loud grinding or rattling noise.
- Defrost System: During the defrost cycle, ice melts and drips into a drain pan. A clogged drain can cause ice to build up and interfere with moving parts, leading to grinding.
- Water Inlet Valve: If your refrigerator has a water dispenser or ice maker, a faulty water inlet valve could be vibrating and creating a grinding-like sound.
- Drain Pan: The drain pan sits beneath the refrigerator and collects water from the defrost cycle. If the refrigerator isn’t level, the pan can vibrate and cause noise.
- Loose Components: Sometimes, panels or other components inside the refrigerator can become loose and vibrate, creating a grinding noise.
Symptoms Checklist
Use this checklist to help pinpoint the source of the noise:
- The noise occurs when the ice maker is filling with water.
- The noise gets louder when the refrigerator is running (compressor active).
- The noise is coming from inside the freezer compartment.
- The noise is intermittent, happening only during defrost cycles.
- The noise is accompanied by a decrease in cooling performance.
- The noise stops when you open the freezer door (suggesting evaporator fan).
- The noise seems to be coming from the back of the refrigerator.
How to Fix lg refrigerator making grinding noise Step-by-Step Guide
Follow these steps to troubleshoot the grinding noise:
- Unplug the Refrigerator: For safety, always unplug the refrigerator before starting any troubleshooting.
- Listen Carefully: Determine the general area where the noise is coming from. Is it the freezer, the back, or the bottom?
- Check the Ice Maker: If the noise is recent, empty the ice bin and observe if the noise stops when the ice maker is not actively producing ice.
- Inspect the Condenser Fan: Located at the back of the refrigerator (usually at the bottom), remove the access panel and check if the fan blades are obstructed by dust or debris. Clean the fan blades carefully with a brush or vacuum. Manually spin the fan to see if it spins freely.
- Examine the Evaporator Fan: Inside the freezer, remove the back panel. Check for ice buildup around the fan. If there is ice, manually defrost the freezer by leaving the door open for several hours (or using a hairdryer on a low setting with caution!). Check if the fan blades spin freely after defrosting.
- Inspect the Drain Pan: Locate the drain pan (usually at the bottom of the refrigerator near the compressor). Make sure it is empty and properly seated.
- Check for Loose Components: Gently press on panels and components inside the refrigerator to see if the noise changes. Tighten any loose screws or secure any loose panels.
- Level the Refrigerator: Use a level to ensure the refrigerator is level. Adjust the leveling feet if necessary.
- Clean the Condenser Coils: Located at the back of the refrigerator, these coils can collect dust, which reduces efficiency and can cause the compressor to work harder (and potentially make noise). Use a vacuum with a brush attachment to clean the coils.
- Check the Water Inlet Valve (if applicable): If your refrigerator has a water dispenser or ice maker, locate the water inlet valve (usually at the back of the refrigerator). Check for any signs of leaks or loose connections.
- Plug the Refrigerator Back In: After completing the above steps, plug the refrigerator back in and observe if the grinding noise is gone.
Fix the Issue Without Buying Parts
Many refrigerator noises can be resolved without replacing parts:
- Reset the Refrigerator: Unplug the refrigerator for 5-10 minutes and then plug it back in. This can sometimes reset the control board and resolve minor issues.
- Clean Regularly: Regularly clean the interior of the refrigerator, the condenser coils, and the drain pan.
- Ensure Proper Airflow: Don’t overfill the refrigerator, as this can restrict airflow and cause the compressor to work harder.
- Listen Carefully: Regular listening for unusual noises can help catch small problems before they become big problems.
- Check Seals: Make sure the door seals are clean and in good condition. Poor seals can cause the refrigerator to work harder and potentially make more noise.
When Replacement Might Be Necessary
If the grinding noise persists after trying the above steps, it may indicate a more serious problem, such as a failing compressor or a damaged fan motor. Compressor replacement typically costs between $300 and $700, including labor. Fan motors range from $50 to $200, plus labor. If the repair costs are significant, consider the age of your refrigerator. If it’s more than 8-10 years old, replacing the entire unit might be a more cost-effective option in the long run. Common parts that fail and cause grinding are the evaporator fan motor, condenser fan motor, and the compressor itself.
Safety Warning
- Always unplug the refrigerator before performing any maintenance or repairs.
- Be careful when working around electrical components.
- Avoid working on wet floors to prevent electric shock.
- If you are not comfortable performing any of these steps, consult a qualified appliance repair technician.
- When cleaning, avoid using harsh chemicals that can damage the refrigerator’s components.
Tools You May Need
- Screwdriver (Phillips and flathead)
- Vacuum cleaner with brush attachment
- Brush
- Level
- Towel or cloth
FAQ
Q: Why is my LG refrigerator making a loud grinding noise only when the door is open?
A: This usually indicates a problem with the evaporator fan motor. The fan may be hitting ice buildup or the motor itself could be failing. Q: How often should I clean the condenser coils?
A: You should clean the condenser coils at least every six months, or more frequently if you have pets that shed a lot. Q: Can a dirty drain pan cause a grinding noise?
A: Not directly, but a clogged drain line can lead to ice buildup, which can then cause the evaporator fan to grind. Q: What should I do if the noise is coming from the compressor?
A: Compressor problems are usually best left to a qualified appliance repair technician. A failing compressor is a serious issue.
Conclusion
A grinding noise from your LG refrigerator can be unsettling, but many causes are easily addressed with a little troubleshooting. By following this guide, you can often identify and resolve the issue yourself, saving you the cost of a service call. However, if the noise persists or you are uncomfortable performing these steps, don’t hesitate to contact a qualified appliance repair technician. Prioritize fixing the problem now to prevent more costly repairs later.
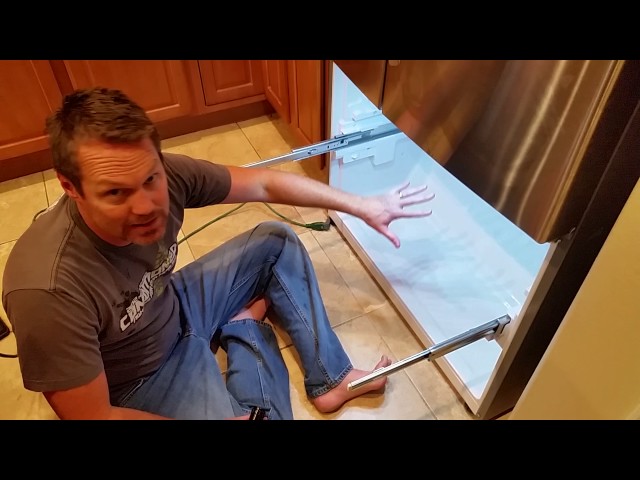
Youtube Video:
Quick Wiring Specifications & Terminal Guide
| Component / Circuit | Standard Wire Gauge | Recommended Protection |
|---|---|---|
| Control & Trigger Signals | 18 – 20 AWG | 5A – 7.5A Inline Fuse |
| Standard Auxiliary Load | 14 – 16 AWG | 15A – 20A Circuit Breaker |
| Main Power Feed / Supply | 10 – 12 AWG | 30A – 40A Heavy-Duty Relay |
Images References
Looking for more diagnostic guides? Explore our complete Refrigerator Problems 4 section for step-by-step troubleshooting solutions.
