
Introduction
A humming noise coming from your LG refrigerator is a common issue that many homeowners experience. While some humming is normal, a sudden increase in loudness or a change in the tone can indicate a problem. Ignoring the noise could lead to more serious issues down the line, such as decreased cooling efficiency or even a complete breakdown of your refrigerator. This guide will walk you through the most common causes of a noisy refrigerator and provide simple steps to troubleshoot the problem yourself.
💡 Technical Key Takeaways:
- Core Focus: Diagnostic schematic and terminal connection layout for Lg Refrigerator Making A Humming Noise.
- Target Scope: Field technicians, automotive DIYers, and residential/commercial electricians.
- Safety Rule: Always disconnect the primary power source/battery terminal and verify zero voltage with a multimeter before touching wires.
Common Causes of LG Refrigerator Making a Humming Noise
Here are some of the most frequent reasons why your LG refrigerator might be humming:
- The Compressor: The compressor is the heart of your refrigerator, and it’s responsible for circulating refrigerant. It naturally produces a hum. An aging or struggling compressor often hums louder.
- The Condenser Fan Motor: This fan cools the condenser coils. If the motor is dusty, dirty, or worn, it can create a humming or buzzing sound.
- The Evaporator Fan Motor: Located inside the freezer, this fan circulates cold air. Ice buildup or a failing motor bearing can cause it to hum loudly.
- Icemaker: If your refrigerator has an icemaker, a humming noise could be related to its operation, especially during the filling process.
- Water Inlet Valve: This valve controls the water supply to the icemaker and water dispenser. A faulty valve can vibrate and create a humming sound.
- Defrost System: During the defrost cycle, the defrost heater melts frost. Sometimes, the process can cause a humming or buzzing noise.
- Loose Components: Internal parts like shelves or drawers can vibrate against the refrigerator walls, creating a humming sound.
- Refrigerant Lines: Refrigerant flowing through the lines can cause a humming noise, especially if the lines are touching other components or the refrigerator frame.
- Uneven Flooring: If the refrigerator is not level, the compressor can vibrate more, leading to a louder hum.
- Relay Switch: Sometimes the refrigerator relay switch has gone bad and cause the humming noise.
Symptoms Checklist
Use this checklist to help pinpoint the cause of the humming:
- Humming noise is louder than usual.
- Noise increases or decreases intermittently.
- Noise is accompanied by other sounds (buzzing, clicking, rattling).
- Refrigerator is not cooling as efficiently.
- Freezer is accumulating excessive frost.
- Noise seems to be coming from a specific area of the refrigerator (e.g., back, bottom, inside the freezer).
- The humming is constant.
- The humming happens when the door is opened.
How to Fix LG Refrigerator Making a Humming Noise Step-by-Step Guide
- Unplug the Refrigerator: For safety, always unplug the refrigerator before starting any troubleshooting.
- Check the Condenser Fan: Locate the condenser fan (usually at the back, bottom). Clean any dust or debris with a brush or vacuum. Ensure the fan blades spin freely.
- Inspect the Evaporator Fan: Open the freezer and locate the evaporator fan (usually behind a panel). Check for ice buildup. If present, manually defrost the freezer or use the refrigerator’s defrost function.
- Listen to the Compressor: The compressor is typically at the back, bottom. Place your hand gently on the compressor (after unplugging!) to feel for excessive vibration. A strong vibration could indicate a problem. Plug the fridge back in and listen carefully to the compressor.
- Check the Icemaker: If your refrigerator has an icemaker, observe its operation. Listen for unusual noises during the water filling cycle.
- Inspect the Water Inlet Valve: This valve is usually located behind the refrigerator. Check for any signs of leaks or damage.
- Level the Refrigerator: Use a level to ensure the refrigerator is sitting evenly. Adjust the legs at the bottom of the refrigerator as needed.
- Check for Loose Components: Open the refrigerator and freezer doors and inspect for any loose shelves, drawers, or panels. Secure them properly.
- Inspect Refrigerant Lines: Gently check that refrigerant lines are not touching other components or the refrigerator frame. If they are, carefully reposition them.
- Clean the Condenser Coils: The condenser coils are usually located at the back of the refrigerator. Use a vacuum or brush to remove any dust or debris. This helps the refrigerator run more efficiently and can reduce noise.
- Check the Defrost Drain: A clogged defrost drain can cause water to pool and contribute to noise. Locate the drain (usually at the bottom of the freezer) and clear any blockage with a pipe cleaner or warm water.
- Reset the Refrigerator: Unplug the refrigerator for 10 minutes, then plug it back in. This can sometimes reset the control board and resolve minor issues.
- Listen Carefully After Each Step: After each step, plug the refrigerator back in and listen for any changes in the humming noise. This will help you identify the source of the problem.
Fix the Issue Without Buying Parts
Many humming noises can be resolved with simple maintenance:
- Cleaning: Regularly clean the condenser coils, fan blades, and interior components to prevent dust and debris buildup.
- Leveling: Ensure the refrigerator is level to minimize vibrations.
- Defrosting: Manually defrost the freezer if necessary to prevent ice buildup on the evaporator fan.
- Inspection: Periodically inspect the refrigerator for loose components or refrigerant lines touching other parts.
- Resetting: Try resetting the refrigerator by unplugging it for 10 minutes.
When Replacement Might Be Necessary
If the humming persists after troubleshooting, a failing compressor, condenser fan motor, or evaporator fan motor might be the culprit. The price for replacing a compressor can range from $300-$700 including labor. Replacing fan motors typically cost between $100-$300. Consider whether the cost of repair is worth it compared to buying a new refrigerator, especially if your refrigerator is older.
Safety Warning
- Always unplug the refrigerator before performing any maintenance or repairs.
- Avoid working on electrical components with wet hands or on a wet floor.
- If you are not comfortable working with electrical appliances, consult a qualified technician.
- Be careful when handling fan blades, as they can be sharp.
- Do not attempt to repair the refrigerant system yourself, as it requires specialized equipment and training.
Tools You May Need
- Screwdriver (Phillips and flathead)
- Vacuum cleaner with brush attachment
- Soft brush
- Level
- Pipe cleaner
- Gloves
FAQ
- Why is my refrigerator humming louder at night? The noise may seem louder at night because there is less ambient noise in the house.
- How often should I clean the condenser coils? Ideally, clean the condenser coils every 6 months.
- Can a refrigerator humming noise be dangerous? While a humming noise itself isn’t immediately dangerous, it can indicate a problem that could lead to a breakdown or potential electrical hazard.
- How do I know if the compressor is failing? Signs of a failing compressor include excessive humming, poor cooling performance, and the refrigerator running constantly.
- My refrigerator is still under warranty. What should I do? Contact LG customer service to schedule a repair or replacement under warranty.
Conclusion
Troubleshooting a humming LG refrigerator might seem daunting, but by following these steps, you can often identify and resolve the issue yourself. Don’t hesitate to give these methods a try before contacting a technician. You might be surprised at how much you can fix with a little patience and these simple instructions!
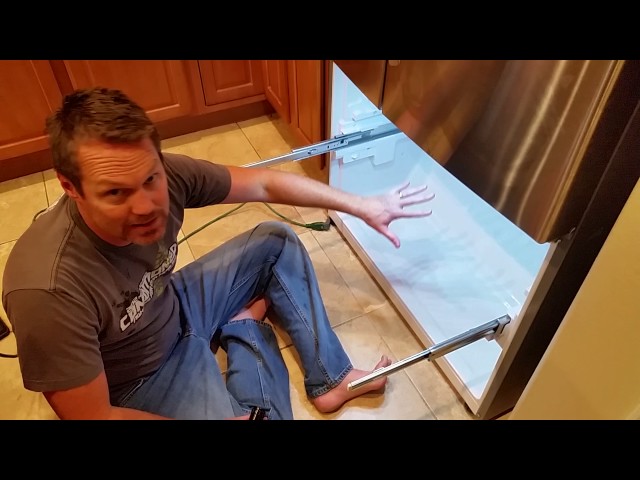
Youtube Video:
Quick Wiring Specifications & Terminal Guide
| Component / Circuit | Standard Wire Gauge | Recommended Protection |
|---|---|---|
| Control & Trigger Signals | 18 – 20 AWG | 5A – 7.5A Inline Fuse |
| Standard Auxiliary Load | 14 – 16 AWG | 15A – 20A Circuit Breaker |
| Main Power Feed / Supply | 10 – 12 AWG | 30A – 40A Heavy-Duty Relay |
Images References
Looking for more diagnostic guides? Explore our complete Refrigerator Problems 4 section for step-by-step troubleshooting solutions.
