
Introduction
Discovering your in-wall AC unit is leaking water inside your home can be a frustrating and potentially damaging situation. It’s not just a nuisance; prolonged water leakage can lead to mold growth, damage to your walls and flooring, and even electrical hazards. This usually happens during periods of heavy AC use, particularly in humid weather. Addressing this problem quickly is crucial to prevent further complications and maintain a healthy and comfortable living environment. Let’s explore the common causes and how you can troubleshoot the issue yourself.
💡 Technical Key Takeaways:
- Core Focus: Diagnostic schematic and terminal connection layout for In Wall Ac Unit Leaking Water Inside.
- Target Scope: Field technicians, automotive DIYers, and residential/commercial electricians.
- Safety Rule: Always disconnect the primary power source/battery terminal and verify zero voltage with a multimeter before touching wires.
Common Causes of in wall ac unit leaking water inside
Several factors can contribute to an in-wall AC unit leaking water. Here are some of the most common culprits:. For more related activities, check out our Inverter Aircon Not Cold.
- Clogged Drain Line: This is the most frequent cause. Condensation naturally forms inside the unit, and it’s meant to drain outside. A blockage in the drain line prevents this, causing water to back up and leak inside.
- Dirty Air Filter: A clogged air filter restricts airflow, causing the evaporator coil to freeze. When the ice melts, it overwhelms the drain pan, resulting in a leak.
- Bent or Damaged Drain Pan: The drain pan collects the condensation. If it’s cracked, rusted, or improperly angled, water can escape.
- Improper Installation: A poorly installed unit might not be level, causing water to spill over the edges of the drain pan.
- Low Refrigerant Levels: Low refrigerant can cause the evaporator coil to freeze, leading to excessive condensation when it thaws.
- Drain Line Disconnection: The drain line may have become disconnected from the unit or the exterior drain.
- Extremely Humid Weather: On very humid days, the AC unit may produce more condensation than it’s designed to handle, leading to temporary leakage.
- Kinked or Blocked Drain Hose: Similar to a clogged drain line, a kink or blockage in the hose can prevent proper drainage.
Symptoms Checklist
Here are some indicators that your in-wall AC unit is leaking water:
- Water dripping from the front or bottom of the unit.
- Puddles of water accumulating on the floor beneath or around the unit.
- Dampness or staining on the wall around the unit.
- Musty odor coming from the unit or the surrounding area.
- The AC unit is running constantly, but the room is not cooling effectively.
- Visible ice forming on the cooling coils inside the unit.
How to Fix in wall ac unit leaking water inside Step-by-Step Guide
Follow these steps to troubleshoot and fix the water leak:
- Safety First: Turn off and unplug the AC unit before proceeding. This is crucial to prevent electrical shock.
- Inspect the Air Filter: Remove the air filter and check for dirt and debris. If it’s dirty, clean or replace it. A clean filter is vital for proper airflow.
- Locate the Drain Line: The drain line is usually a small hose that exits the back or side of the unit. Follow it to where it drains.
- Check for Clogs in the Drain Line: Disconnect the drain line from the AC unit (if possible) and inspect it for clogs. You can use a stiff wire, pipe cleaner, or a wet/dry vacuum to clear any obstructions.
- Flush the Drain Line: After clearing any visible clogs, flush the drain line with a mixture of warm water and a small amount of bleach (about 1 tablespoon per cup of water) to disinfect it and remove any remaining debris.
- Inspect the Drain Pan: Examine the drain pan for cracks, rust, or debris. If it’s damaged, it may need to be replaced. Clean the pan thoroughly.
- Ensure Proper Unit Leveling: Use a level to check if the AC unit is properly level. Adjust as needed to ensure water drains correctly into the drain pan. Shims can be used for leveling.
- Check for Frozen Coils: If you suspect frozen coils, turn off the AC unit and allow it to thaw completely. This may take several hours.
- Clean the Coils (After Thawing): Once the coils have thawed, clean them with a coil cleaner or a soft brush to remove any dirt or debris that may have contributed to the freezing.
- Reconnect the Drain Line: Reattach the drain line securely to the AC unit and ensure it’s properly routed to the drain.
- Test the AC Unit: Plug the AC unit back in and turn it on. Monitor it closely for any signs of leakage.
- Monitor Humidity Levels: If the leakage only occurs on very humid days, consider using a dehumidifier in the room to reduce the amount of moisture in the air.
- Inspect Exterior Drain Outlet: Check the outside drain outlet for any blockages and clear them out if necessary.
- Run the AC on Fan Only: After addressing the potential causes, run the AC on fan only for a few hours to dry out any residual moisture within the unit.
Fix the Issue Without Buying Parts
Many water leak issues can be resolved without purchasing new parts:
- Reset: Simply unplugging the unit for 15 minutes can sometimes reset its internal sensors and resolve minor issues.
- Cleaning: Regularly cleaning the air filter, drain pan, and coils can prevent clogs and buildup that lead to leaks.
- Recalibration (If Applicable): Some units have a self-calibration feature. Refer to your owner’s manual for instructions.
- Inspection Tips: Regularly inspect the drain line for kinks or damage. Look for signs of mold or mildew, which indicate a moisture problem.
- Maintenance Basics: Schedule routine cleaning and maintenance at least once a year, ideally before the cooling season.
When Replacement Might Be Necessary
While many issues can be fixed, sometimes replacement is unavoidable:
- Severely Damaged Drain Pan: If the drain pan is extensively cracked or rusted, it may be beyond repair.
- Coil Damage: If the cooling coils are severely damaged, corroded, or leaking refrigerant (which requires professional repair), replacement might be more cost-effective than repair.
- Unit Age: If the AC unit is more than 10-15 years old and requires frequent repairs, replacing it with a more energy-efficient model might be a better long-term investment.
Replacement costs for an in-wall AC unit can range from $200 to $800+, depending on the size, features, and brand. Professional installation typically adds another $100 to $300. Common parts that fail and may warrant replacement are the fan motor, compressor, or the entire evaporator coil.
Safety Warning
- Always unplug the AC unit before performing any maintenance or repairs.
- Avoid working on electrical components if you are not comfortable or experienced. Contact a qualified electrician.
- Be careful when handling water, especially around electrical outlets. Clean up any spills immediately to prevent slips and falls.
- Wear gloves to protect your hands from dirt, debris, and cleaning solutions.
- Do not use excessive force when disconnecting or reconnecting any parts.
Tools You May Need
- Screwdriver (Phillips and flathead)
- Pliers
- Level
- Flashlight
- Wet/dry vacuum
- Soft brush
- Coil cleaner
- Drain line cleaner or stiff wire
- Gloves
FAQ
Here are some frequently asked questions about leaking in-wall AC units:
-
Q: Why is my AC leaking only when it’s very humid?
A: High humidity increases condensation. Your unit might be producing more water than it can effectively drain. Check for clogs and consider using a dehumidifier. -
Q: How often should I clean my AC unit’s air filter?
A: At least every month, or more frequently if you have pets or allergies. -
Q: Can I use a regular vacuum to clean the drain line?
A: A wet/dry vacuum is recommended. Regular vacuums can be damaged by moisture. -
Q: What does it mean if my AC is leaking refrigerant?
A: Refrigerant leaks require professional attention. Contact a qualified HVAC technician. Refrigerant leaks can be harmful to the environment and affect the unit’s cooling performance. -
Q: My AC is leaking even after I cleaned the drain line. What else could it be?
A: Check the drain pan for cracks or damage. Also, ensure the unit is properly leveled. Low refrigerant could also be the issue.
Conclusion
A leaking in-wall AC unit can be a frustrating problem, but with a little patience and these troubleshooting steps, you can often identify and resolve the issue yourself. By regularly cleaning and maintaining your unit, you can prevent many common causes of leaks and keep your AC running smoothly. Remember to prioritize safety and consult a qualified technician if you’re uncomfortable performing any of these steps or if the problem persists. Don’t give up on DIY before exploring these solutions first!
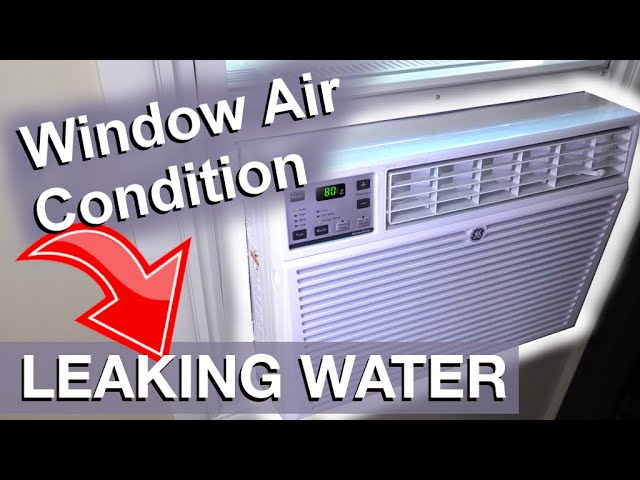
Youtube Video:
Quick Wiring Specifications & Terminal Guide
| Component / Circuit | Standard Wire Gauge | Recommended Protection |
|---|---|---|
| Control & Trigger Signals | 18 – 20 AWG | 5A – 7.5A Inline Fuse |
| Standard Auxiliary Load | 14 – 16 AWG | 15A – 20A Circuit Breaker |
| Main Power Feed / Supply | 10 – 12 AWG | 30A – 40A Heavy-Duty Relay |
Images References
Looking for more diagnostic guides? Explore our complete Air Conditioner Troubleshooting 5 section for step-by-step troubleshooting solutions.
