
Introduction
A Nest thermostat is a smart way to control your home’s temperature and save energy. However, it can be frustrating when your Nest isn’t turning on the heat, especially during cold weather. This guide walks you through common causes and step-by-step troubleshooting to get your heat working again. Don’t worry, you can likely resolve this yourself without needing to call a professional right away! Addressing this quickly is important to maintain a comfortable temperature in your home and prevent potential issues like frozen pipes.
💡 Technical Key Takeaways:
- Core Focus: Diagnostic schematic and terminal connection layout for Heat Not Working With Nest.
- Target Scope: Field technicians, automotive DIYers, and residential/commercial electricians.
- Safety Rule: Always disconnect the primary power source/battery terminal and verify zero voltage with a multimeter before touching wires.
Common Causes of Heat Not Working with Nest
Here are some of the most frequent reasons why your Nest thermostat might not be turning on the heat:. For more related activities, check out our Home Ac Short Cycling.
- Incorrect Wiring: The wires connected to your Nest thermostat might be loose, incorrectly placed, or damaged.
- Low Battery: If your Nest’s battery is low, it might not have enough power to control your heating system.
- Wi-Fi Issues: Your Nest needs a stable Wi-Fi connection to communicate with the Nest servers and function correctly.
- Nest App Settings: Incorrect temperature settings, schedules, or eco modes in the Nest app can prevent the heat from turning on.
- Furnace Issues: The problem might not be with the Nest itself, but with your furnace or heating system.
- Incorrect Thermostat Type Selected: Your Nest needs to be configured for the type of heating system you have (e.g., forced air, radiant heat).
- Common Wire (C-Wire) Issue: Some older systems lack a C-wire, which provides constant power to the Nest. Without it, intermittent issues can occur.
- Blown Fuse: Your furnace likely has a fuse that protects its components. If the fuse blows, the furnace won’t turn on.
- Blocked Air Filter: A dirty air filter can restrict airflow and cause your furnace to overheat and shut down.
- Safety Switch Off: Many furnaces have a safety switch (often near the unit) that can shut off the system.
Symptoms Checklist
Check these signs to accurately identify the issue:
- Nest thermostat displays the correct temperature, but the heat doesn’t turn on.
- Nest thermostat shows “delayed” or “waiting” message.
- Nest thermostat displays an error code.
- The furnace blower fan runs, but no warm air comes out.
- You hear clicking sounds from the furnace but it doesn’t ignite.
- Nest thermostat loses Wi-Fi connection frequently.
- The Nest thermostat screen is blank or unresponsive.
- Your heating bill is higher than usual, even though the heat isn’t working.
How to Fix Heat Not Working with Nest Step-by-Step Guide
Follow these steps to troubleshoot your Nest thermostat:
- Check the Nest Thermostat’s Battery: Remove the Nest from the wall plate and charge it using a USB cable. Let it charge for at least 30 minutes.
- Restart the Nest Thermostat: After charging, reattach the Nest to the wall plate and restart it through the settings menu (Settings > Reset > Restart).
- Verify Wi-Fi Connection: Ensure your Nest is connected to your home Wi-Fi network. If not, reconnect it through the Nest app.
- Review Nest App Settings: Open the Nest app and check your temperature settings, schedule, and eco modes. Make sure the heat is set to a temperature higher than the current room temperature.
- Double-Check Wiring: Turn off the power to your heating system at the breaker. Carefully remove the Nest from the wall plate and inspect the wires. Ensure they are securely connected and match the wiring diagram in the Nest app or on the Nest website.
- Check the Furnace Power Switch: Make sure the power switch on your furnace is turned ON. It’s often located on the side of the unit.
- Inspect the Furnace Air Filter: Replace the air filter if it’s dirty. A clogged filter can restrict airflow and cause the furnace to overheat.
- Locate and Check the Furnace Fuse: Find the fuse panel on your furnace. Check the fuse (usually a car-type fuse) for any breaks or damage. Replace it with a fuse of the same amperage if needed.
- Check the Emergency Heat Setting: If your system has emergency heat, ensure it’s not accidentally turned on. Emergency heat uses significantly more energy.
- Reset the Furnace: Some furnaces have a reset button. Consult your furnace manual to locate and press the reset button.
- Confirm Thermostat Compatibility: Double-check that your Nest thermostat is compatible with your heating system. Refer to the Nest website for compatibility information.
- Check for Error Codes on the Nest: Note any error codes displayed on the Nest thermostat. Search online for the meaning of the error code and troubleshooting tips.
- Test the Heat with the Old Thermostat: If you still have your old thermostat, reconnect it to see if the heat works. This will help determine if the problem is with the Nest or the heating system.
Fix the Issue Without Buying Parts
Often, you can resolve the issue without spending money:
- Reset: Restarting your Nest or furnace can sometimes clear temporary glitches.
- Cleaning: Regularly clean your Nest thermostat’s screen and ensure the area around it is free from dust and debris.
- Recalibration: Calibrate your Nest temperature sensor in the app to ensure accurate readings.
- Inspection Tips: Regularly inspect your furnace’s air filter, wiring connections, and vents for any signs of damage or blockage.
- Maintenance Basics: Keep your furnace clean and well-maintained. Schedule regular professional maintenance to prevent future problems.
When Replacement Might Be Necessary
If you’ve tried all the troubleshooting steps and your heat still isn’t working, you might need to replace a part or the entire furnace. Common failing parts include the furnace igniter ($30-$70), the flame sensor ($20-$50), or the control board ($100-$300). A complete furnace replacement can range from $3,000 to $7,000 depending on the type and efficiency.
Safety Warning
- Turn off the power to your heating system at the breaker before working on any electrical components.
- If you’re not comfortable working with electricity, contact a qualified HVAC technician.
- Avoid touching any wires or components while the power is on.
- Do not work on your furnace if it’s wet or if you’re standing in water.
- Always follow the manufacturer’s instructions when replacing parts.
Tools You May Need
- Screwdrivers (Phillips and flathead)
- Pliers
- Wire strippers
- Multimeter (for testing voltage optional)
- Flashlight
- New furnace fuse (if needed)
FAQ
Here are some frequently asked questions:
- Q: My Nest says “Delayed” or “Waiting.” What does this mean? A: This means the Nest is waiting for the heating system to respond. Check your wiring, furnace power, and air filter.
- Q: My Nest loses Wi-Fi connection frequently. How can I fix this? A: Ensure your Wi-Fi router is close enough to the Nest thermostat. Restart your router and check for any Wi-Fi interference.
- Q: The furnace blower fan runs, but no warm air comes out. What’s wrong? A: This could indicate a problem with the furnace igniter, flame sensor, or gas valve. Contact a qualified HVAC technician.
- Q: How do I know if my Nest is compatible with my heating system? A: Check the Nest website for compatibility information or consult with a qualified HVAC technician.
- Q: My heat worked fine before I installed the Nest. What went wrong? A: Double-check your wiring. An incorrect connection is the most common cause.
Conclusion
Troubleshooting your Nest thermostat and heating system can seem daunting, but by following these steps, you can often identify and resolve the problem yourself. Remember to prioritize safety and consult a qualified HVAC technician if you’re uncomfortable working with electricity or gas. Don’t hesitate to try these DIY fixes before calling for professional help you might save yourself time and money!
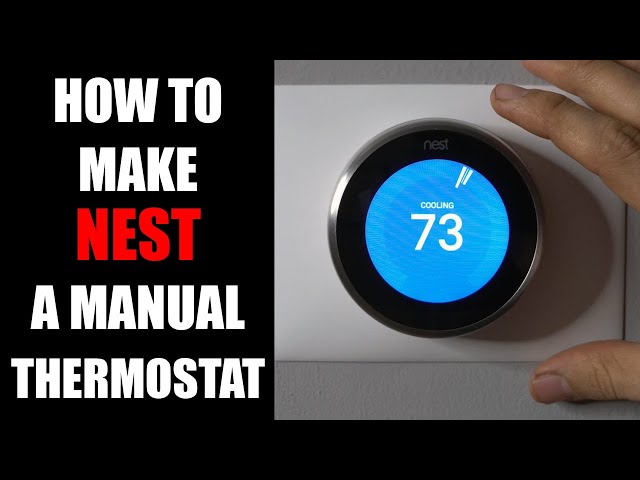
Youtube Video:
Quick Wiring Specifications & Terminal Guide
| Component / Circuit | Standard Wire Gauge | Recommended Protection |
|---|---|---|
| Control & Trigger Signals | 18 – 20 AWG | 5A – 7.5A Inline Fuse |
| Standard Auxiliary Load | 14 – 16 AWG | 15A – 20A Circuit Breaker |
| Main Power Feed / Supply | 10 – 12 AWG | 30A – 40A Heavy-Duty Relay |
Images References
Looking for more diagnostic guides? Explore our complete Air Conditioner Troubleshooting 4 section for step-by-step troubleshooting solutions.
