
Introduction
A refrigerator that isn’t defrosting can quickly become a major headache. Ice buildup in your GE side-by-side refrigerator restricts airflow, causing temperatures to rise in both the fridge and freezer compartments. This can lead to food spoilage and ultimately, wasted money. Addressing this issue promptly is important, as a neglected defrost problem can damage your refrigerator’s components. Don’t worry, though! Many defrosting problems are easily fixed with a bit of troubleshooting.
💡 Technical Key Takeaways:
- Core Focus: Diagnostic schematic and terminal connection layout for Ge Side By Side Refrigerator Not Defrosting.
- Target Scope: Field technicians, automotive DIYers, and residential/commercial electricians.
- Safety Rule: Always disconnect the primary power source/battery terminal and verify zero voltage with a multimeter before touching wires.
Common Causes of GE Side by Side Refrigerator Not Defrosting
Here are some common culprits behind a GE side-by-side refrigerator that isn’t defrosting:
- Defrost Timer Malfunction: The defrost timer controls how often the refrigerator goes into defrost mode. If it’s faulty, it might not activate the defrost cycle.
- Defrost Heater Failure: The defrost heater melts the frost that accumulates on the evaporator coils. If it burns out, ice will accumulate.
- Defrost Thermostat Issues: This thermostat monitors the evaporator coil’s temperature and signals the heater to turn on and off. A faulty thermostat might not sense the need to defrost.
- Faulty Defrost Sensor: Some newer models use a sensor instead of a thermostat. This can also fail, preventing the defrost cycle.
- Blocked Drain Tube: The drain tube carries away melted frost water. If it’s clogged, water will freeze and contribute to ice buildup.
- Damaged Door Seals: Worn or damaged door seals allow warm, moist air to enter the refrigerator, increasing frost formation.
- Faulty Control Board: The main control board manages many of the refrigerator’s functions, including defrosting. A malfunctioning board can disrupt the cycle.
- Overcrowded Freezer: While not directly causing the issue, a severely overcrowded freezer can restrict airflow, making the defrost system work harder and potentially fail sooner.
Symptoms Checklist
Look for these symptoms to confirm a defrosting problem:
- Excessive frost or ice buildup on the back wall of the freezer.
- Rising temperatures in both the refrigerator and freezer compartments.
- Food spoiling faster than usual.
- Water pooling inside the refrigerator.
- Unusual noises coming from the refrigerator (e.g., fan hitting ice).
- The refrigerator running almost constantly.
How to Fix GE Side by Side Refrigerator Not Defrosting Step-by-Step Guide
Here’s a step-by-step guide to troubleshoot your GE refrigerator:
- Unplug the Refrigerator: This is crucial for your safety. Always disconnect power before working on electrical appliances.
- Locate the Evaporator Coils: These are usually behind a panel in the back of the freezer compartment.
- Inspect the Evaporator Coils: Check for excessive ice buildup. A normal amount of frost is a thin, even layer.
- Manually Defrost: If there’s significant ice buildup, manually defrost the refrigerator by leaving the door open for several hours (or use a hairdryer on a low setting to speed up the process – be CAREFUL not to melt plastic parts!). Place towels to absorb melting water.
- Check the Defrost Drain Tube: Locate the drain tube (usually at the back of the freezer, near the bottom). Use a long, flexible object (like a pipe cleaner or a turkey baster) to clear any clogs. You can also use warm water to flush the drain.
- Inspect the Door Seals: Check the rubber seals around the refrigerator and freezer doors. Look for tears, cracks, or gaps. Clean them with a mild detergent and warm water.
- Reset the Refrigerator: Plug the refrigerator back in. Sometimes a simple reset can resolve minor issues.
- Observe the Refrigerator: After plugging it back in, monitor the refrigerator’s performance for the next 24-48 hours. Check if the temperature is stabilizing and if the ice buildup is returning.
- Check the Defrost Timer: On older models, the defrost timer is often located behind the kickplate at the bottom front of the refrigerator or sometimes behind the control panel inside the refrigerator. Manually advance the timer to force a defrost cycle. Listen for the heater to turn on (you might hear a slight buzzing sound). If nothing happens, the timer might be faulty.
- Clean the Condenser Coils: Located at the back (or sometimes at the bottom) of the refrigerator, the condenser coils dissipate heat. Dust and debris can accumulate here, making the refrigerator work harder. Clean them with a vacuum cleaner brush attachment.
- Double Check Freezer SettingEnsure your freezer setting is not on high and the refrigertor is not on low as this can lead to icing.
Fix the Issue Without Buying Parts
Before considering replacement parts, try these free methods:
- Full Defrost: Completely defrosting the refrigerator is crucial. This removes existing ice and allows you to assess the situation.
- Drain Cleaning: Regularly cleaning the drain tube prevents clogs and ensures proper water drainage.
- Seal Inspection and Cleaning: Regularly inspect and clean the door seals to prevent air leaks.
- Coil CleaningClean the coils regularly (once or twice per year).
- Proper Food Storage: Ensure food is properly sealed to minimize moisture and frost buildup.
When Replacement Might Be Necessary
If the above steps don’t resolve the issue, certain parts might need replacement. Here are a few common culprits and estimated cost ranges (USD):. For more related activities, check out our Hotpoint Refrigerator Leaking Water Inside.
- Defrost Heater: $50 – $150
- Defrost Thermostat/Sensor: $30 – $80
- Defrost Timer: $40 – $100
- Control Board: $100 – $300
Important: These are estimated prices. Labor costs for professional repair can significantly increase the total expense.
Safety Warning
- Always unplug the refrigerator before performing any troubleshooting or repairs.
- Avoid using sharp objects to remove ice, as this can damage the evaporator coils.
- Be careful when working with electrical components. If you’re unsure about any step, consult a qualified technician.
- Keep the floor dry to prevent slips and falls.
Tools You May Need
- Screwdrivers (Phillips and flathead)
- Pliers
- Vacuum cleaner with brush attachment
- Pipe cleaner or flexible wire
- Warm water
- Towels
FAQ
Here are some frequently asked questions:
-
Q: How often should I defrost my refrigerator?
A: Most modern refrigerators have automatic defrost, but if yours doesn’t, you should manually defrost it whenever you see significant ice buildup (more than inch thick).
-
Q: How long does a defrost cycle last?
A: A typical defrost cycle lasts about 20-30 minutes.
-
Q: Can I use a regular hair dryer to defrost the refrigerator?
A: Yes, but use it on a low setting and keep it moving to avoid melting plastic parts.
-
Q: Why is my refrigerator still not defrosting after I cleaned the drain tube?
A: There may be other issues, such as a faulty defrost heater, thermostat, or timer. Follow the troubleshooting steps above to investigate further.
Conclusion
Don’t panic if your GE side-by-side refrigerator isn’t defrosting! By following these troubleshooting steps, you can often identify and fix the problem yourself, saving time and money. Remember to prioritize safety and if you’re not comfortable with any step, don’t hesitate to call a qualified appliance repair technician for assistance. Good luck!
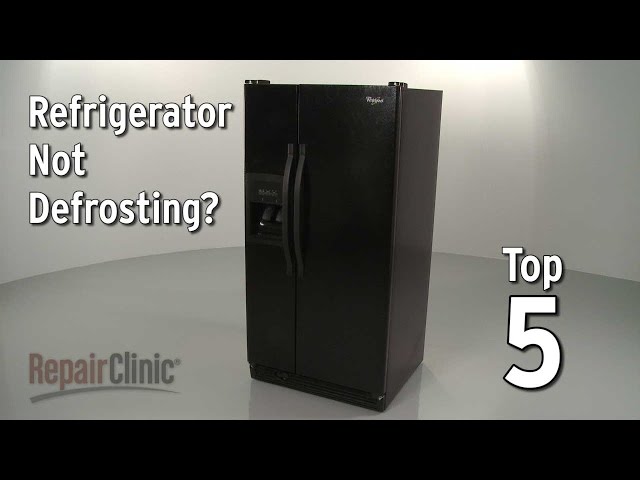
Youtube Video:
Quick Wiring Specifications & Terminal Guide
| Component / Circuit | Standard Wire Gauge | Recommended Protection |
|---|---|---|
| Control & Trigger Signals | 18 – 20 AWG | 5A – 7.5A Inline Fuse |
| Standard Auxiliary Load | 14 – 16 AWG | 15A – 20A Circuit Breaker |
| Main Power Feed / Supply | 10 – 12 AWG | 30A – 40A Heavy-Duty Relay |
Images References
Looking for more diagnostic guides? Explore our complete Refrigerator Problems 3 section for step-by-step troubleshooting solutions.
