
Introduction
A refrigerator ice maker that isn’t filling with water can be a major inconvenience, especially during hot weather or when you’re planning a party. Instead of having a constant supply of ice, you’re left with empty trays and a thirsty family. This issue often stems from a simple problem that’s easily fixable, so it’s worth investigating before calling a repair technician. The sooner you address the issue, the sooner you’ll have ice again!
💡 Technical Key Takeaways:
- Core Focus: Diagnostic schematic and terminal connection layout for Ge Refrigerator Ice Maker Not Filling With Water.
- Target Scope: Field technicians, automotive DIYers, and residential/commercial electricians.
- Safety Rule: Always disconnect the primary power source/battery terminal and verify zero voltage with a multimeter before touching wires.
Common Causes of GE Refrigerator Ice Maker Not Filling with Water
Here are some common reasons why your GE ice maker might not be getting water:
- Frozen Water Supply Line: Ice can build up inside the water line, blocking the flow of water to the ice maker.
- Clogged Water Filter: A dirty or old water filter can restrict water flow.
- Kinked or Damaged Water Line: The water line behind the refrigerator might be bent, pinched, or damaged.
- Low Water Pressure: Insufficient water pressure to the refrigerator can prevent the ice maker from filling.
- Faulty Water Inlet Valve: This valve controls the flow of water to the ice maker and can fail.
- Ice Maker Assembly Issue: The ice maker itself could have a mechanical problem preventing it from cycling and calling for water.
- Frozen Ice Maker: If the ice maker itself is frozen solid, it can’t function properly.
- Incorrect Freezer Temperature: If the freezer is too warm, the ice maker may not initiate a cycle.
- Closed Shut-Off Valve: The water supply valve to the refrigerator could accidentally be shut off.
Symptoms Checklist
Use this checklist to help determine if your ice maker is indeed not filling with water:
- Ice maker is completely empty.
- No water sound when the ice maker should be filling.
- Ice maker arm is in the down position (meaning it’s turned “on”).
- Water dispenser works normally (if your refrigerator has one). If not, it could indicate a larger water supply problem.
- Ice cubes are smaller than usual or hollow (indicating a slow water fill).
- Freezer temperature is above 10F.
How to Fix GE Refrigerator Ice Maker Not Filling with Water Step-by-Step Guide
Follow these steps to troubleshoot and fix your ice maker:
- Check the Water Supply Valve: Make sure the water supply valve behind the refrigerator is fully open. It’s usually a small, oval-shaped valve on the water line.
- Inspect the Water Line: Look for any kinks, bends, or damage to the water line running from the wall to the refrigerator. Straighten any kinks and replace damaged sections if necessary.
- Replace the Water Filter: Replace the water filter every 6 months, or as recommended by the manufacturer. A clogged filter significantly reduces water flow. Refer to your refrigerators manual for specific instructions.
- Check Water Pressure: Make sure your home’s water pressure is adequate. Most refrigerators require at least 20 psi. Contact a plumber to test your water pressure if you’re unsure.
- Thaw a Frozen Water Line: If you suspect a frozen water line, unplug the refrigerator and let it thaw for several hours. You can also use a hairdryer on a low setting to gently warm the water line (being very careful not to melt or damage anything).
- Check the Freezer Temperature: The freezer temperature should be between 0F and 5F for optimal ice maker operation. Adjust the temperature setting if needed.
- Manually Cycle the Ice Maker: Some GE ice makers have a manual cycle button. Locate it (usually on the side or bottom of the ice maker) and press it to force the ice maker to cycle. This can sometimes dislodge an obstruction or reset the system.
- Inspect the Ice Maker Assembly: Look for any obvious signs of damage or obstruction in the ice maker assembly. Ensure the ice maker arms can move freely.
- Clean the Ice Maker: Remove any ice buildup or debris from the ice maker using a soft cloth and warm water.
- Check the Water Inlet Valve: The water inlet valve is located behind the refrigerator, near the water supply connection. You can test it with a multimeter to see if it’s receiving power when the ice maker calls for water. (This step requires more advanced electrical knowledge, proceed with caution.)
- Ensure the Ice Maker Arm is Down: The ice maker must be in the “on” position. The arm that senses ice levels should be down.
- Unplug and Reset: As a last resort, unplug the refrigerator for 5-10 minutes to reset the electronic controls. Then plug it back in and see if the ice maker starts working.
Fix the Issue Without Buying Parts
Before you consider replacing any parts, try these free methods:
- Reset: As mentioned above, unplugging the refrigerator for 5-10 minutes often resolves minor glitches.
- Cleaning: Regularly cleaning the ice maker and surrounding areas can prevent ice buildup and obstructions.
- Inspection Tips: Visually inspect all water lines and connections for any signs of leaks or damage.
- Maintenance Basics: Replace the water filter on schedule and maintain proper freezer temperature.
When Replacement Might Be Necessary
If you’ve tried all the troubleshooting steps and the ice maker still isn’t filling with water, you might need to replace a part. The most common parts to fail are the water inlet valve and the ice maker assembly itself. The cost for a water inlet valve typically ranges from $30 to $70, while a new ice maker assembly can cost between $100 and $300, depending on the model. Consider consulting a qualified appliance repair technician before replacing any parts to confirm the diagnosis.
Safety Warning
- Always unplug the refrigerator before performing any repairs.
- Avoid working with electrical components if you are not comfortable or experienced.
- Be careful when using a hairdryer to thaw frozen water lines; avoid overheating and melting plastic components.
- Clean up any water spills immediately to prevent slips and falls.
Tools You May Need
- Screwdrivers (Phillips and flathead)
- Pliers
- Adjustable wrench
- Multimeter (for testing electrical components – optional, but useful)
- Soft cloth or sponge
- New water filter
FAQ
Here are some frequently asked questions about ice maker problems:
- Q: How long does it take for an ice maker to make ice after fixing a problem? A: It can take anywhere from 24 to 48 hours for the ice maker to produce a full batch of ice after it starts working again.
- Q: Why is my ice maker making small or hollow ice cubes? A: This usually indicates low water pressure or a partially clogged water filter.
- Q: Can I use vinegar to clean my ice maker? A: Yes, you can use a diluted vinegar solution to clean the ice maker. Just be sure to rinse it thoroughly afterward.
- Q: How do I know if my water inlet valve is bad? A: You can test the water inlet valve with a multimeter to see if it’s receiving power when the ice maker calls for water. If it’s receiving power but not opening, the valve is likely faulty.
Conclusion
Troubleshooting a GE refrigerator ice maker that’s not filling with water can seem daunting, but by following these steps, you can often identify and fix the problem yourself. Start with the simple solutions like checking the water supply and filter, and then work your way through the more complex issues. If you’re still unable to resolve the problem, don’t hesitate to call a qualified appliance repair technician for assistance. Good luck, and enjoy your ice!
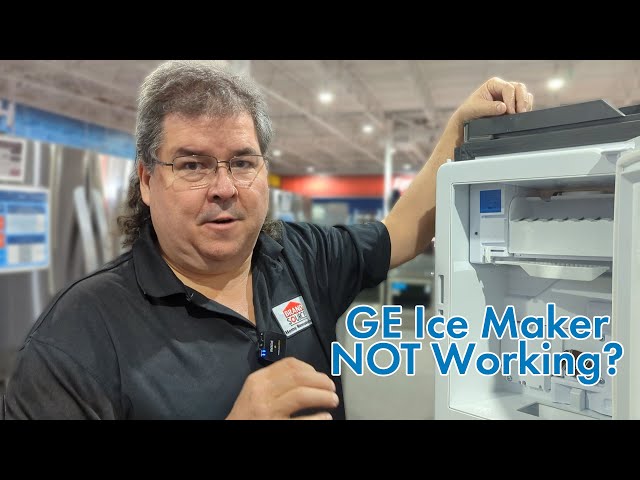
Youtube Video:
Quick Wiring Specifications & Terminal Guide
| Component / Circuit | Standard Wire Gauge | Recommended Protection |
|---|---|---|
| Control & Trigger Signals | 18 – 20 AWG | 5A – 7.5A Inline Fuse |
| Standard Auxiliary Load | 14 – 16 AWG | 15A – 20A Circuit Breaker |
| Main Power Feed / Supply | 10 – 12 AWG | 30A – 40A Heavy-Duty Relay |
Images References
Looking for more diagnostic guides? Explore our complete Refrigerator Problems 3 section for step-by-step troubleshooting solutions.
