
Introduction
A Daikin mini-split system is a wonderful way to efficiently heat or cool a specific area in your home. However, it can be incredibly frustrating when your Daikin mini split wont turn on. This issue can arise unexpectedly, disrupting your comfort, especially during extreme weather. Addressing this promptly is important to avoid discomfort and prevent potential further damage to the unit. Let’s troubleshoot this together!
💡 Technical Key Takeaways:
- Core Focus: Diagnostic schematic and terminal connection layout for Daikin Mini Split Wont Turn On.
- Target Scope: Field technicians, automotive DIYers, and residential/commercial electricians.
- Safety Rule: Always disconnect the primary power source/battery terminal and verify zero voltage with a multimeter before touching wires.
Common Causes of Daikin Mini Split Won’t Turn On
Several factors can prevent your Daikin mini-split from turning on. Here are some common culprits:
- Power Outage: The most obvious, but worth checking. A general power outage will prevent the unit from powering on.
- Tripped Circuit Breaker: The circuit breaker dedicated to the mini-split might have tripped due to an electrical surge.
- Remote Control Issues: Dead batteries or a malfunctioning remote can prevent you from turning on the unit.
- Unit is in Off Mode: The unit may be in dry, fan, or other modes instead of cooling or heating.
- Dirty Air Filters: Clogged filters can restrict airflow and cause the unit to overheat, leading to it shutting down or not starting.
- Blocked Outdoor Unit: Debris, snow, or ice obstructing the outdoor unit can prevent proper operation.
- Faulty Capacitor: The capacitor helps start the motor. A failed capacitor can prevent the unit from turning on.
- Loose Wiring: Loose connections in the wiring can interrupt the power supply to the unit.
- Thermostat Settings: The thermostat on the unit or remote may be set incorrectly.
- Safety Features: Some units have safety features that prevent operation under certain conditions, like extreme temperatures.
Symptoms Checklist
Here’s a checklist to help pinpoint the problem:
- No lights or display on the indoor unit.
- Remote control is unresponsive, even with fresh batteries.
- Circuit breaker trips immediately when you try to turn on the unit.
- Unit makes clicking sounds but doesn’t start.
- The outdoor unit is frozen over.
- The indoor unit fan is not blowing at all.
- The lights are blinking on the main unit.
How to Fix Daikin Mini Split Won’t Turn On Step-by-Step Guide
Follow these steps to troubleshoot your Daikin mini-split:
- Check the Power Supply: Ensure the unit is plugged in securely. Check for power outages in your area.
- Inspect the Circuit Breaker: Locate the circuit breaker dedicated to your mini-split in your electrical panel. If it’s tripped (switched to the “off” position), flip it to the “off” position and then back to the “on” position.
- Replace Remote Batteries: Replace the batteries in your remote control with fresh ones.
- Test the Remote: Point the remote at a digital camera (like your phone’s camera). Press a button on the remote. If you see a light flashing on the camera screen, the remote is transmitting. If not, the remote might be faulty.
- Set Thermostat Appropriately: Be sure the setting on the remote or unit is appropriate to cool or heat the space.
- Clean the Air Filters: Remove the air filters from the indoor unit (refer to your owner’s manual for location). Wash them with mild soap and water, allow them to dry completely, and then reinstall them.
- Check the Outdoor Unit: Inspect the outdoor unit for any obstructions like leaves, snow, or ice. Clear away any debris to ensure proper airflow.
- Reset the Unit: Some units have a reset button. Consult your owner’s manual to find the reset button and press it. Otherwise, you can try turning off the circuit breaker for 5 minutes, then turning it back on.
- Inspect Wiring Connections: If you’re comfortable doing so (and after disconnecting power at the breaker), carefully inspect the wiring connections inside the unit. Look for loose or corroded wires. Tighten any loose connections. If you’re not comfortable, skip this step and call a technician.
- Listen for Sounds: Turn the unit on and listen carefully. Do you hear any clicking or humming sounds? This could indicate a problem with the motor or capacitor.
- Look for Error Codes: Check the indoor unit’s display panel for any error codes. Consult your owner’s manual to understand the meaning of the code and possible solutions.
- Verify Thermostat Settings: Make sure the thermostat is set to the desired temperature and mode (heat or cool). Sometimes, a simple setting adjustment can resolve the issue.
Fix the Issue Without Buying Parts
Many issues can be resolved without purchasing new parts:
- Resetting the Unit: As mentioned, a simple reset can sometimes clear temporary glitches.
- Cleaning: Regularly cleaning the air filters and outdoor unit can prevent overheating and airflow problems.
- Inspection: Regularly inspect the unit for obvious issues like debris or loose wiring (when safe).
- Maintenance: Schedule annual maintenance to ensure proper operation and prevent future problems.
When Replacement Might Be Necessary
If you’ve tried all the troubleshooting steps and your Daikin mini-split still won’t turn on, a component may need replacement. Common failing parts include the capacitor (estimated $50-$150), the fan motor (estimated $150-$400), or the control board (estimated $200-$500). Consider calling a qualified HVAC technician to diagnose the issue and perform the replacement. Replacement of the entire unit can range from $1,500 to $5,000+.
Safety Warning
- Always disconnect power at the circuit breaker before inspecting or working on the unit.
- Avoid working on the unit if the floor is wet or damp.
- If you’re not comfortable working with electricity, call a qualified HVAC technician.
- Never touch any internal components while the unit is powered on.
- Follow all safety instructions in the owner’s manual.
Tools You May Need
- Screwdrivers (Phillips and flathead)
- Pliers
- Multimeter (for testing voltage, if comfortable)
- Wrench set
- Vacuum cleaner or brush
FAQ
Here are some frequently asked questions:
- Q: Why is my mini-split blowing warm air when it’s supposed to be cooling? A: Check the thermostat settings and make sure it’s set to “cool.” Also, clean the air filters.
- Q: My mini-split turns on but then shuts off after a few minutes. What’s wrong? A: This could be due to overheating. Check for blocked airflow (dirty filters, blocked outdoor unit).
- Q: The remote control isn’t working, even with new batteries. What should I do? A: Try resetting the remote (some have a reset button). If that doesn’t work, the remote might be faulty and need replacement.
- Q: Is it normal for the outdoor unit to make noise? A: Some noise is normal, but excessive or unusual noises could indicate a problem. Call a technician if you’re concerned.
- Q: How often should I clean the filters on my mini split? A: Ideally, clean your mini split filters every 2-4 weeks for best performance.
Conclusion
Troubleshooting a Daikin mini split wont turn on can seem daunting, but by following these steps, you can often identify and resolve the issue yourself. Remember to prioritize safety and consult your owner’s manual for specific instructions. If you’re unable to fix the problem, don’t hesitate to call a qualified HVAC technician for professional assistance. Often, simple maintenance or checks can make a big difference!
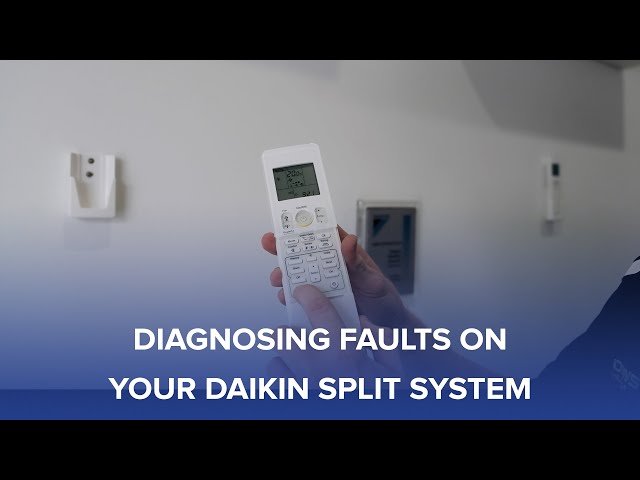
Youtube Video:
Quick Wiring Specifications & Terminal Guide
| Component / Circuit | Standard Wire Gauge | Recommended Protection |
|---|---|---|
| Control & Trigger Signals | 18 – 20 AWG | 5A – 7.5A Inline Fuse |
| Standard Auxiliary Load | 14 – 16 AWG | 15A – 20A Circuit Breaker |
| Main Power Feed / Supply | 10 – 12 AWG | 30A – 40A Heavy-Duty Relay |
Images References
Looking for more diagnostic guides? Explore our complete Air Conditioner Troubleshooting 4 section for step-by-step troubleshooting solutions.
