
Introduction
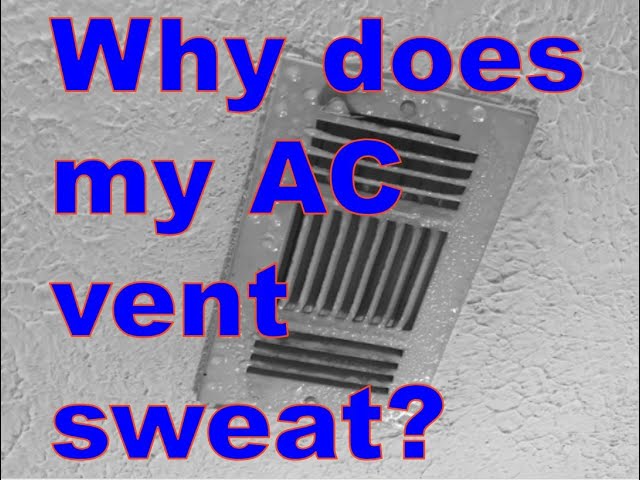
Finding water dripping from your AC vents can be concerning, and it’s a problem that needs attention. This condensation isn’t normal and usually indicates an underlying issue with your air conditioning system. It’s most common during periods of high humidity, as the cold air from the AC meets warm, moist air, causing condensation. Ignoring this problem can lead to water damage in your home, mold growth, and reduced AC efficiency. The longer you wait, the worse the potential damage and costs become, so let’s investigate!
💡 Technical Key Takeaways:
- Core Focus: Diagnostic schematic and terminal connection layout for Condensation Dripping From Ac Vent.
- Target Scope: Field technicians, automotive DIYers, and residential/commercial electricians.
- Safety Rule: Always disconnect the primary power source/battery terminal and verify zero voltage with a multimeter before touching wires.
Common Causes of Condensation Dripping from AC Vent
Several factors can contribute to condensation dripping from your AC vents:
- Clogged Air Filter: A dirty air filter restricts airflow, causing the evaporator coil to get too cold and freeze up. When the ice melts, it drips.
- Frozen Evaporator Coil: This often happens when airflow is restricted (see clogged filter), or refrigerant levels are low.
- Low Refrigerant Levels: Insufficient refrigerant reduces the coil’s temperature, making it prone to freezing and subsequent dripping when thawed.
- Blocked Drain Line: The condensate drain line removes water produced during normal AC operation. If clogged, water backs up and can leak from vents.
- Improper Insulation: Poorly insulated ducts can allow warm, humid air to come into contact with cold duct surfaces, causing condensation.
- Leaky Ductwork: Leaks in your ductwork can draw in humid air from attics or crawl spaces, leading to condensation.
- High Humidity Levels: In very humid climates, even a properly functioning AC system can struggle to manage all the moisture, occasionally leading to drips.
- Incorrectly Sized AC Unit: An oversized unit may cool the air too quickly, leading to short cycles and inadequate dehumidification.
Symptoms Checklist
Look for these indicators to accurately identify the issue:
- Visible water dripping from AC vents.
- Water stains on ceilings or walls near the vents.
- Musty or moldy odors.
- Ice formation on the outdoor AC unit (condenser).
- AC unit runs constantly but doesn’t cool the house effectively.
- AC unit cycles on and off frequently (short cycling).
- Higher than usual energy bills.
How to Fix Condensation Dripping from AC Vent Step-by-Step Guide
Follow these steps to troubleshoot and fix the issue:
- Turn Off the AC: Immediately turn off your AC system to prevent further damage.
- Inspect the Air Filter: Locate and remove the air filter. If it’s dirty, replace it with a new one of the correct size and type. This is often the easiest fix.
- Check for Ice on the Evaporator Coil: Access the evaporator coil (usually inside the indoor unit). If it’s covered in ice, let it thaw completely (this may take several hours). Do not attempt to chip away the ice. Simply let it melt.
- Locate the Condensate Drain Line: Find the condensate drain line, usually a PVC pipe located near the indoor unit. It usually drains outside or into a floor drain.
- Check the Drain Line for Clogs: Inspect the drain line opening for any visible obstructions.
- Flush the Drain Line: You can try to flush the drain line with a wet/dry vacuum or a mixture of warm water and vinegar. Disconnect the drain line and carefully vacuum out any debris. Alternatively, pour the water/vinegar mixture slowly into the drain line opening.
- Inspect Ductwork for Leaks: Visually inspect the exposed ductwork in your attic or crawl space for any obvious leaks or damage. Use duct tape to temporarily seal small leaks.
- Check Ductwork Insulation: Ensure ductwork is properly insulated. If insulation is damaged or missing, replace it.
- Monitor AC Performance: After completing these steps, turn your AC back on and monitor its performance. Check for any new drips from the vents.
- Check the Condensate Pump (if applicable): If your system uses a condensate pump to remove water, check if it’s working correctly. Ensure it’s plugged in and the reservoir isn’t overflowing.
- Inspect the Drain Pan: Locate the drain pan under the indoor unit and check for cracks or damage. If the pan is overflowing, it could indicate a drain line blockage or other issues.
- Observe Short Cycling: If your AC unit is turning on and off frequently, it may be oversized. Note the frequency and duration of cycles to share with a technician.
Fix the Issue Without Buying Parts
Many condensation issues can be resolved without purchasing replacement parts. Here are some methods to try:
- Regular Air Filter Cleaning/Replacement: A clean air filter is crucial for proper airflow and preventing frozen coils. Aim to replace your filter every 1-3 months, depending on usage.
- Drain Line Maintenance: Regularly flush the condensate drain line with vinegar or a commercial drain cleaner to prevent clogs.
- Proper Ventilation: Ensure your home is properly ventilated to reduce humidity levels. Use exhaust fans in bathrooms and kitchens.
- Seal Air Leaks: Seal any air leaks around windows, doors, and other openings to prevent humid air from entering your home.
- Routine AC Maintenance: Schedule annual maintenance with a qualified technician to inspect and clean your AC system.
When Replacement Might Be Necessary
In some cases, replacement may be necessary. Here are some scenarios:
- Damaged Evaporator Coil: If the evaporator coil is severely corroded or damaged, replacement is often the best solution. (Estimated cost: $800-$2000 USD)
- Leaky Ductwork: Extensive ductwork damage or leaks may require partial or complete ductwork replacement. (Estimated cost: $500-$3000 USD)
- Faulty Condensate Pump: If the condensate pump is malfunctioning and cannot be repaired, it needs to be replaced. (Estimated cost: $100-$300 USD)
- Old or Inefficient AC Unit: If your AC unit is very old (15+ years) or inefficient, replacement with a newer model may be more cost-effective in the long run. (Estimated cost: $3000-$7000 USD+)
Safety Warning
- Always turn off the AC unit at the breaker before performing any maintenance or repairs.
- Be careful when working around electrical components. If you’re not comfortable, consult a qualified technician.
- Avoid using excessive force when cleaning or inspecting components.
- Be aware of potential slip hazards due to water leaks. Wipe up any spills immediately.
- Avoid direct skin contact with chemical drain cleaners; wear gloves and eye protection when using.
Tools You May Need
- Screwdriver (Phillips and flathead)
- Wet/dry vacuum
- Duct tape
- New air filter
- Gloves
- Eye protection
- Flashlight
FAQ
Here are some frequently asked questions:
- Q: Why is my AC dripping even after I changed the filter? A: Other issues like low refrigerant or a clogged drain line might be the cause. Follow the troubleshooting steps above.
- Q: How often should I clean my AC drain line? A: At least twice a year, ideally at the beginning and end of the cooling season.
- Q: Is it safe to run my AC with a frozen coil? A: No, running your AC with a frozen coil can damage the compressor. Turn it off and let the coil thaw completely.
- Q: Can I use bleach to clean the drain line? A: While some people use bleach, it can corrode certain materials. Vinegar is a safer and more environmentally friendly option.
- Q: How can I tell if my AC unit is the right size for my home? A: A professional HVAC technician can perform a load calculation to determine the appropriate size unit for your home based on factors like square footage, insulation, and climate.
Conclusion
Condensation dripping from your AC vents is a sign that something needs attention, but with a little investigation and these troubleshooting steps, you may be able to resolve the issue yourself. Remember to prioritize safety and take your time. If you’ve exhausted these solutions and the problem persists, don’t hesitate to call a qualified HVAC technician for professional assistance. Taking care of the problem now will prevent bigger headaches down the road!
Youtube Video:
Quick Wiring Specifications & Terminal Guide
| Component / Circuit | Standard Wire Gauge | Recommended Protection |
|---|---|---|
| Control & Trigger Signals | 18 – 20 AWG | 5A – 7.5A Inline Fuse |
| Standard Auxiliary Load | 14 – 16 AWG | 15A – 20A Circuit Breaker |
| Main Power Feed / Supply | 10 – 12 AWG | 30A – 40A Heavy-Duty Relay |
Images References
Looking for more diagnostic guides? Explore our complete Air Conditioner Troubleshooting 4 section for step-by-step troubleshooting solutions.
