
Introduction
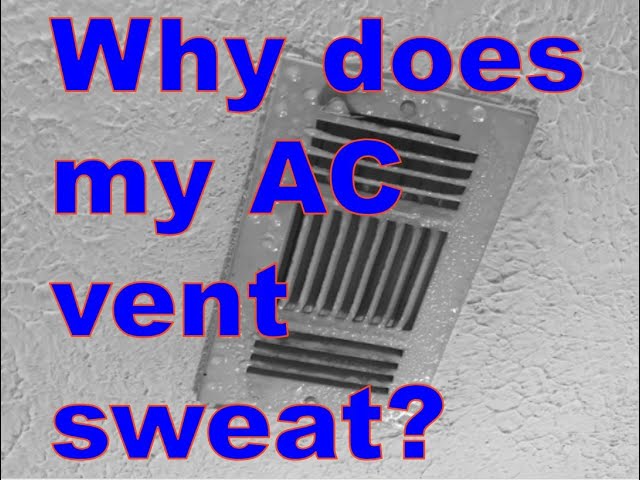
Seeing water droplets or dampness around your AC vents can be alarming. This is called condensation, and it happens when warm, moist air meets the cold surface of your AC vent. While a little condensation might seem harmless, it can lead to bigger problems like mold growth, water damage to your ceiling, and reduced AC efficiency. It’s especially common in humid climates or during periods of heavy AC use. Addressing this promptly is crucial to prevent further damage and maintain a healthy home environment. Don’t ignore it – let’s figure out why it’s happening and what you can do about it.
💡 Technical Key Takeaways:
- Core Focus: Diagnostic schematic and terminal connection layout for Condensation Around Ac Vent.
- Target Scope: Field technicians, automotive DIYers, and residential/commercial electricians.
- Safety Rule: Always disconnect the primary power source/battery terminal and verify zero voltage with a multimeter before touching wires.
Common Causes of Condensation Around AC Vent
Several factors can cause condensation around your AC vents:
- High Humidity: The more moisture in the air, the more likely condensation will form.
- Poor Insulation: Vents that aren’t properly insulated become very cold, attracting condensation.
- Air Leaks: Gaps around the vent allow warm, humid air to come into contact with the cold vent surface.
- Dirty Air Filter: A clogged filter restricts airflow, making the AC unit work harder and potentially overcool the vents.
- Blocked Vents: Obstructed vents reduce airflow and can cause vents to become excessively cold.
- Improperly Sized AC Unit: An AC unit that’s too large cools the air too quickly, which can lead to higher humidity and condensation.
- Leaky Ductwork: If the ductwork running to the vent has leaks, warm air can enter and cause condensation at the vent.
- Low Refrigerant Levels: Low refrigerant can cause the evaporator coil and vents to become excessively cold, increasing condensation.
- Return Air Leaks: Leaks in the return air ductwork pulling in humid air from outside.
Symptoms Checklist
Check if you’re experiencing these symptoms:
- Water droplets forming on or around AC vents.
- Dampness or staining on the ceiling around the vents.
- Musty odor near the vents.
- Visible mold growth on or around the vents.
- AC unit running constantly or not cooling effectively.
- Higher than usual humidity levels in the home.
How to Fix Condensation Around AC Vent Step-by-Step Guide
Here’s a step-by-step guide to troubleshoot and fix condensation around your AC vents:
- Check Your Air Filter: A dirty filter restricts airflow and can cause the AC to overwork. Replace it with a clean one.
- Inspect for Air Leaks: Look around the vent where it meets the ceiling for any gaps. Seal them with caulk or weather stripping.
- Ensure Proper Insulation: If possible, check the insulation around the ductwork leading to the vent. Add more insulation if needed.
- Adjust Vent Direction: Make sure the vents are directed away from walls and furniture to promote good airflow.
- Clear Obstructions: Ensure furniture, curtains, or other items aren’t blocking the vents.
- Monitor Humidity Levels: Use a dehumidifier to lower the humidity in your home, especially during humid months. Aim for a humidity level between 30% and 50%.
- Check for Leaky Ductwork (Visual): Inspect visible sections of ductwork in your attic or basement for any obvious leaks.
- Adjust Fan Speed: If your AC unit has adjustable fan speeds, try setting it to a lower speed. This can help prevent overcooling and reduce condensation.
- Run the Fan Continuously: Running the AC fan continuously can help circulate air and reduce humidity. Some thermostats have a “fan on” setting.
- Inspect the Drain Line: Make sure the AC unit’s condensate drain line is clear and draining properly. A clogged drain can increase humidity.
- Check for Icing: Inspect the evaporator coil (requires removing an access panel on the indoor unit – proceed with caution and unplug the unit first). If it’s iced over, let it thaw completely before restarting the AC. Icing indicates airflow issues or low refrigerant.
- Observe Vent Temperature: After making adjustments, monitor the temperature of the air coming out of the vent. It should be cool but not excessively cold.
- Repeat Inspection: Over the next few days, frequently monitor the vent to check if the condensation issue is fixed.
Fix the Issue Without Buying Parts
Before spending money, try these free fixes:
- Reset your AC: Turn off the AC unit and the breaker for about 30 minutes, then turn it back on. This can sometimes resolve minor issues.
- Clean the Vents: Wipe down the vents regularly with a damp cloth to remove dust and debris.
- Inspection Tips: Walk around the house and inspect for open windows and doors or anything else that is causing the humidity to be high.
- Basic Maintenance: Make air filter replacement part of your regular home maintenance (every 1-3 months) to keep the air flowing.
When Replacement Might Be Necessary
If the condensation persists after trying these steps, you may need to consider replacing some parts or seeking professional help. Here are a few possibilities:. For more related activities, check out our Coils On Ac Unit Frozen.
- Insulation: If the ductwork insulation is old, damaged, or insufficient, it may need replacement ($50 – $200).
- AC Unit: An improperly sized or aging AC unit may need replacement ($3,000 – $7,000 installed).
- Ductwork: If there are excessive leaks in the ductwork it may need to be replaced ($500-$2000).
These costs are estimates only and vary based on the size and type of AC unit, region, and contractor.
Safety Warning
Please take these safety precautions:
- Always turn off the power to the AC unit at the breaker before performing any maintenance or repairs.
- Avoid working on electrical components if you’re not comfortable or experienced.
- Be careful when working on a ladder to avoid falls.
- If you suspect a refrigerant leak, do not attempt to fix it yourself. Contact a qualified HVAC technician.
- If you’re cleaning around vents, ensure the floor is dry to prevent slips.
Tools You May Need
Here’s a list of helpful tools for this project:
- Screwdriver (Phillips and flathead)
- Vacuum cleaner with hose attachment
- Caulk or weather stripping
- Ladder
- Wrench
- Hygrometer (to measure humidity)
FAQ
Here are some frequently asked questions:
- Q: Why is condensation only on some of my vents? A: Some vents may be colder than others due to their location, insulation, or airflow.
- Q: Can condensation cause mold? A: Yes, excessive condensation can create a damp environment that promotes mold growth.
- Q: How often should I change my air filter? A: Change your air filter every 1-3 months, depending on usage and air quality.
- Q: Is it normal for AC vents to drip sometimes? A: Occasional dripping can happen, especially in humid weather. However, consistent dripping indicates a problem.
- Q: Why is humidity inside my house so high? A: Many things can cause this but some common things are: Poor ventilation, houseplants, or recent flooding.
- Q: Does running the AC fan all the time really help with condensation? A: Yes, it circulates air and reduces humidity, minimizing temperature differences.
Conclusion
Don’t let condensation around your AC vents dampen your home comfort! By following these troubleshooting steps, you can often identify and fix the problem yourself, saving money and preventing further damage. Remember to prioritize safety and don’t hesitate to call a qualified HVAC technician if you’re unsure or if the problem persists. A little DIY effort can go a long way to keeping your home cool, dry, and healthy!
Youtube Video:
Quick Wiring Specifications & Terminal Guide
| Component / Circuit | Standard Wire Gauge | Recommended Protection |
|---|---|---|
| Control & Trigger Signals | 18 – 20 AWG | 5A – 7.5A Inline Fuse |
| Standard Auxiliary Load | 14 – 16 AWG | 15A – 20A Circuit Breaker |
| Main Power Feed / Supply | 10 – 12 AWG | 30A – 40A Heavy-Duty Relay |
Images References
Looking for more diagnostic guides? Explore our complete Air Conditioner Troubleshooting 4 section for step-by-step troubleshooting solutions.
