
Introduction
Is your central air conditioner running but not blowing any air? This is a frustrating and potentially serious issue. Not only does it mean you’re stuck in the heat, but it could also indicate a larger problem with your HVAC system. If left unchecked, it can lead to further damage and costly repairs. It often happens unexpectedly, leaving you sweltering on a hot day. It’s important to address this problem quickly to avoid discomfort and prevent more significant issues with your system.
💡 Technical Key Takeaways:
- Core Focus: Diagnostic schematic and terminal connection layout for Central Air Not Blowing Any Air.
- Target Scope: Field technicians, automotive DIYers, and residential/commercial electricians.
- Safety Rule: Always disconnect the primary power source/battery terminal and verify zero voltage with a multimeter before touching wires.
Common Causes of Central Air Not Blowing Any Air
Here are some of the most common reasons why your central air might not be blowing air:
- Tripped Circuit Breaker: A power surge or overload can cause the circuit breaker for your AC unit to trip, cutting off power.
- Dirty Air Filter: A clogged filter restricts airflow, causing the system to work harder and potentially shut down.
- Frozen Evaporator Coil: Restricted airflow due to a dirty filter can cause the evaporator coil to freeze up, blocking airflow.
- Blocked Vents: Closed or blocked vents can prevent air from circulating properly.
- Disconnected Ductwork: Detached or damaged ductwork can leak conditioned air into unused spaces.
- Fan Motor Problems: The fan motor could be faulty or burned out, preventing the blower fan from turning.
- Thermostat Issues: The thermostat may be set incorrectly or malfunctioning, not signaling the system to turn on.
- Compressor Problems: While less common for no airflow, a failing compressor can sometimes lead to system shutdown.
- Condenser Unit Problems: Debris buildup around the outdoor condenser unit can inhibit its ability to release heat.
Symptoms Checklist
Use this checklist to help pinpoint the problem:
- The AC unit turns on, but no air comes out of the vents.
- You hear the AC unit running outside, but nothing inside.
- The air coming from the vents is warm or only slightly cool.
- You notice ice buildup on the copper pipes connected to the indoor unit.
- The circuit breaker for the AC unit has tripped.
- The thermostat displays an error message.
How to Fix Central Air Not Blowing Any Air Step-by-Step Guide
- Check the Thermostat: Ensure the thermostat is set to “cool” and the temperature is lower than the current room temperature. Also, make sure it’s set to “auto” rather than “fan only.”
- Inspect the Air Filter: Locate the air filter (usually in the return air vent or near the indoor unit). If it’s dirty, replace it with a new one.
- Check the Circuit Breaker: Locate the circuit breaker panel and find the breaker for the AC unit. If it’s tripped (in the “off” or middle position), flip it all the way to the “off” position, then back to the “on” position.
- Inspect the Vents: Ensure all supply vents (where the cool air comes out) are open and not blocked by furniture or rugs.
- Check the Outdoor Unit: Examine the outdoor condenser unit. Make sure it’s free of debris like leaves, grass clippings, or branches. Clear any obstructions around the unit.
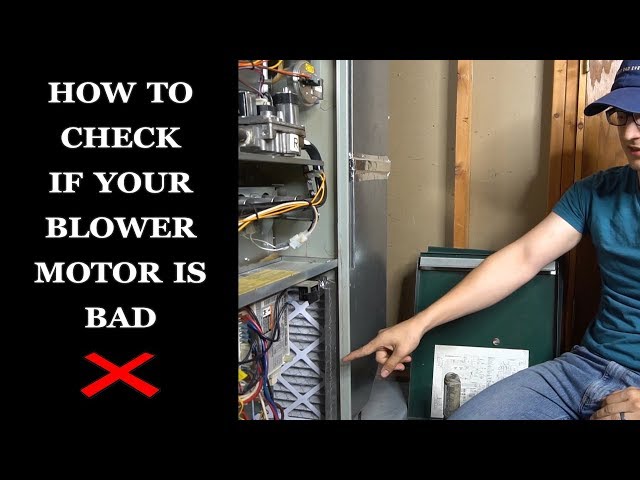
- Listen to the Fan Motor: Go near the indoor unit and listen for the blower fan. If you don’t hear it running, there might be an issue with the fan motor.
- Look for Ice Buildup: Inspect the copper pipes connected to the indoor unit for ice. If you see ice, turn off the AC and just run the fan to melt the ice. This can take several hours.
- Check Ductwork Connections: If accessible, inspect the ductwork for any disconnections or damage. Seal any visible leaks with duct tape.
- Reset the System: Turn off the AC unit at the thermostat and the circuit breaker. Wait 30 minutes, then turn the breaker back on, wait a few minutes, and turn the thermostat back on.
- Inspect the Condensate Drain: The AC unit produces condensation. Ensure the drain line is not clogged. You can try using a wet/dry vacuum to clear any blockage.
- Check for Error Codes: Some thermostats and AC units display error codes. Consult your owner’s manual for the meaning of the code and troubleshooting steps.
- Listen for Unusual Noises: Note any unusual noises coming from the indoor or outdoor unit, such as grinding, squealing, or rattling. These noises can provide clues to the problem.
- Monitor Airflow After Each Step: After completing each step, check if the airflow has improved. This will help you pinpoint the source of the problem.
Fix the Issue Without Buying Parts
Many times, you can resolve the “central air not blowing” issue without buying new parts:
- Resetting the System: As mentioned above, a simple reset can sometimes resolve minor glitches.
- Cleaning Components: Cleaning the air filter and outdoor unit can significantly improve airflow.
- Thermostat Calibration: Some thermostats need recalibration. Check your owner’s manual for instructions.
- Visual Inspections: Regularly inspect the system for any obvious issues like loose wires, disconnected ductwork, or debris buildup.
- Basic Maintenance: Regularly replace the air filter and clean the outdoor unit to prevent future problems.
When Replacement Might Be Necessary
If you’ve tried all the troubleshooting steps and your central air is still not blowing air, a replacement part might be necessary. Here are some common parts that fail:
- Blower Motor: The motor that powers the fan can burn out, costing between $200-$600 for the part alone.
- Capacitor: A capacitor helps start and run the motors. A failed capacitor can prevent the fan from running, with parts costing $20-$100.
- Thermostat: A malfunctioning thermostat can send incorrect signals to the system, priced around $75-$300.
- Control Board: The control board manages the system’s functions. Replacement costs range from $200-$700.
Note: These prices are estimates and can vary depending on the brand, model, and location.
Safety Warning
- Always turn off the power to the AC unit at the circuit breaker before performing any maintenance or repairs.
- Avoid working on electrical components if you are not comfortable doing so. Call a qualified technician.
- Never spray water directly onto electrical components.
- Be careful when working on ladders to avoid falls.
- If you suspect a refrigerant leak, do not attempt to fix it yourself. Call a qualified HVAC technician.
Tools You May Need
- Screwdrivers (Phillips and flathead)
- New air filter
- Duct tape
- Wet/dry vacuum
- Wrench set
- Multimeter (for testing electrical components – only if you are comfortable using it)
FAQ
-
Q: Why is my AC running but not cooling?
A: This could be due to a dirty air filter, frozen evaporator coil, or refrigerant leak. Check the filter first. -
Q: How often should I change my air filter?
A: It’s recommended to change it every 1-3 months, depending on usage and the type of filter. -
Q: What does it mean if the breaker keeps tripping?
A: It could indicate a short circuit, overload, or faulty component. Call a qualified electrician or HVAC technician. -
Q: How do I know if my capacitor is bad?
A: A bad capacitor may cause the fan motor to hum but not start, or the motor may start slowly. A multimeter can be used to test its capacitance (if you are familiar with that type of testing).
Conclusion
Troubleshooting a central air system that’s not blowing air can seem daunting, but by following these steps, you can often identify and resolve the issue yourself. Remember to prioritize safety and consult the user’s manual. If you’ve exhausted these troubleshooting steps and the problem persists, it’s best to call a qualified HVAC technician for professional assistance. Don’t hesitate to seek expert help when needed. Getting your system working correctly will ensure you’re cool and comfortable!
Youtube Video:
Quick Wiring Specifications & Terminal Guide
| Component / Circuit | Standard Wire Gauge | Recommended Protection |
|---|---|---|
| Control & Trigger Signals | 18 – 20 AWG | 5A – 7.5A Inline Fuse |
| Standard Auxiliary Load | 14 – 16 AWG | 15A – 20A Circuit Breaker |
| Main Power Feed / Supply | 10 – 12 AWG | 30A – 40A Heavy-Duty Relay |
Images References
Looking for more diagnostic guides? Explore our complete Air Conditioner Troubleshooting 4 section for step-by-step troubleshooting solutions.
