
Introduction
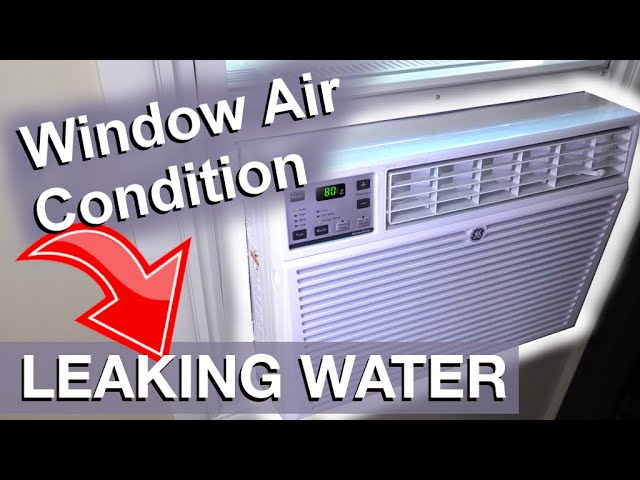
Finding water dripping from your indoor air conditioner unit can be alarming. It’s a sign that something isn’t working correctly within your AC system. Besides being a nuisance, this dripping water can damage your walls, ceilings, and furniture. It’s especially common during periods of high humidity and heavy AC use. Addressing the issue promptly is crucial to prevent further damage and costly repairs. Don’t ignore the drips!
💡 Technical Key Takeaways:
- Core Focus: Diagnostic schematic and terminal connection layout for Air Conditioner Water Dripping From Indoor Unit.
- Target Scope: Field technicians, automotive DIYers, and residential/commercial electricians.
- Safety Rule: Always disconnect the primary power source/battery terminal and verify zero voltage with a multimeter before touching wires.
Common Causes of Air Conditioner Water Dripping From Indoor Unit
Here are some of the most frequent reasons why your indoor AC unit might be leaking:
- Clogged Drain Line: This is the most common culprit. Condensation produced by the AC needs to drain, and a blockage can cause water to back up and leak.
- Dirty Air Filter: A dirty filter restricts airflow, causing the evaporator coil to freeze. When the ice melts, it can overwhelm the drain pan and cause leaks.
- Frozen Evaporator Coil: Similar to a dirty filter, low refrigerant levels or poor airflow can lead to the coil freezing.
- Broken or Cracked Drain Pan: The drain pan collects condensation. If it’s damaged, it can leak.
- Low Refrigerant: Low refrigerant can cause the evaporator coil to freeze, leading to water leaks when it melts.
- Improper Installation: If the AC unit wasn’t installed correctly, the drain line may not be properly sloped, preventing proper drainage.
- Drain Line Disconnection: The drain line might have become disconnected from the unit.
- Damaged or Missing Insulation: Condensation can form on uninsulated pipes and drip.
Symptoms Checklist
Look for these signs to confirm the cause of your AC leak:
- Visible water dripping from the indoor unit.
- Water stains on the ceiling or walls near the unit.
- Musty or moldy odors coming from the unit.
- The AC unit is running but not cooling effectively.
- Ice forming on the refrigerant lines or evaporator coil (visible if you can access the coil).
How to Fix Air Conditioner Water Dripping From Indoor Unit Step-by-Step Guide
Follow these steps to troubleshoot and fix the issue:
- Turn off the AC: Before you start, turn off the AC unit at the thermostat and the breaker to prevent electrical shock.
- Inspect the Air Filter: Remove the air filter and check its condition. If it’s dirty, replace it with a new one. This can solve many airflow-related problems.
- Locate the Drain Line: Find the drain line, usually a PVC pipe exiting the indoor unit. It typically drains outside or into a nearby drain.
- Check for Clogs in the Drain Line: Disconnect the drain line (carefully!) and check for any visible obstructions.
- Flush the Drain Line: Use a wet/dry vacuum to suck out any clogs in the drain line. Alternatively, you can use a garden hose to flush it with water. Be careful not to create too much pressure.
- Pour Vinegar into the Drain Line: Pour a cup of white vinegar into the drain line. This can help dissolve any remaining algae or mold that might be causing the clog. Let it sit for about 30 minutes, then flush with water.
- Check the Drain Pan: Inspect the drain pan for cracks or damage. If it’s cracked, it will need to be replaced (but let’s hold off on replacing parts for now).
- Clear Debris from the Drain Pan: Remove any standing water and debris from the drain pan using a wet/dry vacuum or a sponge.
- Check for Ice on the Evaporator Coil: If you can safely access the evaporator coil (behind the air filter), check for ice buildup. If ice is present, let it thaw completely. This may take several hours. Turning the AC off will help the process.
- Restart the AC: After you’ve cleared any clogs, cleaned the pan and if any ice has been present allowed it to melt, turn the AC back on and monitor it for leaks.
- Monitor the Unit: Run the AC for a few hours and observe if the dripping returns.
- Check for proper slope: Ensure the drain line slopes downwards consistently to allow for proper drainage.
- Inspect insulation: Check around refrigerant pipes and ensure that the insulation is intact and undamaged.
Fix the Issue Without Buying Parts
Many AC leaks can be resolved without spending money:
- Regular Cleaning: Clean your air filter monthly, especially during peak usage.
- Vinegar Flush: Periodically flush the drain line with white vinegar to prevent clogs.
- Visual Inspections: Regularly inspect the drain pan and surrounding areas for leaks or signs of damage.
- AC Reset: Turn the AC off at the breaker for a few minutes, then turn it back on. This can sometimes reset the system and resolve minor issues.
When Replacement Might Be Necessary
If you’ve tried all the troubleshooting steps and the leak persists, replacement may be necessary. Here are some parts that commonly fail and their estimated replacement costs:
- Drain Pan: $50 – $150 (USD)
- Drain Line: $20 – $50 (USD) (Usually easy to replace yourself)
- Air Filter Housing: $30-$100 (USD)
- Refrigerant Lines: $100-$400 (USD) (Best left to professionals).
If your refrigerant is low, you likely have a leak and need to call a technician. Adding refrigerant yourself is not recommended. The repair can be costly and you need professional tools.
Safety Warning
Keep these safety tips in mind while working on your AC unit:
- Always turn off the power to the AC unit at the breaker before performing any maintenance or repairs.
- Be careful when handling electrical components.
- Wear gloves to protect your hands.
- Clean up any spilled water immediately to prevent slips and falls.
Tools You May Need
Here’s a list of tools that might be helpful:
- Screwdriver (Phillips and flathead)
- Wet/dry vacuum
- Garden hose
- Gloves
- Flashlight
- Wrench (for drain line connections)
FAQ
Here are some common questions about AC leaks:
- Q: Why is my AC dripping even after I cleaned the filter? A: There may be other issues, such as a clogged drain line or low refrigerant.
- Q: How often should I clean my AC drain line? A: It’s recommended to clean it at least twice a year.
- Q: Can I use bleach to clean the drain line? A: While some people use bleach, vinegar is a safer and more environmentally friendly option.
- Q: What if I can’t find the drain line? A: Consult your AC unit’s manual or contact a professional.
Conclusion
Don’t let a dripping AC ruin your day! By following these troubleshooting steps, you can often resolve the issue yourself and save money on repair costs. Remember to prioritize safety and perform regular maintenance to prevent future leaks. If you’ve exhausted all options and the problem persists, it’s best to call a qualified HVAC technician for assistance.
Youtube Video:
Quick Wiring Specifications & Terminal Guide
| Component / Circuit | Standard Wire Gauge | Recommended Protection |
|---|---|---|
| Control & Trigger Signals | 18 – 20 AWG | 5A – 7.5A Inline Fuse |
| Standard Auxiliary Load | 14 – 16 AWG | 15A – 20A Circuit Breaker |
| Main Power Feed / Supply | 10 – 12 AWG | 30A – 40A Heavy-Duty Relay |
Images References
Looking for more diagnostic guides? Explore our complete Air Conditioner Troubleshooting 3 section for step-by-step troubleshooting solutions.
