
Introduction
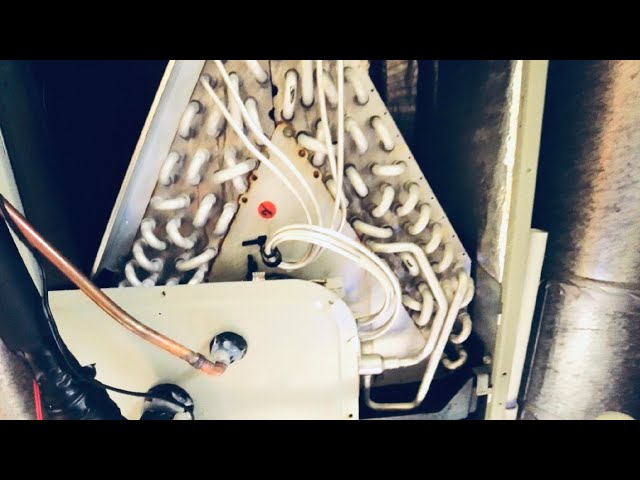
Finding water leaking from your air conditioner can be alarming. The evaporator coil, located inside your indoor AC unit, is responsible for cooling the air. When it leaks, it’s usually a sign something isn’t working right, and it could lead to bigger problems like mold growth, damaged ceilings, or even electrical issues. Addressing this issue quickly can prevent costly repairs down the road. Let’s figure out what’s causing the leak!
💡 Technical Key Takeaways:
- Core Focus: Diagnostic schematic and terminal connection layout for Air Conditioner Evaporator Coil Leaking Water.
- Target Scope: Field technicians, automotive DIYers, and residential/commercial electricians.
- Safety Rule: Always disconnect the primary power source/battery terminal and verify zero voltage with a multimeter before touching wires.
Common Causes of Air Conditioner Evaporator Coil Leaking Water
Here are some of the most common reasons why your evaporator coil might be leaking:
- Clogged Air Filter: A dirty air filter restricts airflow, causing the evaporator coil to get too cold and freeze over. When the ice melts, it drips.
- Dirty Evaporator Coil: Dust and debris build-up can insulate the coil, causing it to freeze and leak.
- Low Refrigerant: Insufficient refrigerant reduces the coil’s temperature, leading to freezing and melting.
- Blocked Drain Line: The condensate drain line removes water produced by the cooling process. If it’s clogged, the water backs up and overflows.
- Damaged Drain Pan: The drain pan catches water from the evaporator coil. Cracks or rust can cause leaks.
- High Humidity: Extremely humid conditions can overwhelm the AC’s ability to remove moisture, resulting in excessive condensation.
- Improper Installation: Incorrectly installed AC units may have poorly sealed connections or inadequate drainage.
- Frozen Coil: Usually from restricted airflow or low refrigerant. Melting ice equals dripping water.
Symptoms Checklist
Look for these signs to confirm if your evaporator coil is leaking:
- Water dripping from your indoor AC unit.
- Visible ice forming on the evaporator coil (inside the unit).
- Musty or moldy odor coming from your vents.
- Water stains on the ceiling near the AC unit.
- Reduced cooling performance from your AC.
- Higher than usual energy bills.
- Standing water around the indoor AC unit.
How to Fix Air Conditioner Evaporator Coil Leaking Water Step-by-Step Guide
Follow these steps to troubleshoot and potentially fix the leak:
- Turn off the AC: Switch off the air conditioner at the thermostat and the breaker to prevent electrical shock.
- Inspect the Air Filter: Remove the air filter and check if it’s dirty. If it is, replace it with a new one. A clean filter is crucial for proper airflow.
- Check for Ice: Open the access panel to the indoor unit (refer to your AC manual). Look for ice buildup on the evaporator coil. If you see ice, let it thaw completely before proceeding. This might take several hours.
- Locate the Drain Line: The drain line is usually a PVC pipe coming out of the indoor unit. Find the end of the drain line, often located outside or near a drain.
- Clear the Drain Line: Use a wet/dry vacuum to suck out any clogs from the drain line. Place the vacuum hose over the drain line opening and let it run for a few minutes. Alternatively, use a stiff wire or pipe cleaner to break up any blockage.
- Check the Drain Pan: Locate the drain pan beneath the evaporator coil. Inspect it for cracks, rust, or standing water. If you find cracks, you might need to replace the pan later (we’ll talk about this later). For now, make sure its clean of debris.
- Clean the Evaporator Coil (If Accessible): If you can safely access the evaporator coil, use a coil cleaner (available at most hardware stores) to remove dirt and debris. Follow the cleaner’s instructions carefully. Be gentle to avoid damaging the fins.
- Check the Refrigerant Lines: Examine the refrigerant lines (copper pipes) connected to the evaporator coil for any signs of damage or leaks. If you suspect a refrigerant leak, do NOT attempt to fix it yourself. This requires a qualified technician.
- Restart the AC: Once you’ve completed the above steps and the coil is completely thawed (if it was frozen), turn the AC back on at the breaker and the thermostat.
- Monitor for Leaks: Observe the AC unit carefully for any signs of water leaks. Give it some time (at least an hour) to see if the problem is resolved.
- Adjust Thermostat Settings: Ensure that the thermostat is set to a reasonable temperature. Setting it too low can cause the evaporator coil to freeze up, especially in humid conditions.
- Improve Airflow: Make sure that vents throughout your home are not blocked by furniture or curtains. Good airflow helps prevent the evaporator coil from freezing.
Fix the Issue Without Buying Parts
Sometimes, simple fixes can resolve the leaking problem:
- Regular Air Filter Replacement: Replace your air filter every 1-3 months, or more frequently if you have pets or allergies.
- Preventative Maintenance: Schedule annual AC maintenance to have a professional clean the coils, check refrigerant levels, and inspect other components.
- Thermostat Adjustment: Avoid setting your thermostat too low. A difference of more than 20 degrees between indoor and outdoor temperature can strain your system.
- Inspect and Clean the Area: Regular cleaning around the indoor and outdoor units will improve airflow and prevent debris buildup.
When Replacement Might Be Necessary
In some cases, the evaporator coil itself may be damaged and require replacement. This is usually a last resort and is more expensive. Signs that replacement is needed include:. For more related activities, check out our Air Conditioner Loud Outside.
- Persistent Leaks: Even after cleaning and unclogging the drain line, the coil continues to leak.
- Visible Damage: The coil has significant corrosion, damage, or leaks.
- Refrigerant Leaks: The refrigerant lines connected to the coil are leaking, and the coil itself is the source.
Replacing an evaporator coil can cost between $800 and $2500 USD, including parts and labor. The drain pan is a much cheaper part ($50-$200) and easier to replace. Its always best to get a professional opinion and multiple quotes before proceeding with a replacement.
Safety Warning
- Always turn off the power to the AC unit at the breaker before performing any maintenance or repairs.
- Avoid touching any electrical components while the unit is powered on.
- Be careful when using coil cleaners, as they can be corrosive. Wear gloves and eye protection.
- If you are uncomfortable working with electrical components or refrigerant, call a qualified HVAC technician.
- Wipe up any spilled water immediately to prevent slips and falls.
Tools You May Need
- Screwdriver (Phillips and flathead)
- Wet/Dry Vacuum
- Air Filter
- Coil Cleaner
- Gloves
- Eye Protection
- Stiff Wire or Pipe Cleaner
FAQ
Q: Why is my AC leaking even after I changed the filter?
A: Even with a clean filter, other issues like a clogged drain line, low refrigerant, or a dirty coil can cause leaks.
Q: How often should I clean my evaporator coil?
A: Ideally, have a professional clean your evaporator coil annually as part of your AC maintenance.
Q: Can I use a regular vacuum to clean the drain line?
A: It’s best to use a wet/dry vacuum, as a regular vacuum can be damaged by water.
Q: Is it safe to run my AC if it’s leaking a little bit?
A: It’s not recommended. A small leak can quickly turn into a larger problem and potentially damage your home. Turn off the AC and troubleshoot the issue.
Conclusion
Troubleshooting an air conditioner evaporator coil leak can seem daunting, but by following these steps, you can often identify and resolve the issue yourself. Remember to prioritize safety and don’t hesitate to contact a qualified HVAC technician if you’re uncomfortable with any of the procedures. Taking a proactive approach to AC maintenance can save you time, money, and headaches in the long run. Good luck!
Youtube Video:
Quick Wiring Specifications & Terminal Guide
| Component / Circuit | Standard Wire Gauge | Recommended Protection |
|---|---|---|
| Control & Trigger Signals | 18 – 20 AWG | 5A – 7.5A Inline Fuse |
| Standard Auxiliary Load | 14 – 16 AWG | 15A – 20A Circuit Breaker |
| Main Power Feed / Supply | 10 – 12 AWG | 30A – 40A Heavy-Duty Relay |
Images References
Looking for more diagnostic guides? Explore our complete Air Conditioner Troubleshooting 3 section for step-by-step troubleshooting solutions.
