
Introduction
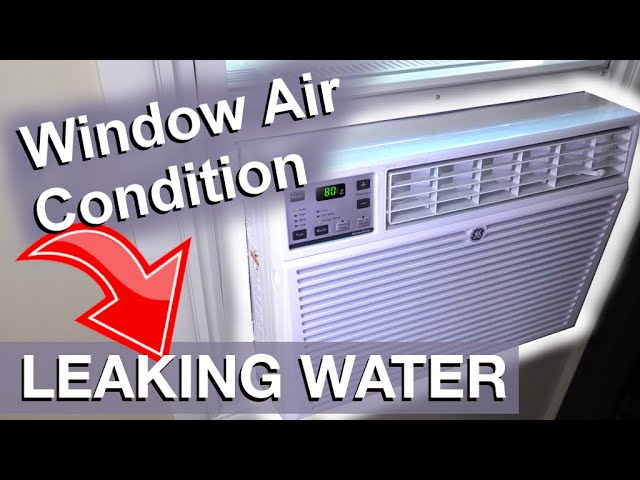
A window AC unit leaking inside is a common problem that can be frustrating for homeowners. Not only can it damage your floors and walls, but it can also indicate a more serious issue with your unit. This usually happens during periods of high humidity or when the AC is working hard to cool the room. Addressing this issue promptly is important to prevent further damage and ensure your AC unit continues to function efficiently.
💡 Technical Key Takeaways:
- Core Focus: Diagnostic schematic and terminal connection layout for Ac Window Unit Leaking Inside.
- Target Scope: Field technicians, automotive DIYers, and residential/commercial electricians.
- Safety Rule: Always disconnect the primary power source/battery terminal and verify zero voltage with a multimeter before touching wires.
Common Causes of AC Window Unit Leaking Inside
Here are some of the most common reasons why your window AC unit might be leaking inside:
- Clogged Drain: The drain hole is responsible for channeling condensation outside. If clogged with dust, debris, or mold, water will back up and leak indoors.
- Incorrect Installation Angle: AC units need to be slightly tilted outwards to allow proper drainage. If installed level or tilted inwards, water will pool inside.
- Dirty Air Filter: A clogged air filter restricts airflow, causing the evaporator coil to freeze up. When the ice melts, it can overwhelm the drainage system.
- Damaged Drain Pan: The drain pan collects condensation. If cracked or damaged, it can leak.
- Freezing Evaporator Coils: Low refrigerant levels or poor airflow can cause the evaporator coils to freeze. When the ice melts, it creates excess water.
- High Humidity: During periods of high humidity, the AC unit needs to remove more moisture from the air, potentially overwhelming the drainage system.
- Debris in the AC Unit: Leaves, insects, and other debris can accumulate inside the unit, blocking drainage channels.
- Faulty Condensate Pump: Some units have a small pump to help drain the water. If this pump fails, water can accumulate and leak inside (less common in smaller window units).
Symptoms Checklist
Here are some signs that your AC unit is leaking inside:
- Water dripping from the front or sides of the unit
- Water pooling on the floor around the unit
- A musty or moldy smell near the unit
- Visible mold growth on or around the unit
- The AC unit is louder than usual
- The AC unit is not cooling as effectively as it used to
How to Fix AC Window Unit Leaking Inside Step-by-Step Guide
Follow these steps to troubleshoot and fix your leaking AC unit:
- Unplug the AC Unit: For safety, always disconnect the power before working on your AC unit.
- Inspect the Installation Angle: Ensure the unit is slightly tilted downwards towards the outside. Use a level to check. Adjust the mounting brackets if necessary.
- Clean the Air Filter: Remove the air filter and wash it with mild soap and water. Let it dry completely before reinstalling.
- Check the Drain Hole: Locate the drain hole, usually on the back or bottom of the unit. Use a straightened paperclip, pipe cleaner, or small wire to clear any clogs.
- Inspect the Drain Pan: If accessible, check the drain pan for cracks or damage. Clean out any standing water or debris.
- Clean the Evaporator Coils: Carefully clean the evaporator coils with a soft brush or vacuum cleaner attachment to remove dust and debris.
- Inspect the Unit’s Interior: Remove the outer casing (refer to your user manual). Look for any visible signs of blockage or damage. Clean out any leaves, insects, or other debris.
- Check for Ice Buildup: If you suspect freezing coils, let the unit thaw completely. Then, try running it on a lower setting or fan-only mode to prevent re-freezing.
- Dry the Area: Use a towel or sponge to clean up any spilled water around the AC unit.
- Run a Test: Plug the unit back in and run it for a while to see if the leak has stopped.
- Monitor Humidity: If high humidity is contributing, consider using a dehumidifier in the room.
- Ensure Proper Ventilation: Make sure there’s good airflow around the AC unit. Don’t block it with curtains or furniture.
Fix the Issue Without Buying Parts
You can often resolve leaks without buying new parts by following these tips:
- Reset the Unit: Sometimes, simply unplugging the unit for 15-20 minutes and plugging it back in can reset its internal controls.
- Thorough Cleaning: Regularly cleaning the air filter and the unit’s exterior can prevent clogs and improve performance.
- Proper Installation: Ensuring the correct installation angle is crucial for proper drainage.
- Regular Inspection: Periodically inspect the drain hole and pan for any signs of blockage or damage.
- Maintain Airflow: Don’t block the unit or vents to maintain optimal airflow and prevent freezing.
When Replacement Might Be Necessary
If you’ve tried all the troubleshooting steps and the leak persists, replacement might be necessary. Common failing parts include the drain pan (difficult to replace individually) and the compressor (expensive to repair). A new window AC unit typically costs between $150 and $500 USD, depending on the size and features.
Safety Warning
- Always unplug the AC unit before performing any maintenance or repairs.
- Avoid working on the unit if the floor is wet to prevent electric shock.
- Do not use sharp objects to clear the drain hole, as this could damage the drain pan.
- If you’re uncomfortable working with electrical appliances, consult a qualified technician.
Tools You May Need
- Screwdriver
- Level
- Paperclip or pipe cleaner
- Soft brush or vacuum cleaner attachment
- Mild soap and water
- Towel or sponge
FAQ
Here are some frequently asked questions about AC unit leaks:
- Why is my AC leaking more when it’s humid? Higher humidity means the AC has to remove more moisture from the air, leading to more condensation and a higher chance of leaks if the drainage is not working efficiently.
- Can a dirty air filter cause a leak? Yes, a dirty air filter restricts airflow, which can cause the evaporator coils to freeze. When the ice melts, it can overwhelm the drainage system.
- How often should I clean my AC unit’s air filter? Ideally, you should clean the air filter every 2-4 weeks, depending on how often you use the AC and how dusty your environment is.
- What does it mean if my AC is leaking refrigerant? If you suspect a refrigerant leak (often indicated by a hissing sound or a strong chemical smell), contact a qualified technician immediately. Refrigerant leaks can be harmful and require specialized equipment to repair.
Conclusion
Don’t let a leaking AC unit ruin your day! By following this troubleshooting guide, you can often diagnose and fix the problem yourself. Remember to prioritize safety and take your time. If you’re not comfortable performing any of these steps, or if the leak persists, don’t hesitate to call a qualified HVAC technician. Good luck!
Youtube Video:
Quick Wiring Specifications & Terminal Guide
| Component / Circuit | Standard Wire Gauge | Recommended Protection |
|---|---|---|
| Control & Trigger Signals | 18 – 20 AWG | 5A – 7.5A Inline Fuse |
| Standard Auxiliary Load | 14 – 16 AWG | 15A – 20A Circuit Breaker |
| Main Power Feed / Supply | 10 – 12 AWG | 30A – 40A Heavy-Duty Relay |
Images References
Looking for more diagnostic guides? Explore our complete Air Conditioner Troubleshooting 3 section for step-by-step troubleshooting solutions.
