
Introduction
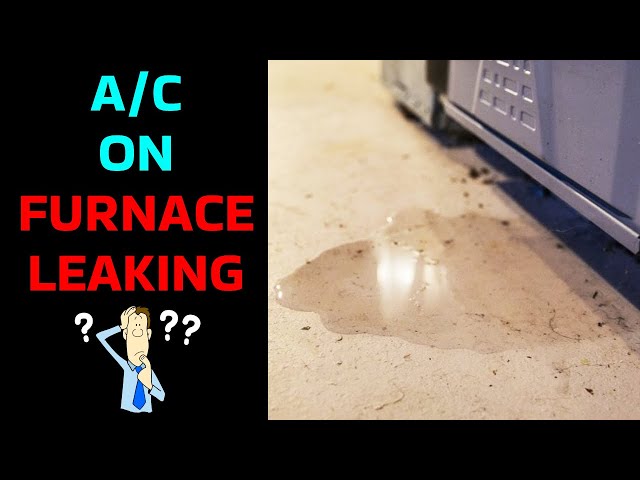
Finding water dripping from your AC unit in the attic can be a homeowner’s nightmare. It often happens during the hottest months when the AC is working overtime, leading to a build-up of condensation. A leaking AC can damage your ceiling, walls, and insulation, creating the perfect environment for mold growth. Addressing this issue quickly is crucial to prevent costly repairs and health hazards. Don’t panic; many causes are easily fixable!
💡 Technical Key Takeaways:
- Core Focus: Diagnostic schematic and terminal connection layout for Ac Unit In Attic Dripping Water.
- Target Scope: Field technicians, automotive DIYers, and residential/commercial electricians.
- Safety Rule: Always disconnect the primary power source/battery terminal and verify zero voltage with a multimeter before touching wires.
Common Causes of ac unit in attic dripping water
Here are some common reasons why your AC unit might be leaking water:
- Clogged Drain Line: This is the most frequent culprit. Condensation needs to drain, and if the line is blocked, water backs up and overflows.
- Dirty Air Filter: A clogged filter restricts airflow, causing the evaporator coil to freeze. When it melts, it drips excessively.
- Low Refrigerant: Low refrigerant levels cause the evaporator coil to get too cold, leading to ice formation and subsequent dripping when it melts.
- Broken Condensate Pump: Some attic AC units use a pump to push the condensate water up and out. A failing pump can cause backups.
- Damaged Drain Pan: The drain pan beneath the AC unit collects condensation. Cracks or rust can cause it to leak.
- Improper Installation: If the AC unit wasn’t installed correctly, the drain line might not be properly sloped, leading to drainage problems.
- Leaky Ductwork: Though less common, condensation can form on leaky ductwork in humid attics, dripping onto the floor.
- Frozen Evaporator Coils: Anything restricting airflow over the evaporator coil can lead to it freezing, and then melting and dripping.
Symptoms Checklist
Look for these indicators to confirm the source of your problem:
- Water stains on your ceiling below the attic.
- Visible dripping from the AC unit itself.
- A musty or moldy smell in the attic or nearby rooms.
- Standing water in the drain pan.
- The AC unit is running, but the house isn’t cooling properly.
- Ice forming on the refrigerant lines or evaporator coils.
- Water running from the exterior drain pipe near your house when the AC is running. This suggests a blockage further down the line.
How to Fix ac unit in attic dripping water Step-by-Step Guide
Follow these steps to troubleshoot and fix your leaking AC unit:
- Safety First: Turn off the power to your AC unit at the breaker box before starting any work.
- Inspect the Air Filter: Remove the air filter and hold it up to the light. If you can’t see through it easily, it’s dirty. Replace it with a clean filter.
- Locate the Drain Line: Find the PVC drain line that runs from the AC unit. It’s usually a 3/4-inch or 1-inch pipe.
- Check for Obvious Blockages: Look for any visible kinks or bends in the drain line that could be restricting water flow. Straighten them out if possible.
- Flush the Drain Line: Use a wet/dry vacuum to suck out any clogs in the drain line. Seal the vacuum hose tightly around the drain line opening and let it run for several minutes. You can also try using a garden hose to flush the line.
- Pour Vinegar Down the Drain Line: Pour one cup of white vinegar down the drain line. This helps dissolve any algae or mold that might be causing the blockage. Let it sit for 30 minutes, then flush with water.
- Inspect the Drain Pan: Check the drain pan for cracks or rust. If you find any damage, you might need to replace the pan (but try cleaning it first, see below).
- Clean the Drain Pan: Even without cracks, the pan can collect sludge. Use a wet/dry vac to remove standing water, then scrub the pan with a brush and a mixture of water and bleach (1 part bleach to 10 parts water). Rinse thoroughly.
- Check the Condensate Pump (if applicable): If your unit has a condensate pump, ensure it’s plugged in and running. Listen for any unusual noises that might indicate a problem. Clean the pump’s reservoir if it’s dirty.
- Inspect the Evaporator Coils: (Requires removing access panel, proceed carefully). Look for ice buildup on the coils. If there’s ice, let it melt completely before proceeding. Once melted, clean the coils with a fin comb to remove any dust or debris.
- Restart the AC Unit: Turn the power back on at the breaker box and monitor the AC unit for any further leaks.
- Monitor Drain Line Output: Watch the end of the drain line outside your house. You should see water dripping out regularly when the AC is running. If not, the clog may still be present.
- Check Ductwork for Condensation: Inspect your ductwork, especially joints and seams, for condensation. Insulate any sections that are prone to condensation.
Fix the Issue Without Buying Parts
Many leaks can be resolved with simple maintenance:
- Regular Filter Changes: Change your air filter every 1-3 months, depending on usage.
- Preventative Drain Line Cleaning: Pour a cup of vinegar down the drain line every month to prevent clogs.
- Visual Inspections: Regularly inspect the AC unit, drain pan, and drain line for any signs of leaks or damage.
- Proper Insulation: Ensure your attic is adequately insulated to prevent condensation on ductwork.
When Replacement Might Be Necessary
If you’ve tried all the troubleshooting steps and the AC unit is still leaking, it’s possible that a component is failing. Possible issues include a cracked drain pan (cost: $50-$200), a failing condensate pump ($100-$300), or a refrigerant leak (repair cost varies greatly). In rare cases, if the evaporator coil is corroded or severely damaged, replacing the entire AC unit might be the most cost-effective solution. Replacing an attic AC unit can range from $3,000 to $7,000, depending on the size and efficiency of the unit. Before replacing anything, it is recommended to call a certified technician for a diagnostic test.
Safety Warning
- Always turn off the power to the AC unit before working on it.
- Be careful when working in the attic, as it can be hot and poorly lit.
- Avoid standing in water while working with electrical components.
- Use caution when handling bleach. Wear gloves and eye protection.
- If you are uncomfortable working with electrical or mechanical components, consult a qualified HVAC technician.
Tools You May Need
- Wet/dry vacuum
- Screwdriver (Phillips and flathead)
- Adjustable wrench
- Bucket
- Garden hose
- White vinegar
- Bleach
- Brush
- Fin comb (for cleaning evaporator coils)
- Gloves
- Eye protection
FAQ
Here are some frequently asked questions about leaking AC units:
- Q: How often should I change my AC filter? A: At least every 1-3 months, or more often if you have pets or allergies.
- Q: Can a clogged drain line damage my AC unit? A: Yes, it can cause the evaporator coil to freeze and potentially damage other components.
- Q: Is it safe to use bleach to clean the drain line? A: While bleach can be used, vinegar is a safer and more environmentally friendly alternative for regular maintenance.
- Q: Why is my AC unit leaking even after I cleaned the drain line? A: There might be a more severe clog further down the line, a damaged drain pan, or another underlying issue that requires professional attention.
- Q: How can I tell if my AC unit needs refrigerant? A: Common signs include weak airflow, longer cooling cycles, and ice forming on the refrigerant lines.
- Q: Can I add refrigerant myself? A: It is not recommended, this is best left to certified HVAC technicians as special tools and training are required.
Conclusion
Finding your ac unit in attic dripping water is never a fun experience. However, with a bit of patience and these troubleshooting steps, you can often resolve the issue yourself and prevent further damage. Remember to prioritize safety and take your time. If you’re uncomfortable with any of these steps, or if the problem persists, don’t hesitate to call a qualified HVAC technician for assistance. Most technicians are happy to answer simple questions over the phone and may be able to resolve the problem much faster.
Youtube Video:
Quick Wiring Specifications & Terminal Guide
| Component / Circuit | Standard Wire Gauge | Recommended Protection |
|---|---|---|
| Control & Trigger Signals | 18 – 20 AWG | 5A – 7.5A Inline Fuse |
| Standard Auxiliary Load | 14 – 16 AWG | 15A – 20A Circuit Breaker |
| Main Power Feed / Supply | 10 – 12 AWG | 30A – 40A Heavy-Duty Relay |
Images References
Looking for more diagnostic guides? Explore our complete Air Conditioner Troubleshooting 2 section for step-by-step troubleshooting solutions.
