
Introduction
An AC leak, whether it’s water or refrigerant, can signal serious trouble for your air conditioning system. A water leak, though seemingly minor, can lead to mold growth and damage to your home’s structure. A refrigerant leak, on the other hand, reduces your AC’s cooling efficiency, causing higher energy bills and potentially damaging the compressor, the heart of your AC unit. Addressing an AC leak promptly is crucial to prevent further damage and costly repairs. Common situations where leaks occur include after recent AC use, during periods of high humidity, or after a particularly hot day. Don’t delay identifying and addressing the source of the leak early can save you a lot of headaches and money in the long run.
💡 Technical Key Takeaways:
- Core Focus: Diagnostic schematic and terminal connection layout for Ac Leak.
- Target Scope: Field technicians, automotive DIYers, and residential/commercial electricians.
- Safety Rule: Always disconnect the primary power source/battery terminal and verify zero voltage with a multimeter before touching wires.
Common Causes of AC Leak
Several factors can cause an AC leak. Here are some of the most common:
- Clogged Condensate Drain Line: This is the most frequent cause of water leaks. Dust, algae, and debris can build up, blocking the drain line and causing water to back up and leak.
- Dirty Air Filter: A clogged air filter restricts airflow, causing the evaporator coil to freeze. When the ice melts, it can overwhelm the drain pan and cause a leak.
- Broken or Cracked Drain Pan: The drain pan collects condensate water. Over time, it can become brittle and crack, leading to leaks.
- Low Refrigerant: A refrigerant leak, though less visible than water, can also cause the evaporator coil to freeze. The resulting melting ice will lead to water overflowing.
- Damaged or Disconnected Drain Line: The drain line can become damaged, disconnected, or improperly installed, causing water to leak.
- High Humidity: Excessively humid conditions can increase the amount of condensation produced, potentially overwhelming the drain system.
- Improper Installation: If the AC unit was not installed correctly, the drain line might not be properly sloped, leading to water backup.
- Refrigerant Line Issues: Problems with refrigerant lines, such as corrosion or damage from outside elements, can lead to refrigerant leaks.
Symptoms Checklist
Use this checklist to help you identify an AC leak:
- Water pooling around the indoor air handler or furnace.
- Water leaking from the outdoor AC unit.
- Musty odor or visible mold growth near the AC unit.
- Reduced cooling efficiency.
- Higher than usual energy bills.
- Ice forming on the evaporator coil (inside the indoor unit).
- Hissing or bubbling sound coming from the AC unit.
- AC unit running constantly.
How to Fix AC Leak Step-by-Step Guide
Here’s a step-by-step guide to troubleshooting your AC leak:
- Turn off the AC unit: Before you begin any inspection or repair, turn off the AC unit at the thermostat and the breaker to avoid electrical hazards.
- Locate the Leak: Determine where the water or refrigerant is leaking from. Is it around the indoor unit, outdoor unit, or somewhere else?
- Inspect the Air Filter: Remove the air filter and check if it’s dirty. If it is, replace it with a new one. A dirty filter is a common cause of evaporator coil freezing.
- Check the Condensate Drain Line: Locate the condensate drain line, usually a PVC pipe near the indoor unit. It should lead outside or to a floor drain.
- Clear the Drain Line: If you suspect a clog, try clearing the drain line. You can use a wet/dry vacuum to suck out any debris. Attach the vacuum to the end of the drain line and create a tight seal. Turn on the vacuum for a few minutes to clear the blockage.
- Use a Plumber’s Snake: If vacuuming doesn’t work, try using a plumber’s snake (also known as an auger) to break up the clog. Gently insert the snake into the drain line and rotate it to break up any debris.
- Flush the Drain Line: After clearing the clog, flush the drain line with a mixture of warm water and vinegar. This will help prevent future clogs.
- Inspect the Drain Pan: Check the drain pan for cracks or damage. If you find any, you’ll need to replace the drain pan. (Note: Replacement advice is limited, so focus on inspection.)
- Check for Ice on the Evaporator Coil: If you see ice forming on the evaporator coil, it could indicate low refrigerant or a restricted airflow problem. Allow the ice to melt completely before turning the AC back on.
- Check Refrigerant Lines for Icing: Visually check the copper refrigerant lines for signs of ice buildup.
- Monitor After Restart: After addressing potential causes, turn the AC back on and monitor it closely for a few hours to see if the leak returns.
- Document Observations: Take notes of what you observe. If you have to call a professional, this documentation will be valuable.
Fix the Issue Without Buying Parts
Before resorting to replacing parts, try these free methods:
- Reset Your AC: Turn off the AC unit and the breaker for about 30 minutes, then turn it back on. This can sometimes clear minor glitches.
- Clean the Outdoor Unit: Remove any leaves, grass, or debris that may be blocking airflow around the outdoor unit.
- Inspect the Area Around the Units: Make sure there are no objects blocking the airflow to either the indoor or outdoor unit.
- Regular Maintenance: Clean or replace your air filter regularly (every 1-3 months) to prevent clogs and airflow problems.
- Check for Proper Ventilation: Ensure proper ventilation throughout your home to reduce humidity and condensation.
When Replacement Might Be Necessary
If the leak persists after trying the above steps, it might indicate a more serious problem. A cracked drain pan or a refrigerant leak that cannot be easily repaired may necessitate replacement. Drain pan replacements typically range from $100 to $300. A refrigerant leak repair, which often requires a professional to find and seal the leak, can cost between $200 and $1500 depending on the complexity. Common parts that might fail include the drain pan, condensate pump, and the evaporator coil. For more related activities, check out our Ac Line Frozen Outside.
Safety Warning
- Always turn off the power to the AC unit before performing any maintenance or repairs.
- Avoid touching any electrical components with wet hands.
- If you suspect a refrigerant leak, ventilate the area and avoid breathing in the refrigerant.
- If you’re uncomfortable performing any of these steps, call a qualified HVAC technician.
Tools You May Need
- Screwdriver (Phillips and flathead)
- Wet/dry vacuum
- Plumber’s snake (auger)
- Bucket
- Warm water
- Vinegar
- New air filter
FAQ
Here are some frequently asked questions about AC leaks:
-
Q: How do I know if it’s a water leak or a refrigerant leak?
A: Water leaks are usually visible and produce a dripping sound. Refrigerant leaks are often harder to detect but might be indicated by reduced cooling efficiency or a hissing sound. -
Q: Can I fix a refrigerant leak myself?
A: Refrigerant leaks should be handled by a licensed HVAC technician due to EPA regulations and the complexity of the repair. -
Q: How often should I clean my AC’s drain line?
A: It’s recommended to clean your AC’s drain line at least once a year, or more frequently if you notice signs of a clog. -
Q: Is it safe to run my AC with a small water leak?
A: It’s not recommended, as the water leak can cause further damage to your AC system and lead to mold growth. -
Q: What does a refrigerant leak smell like?
A: Refrigerant leaks can sometimes have a sweet or slightly oily smell. However, relying on smell alone is not a reliable way to detect a leak.
Conclusion
Troubleshooting an AC leak can seem daunting, but by following these steps, you can often identify and address the problem yourself. Remember to prioritize safety and don’t hesitate to call a qualified HVAC technician if you’re uncomfortable performing any of these tasks. Regular maintenance, such as cleaning the drain line and replacing the air filter, can help prevent future leaks and keep your AC running efficiently.
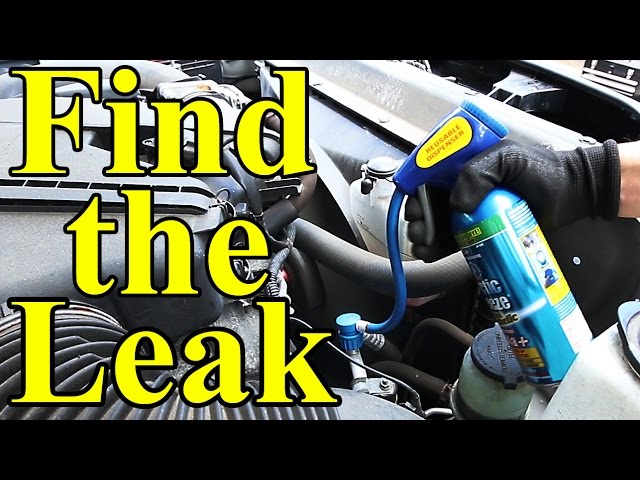
Youtube Video:
Quick Wiring Specifications & Terminal Guide
| Component / Circuit | Standard Wire Gauge | Recommended Protection |
|---|---|---|
| Control & Trigger Signals | 18 – 20 AWG | 5A – 7.5A Inline Fuse |
| Standard Auxiliary Load | 14 – 16 AWG | 15A – 20A Circuit Breaker |
| Main Power Feed / Supply | 10 – 12 AWG | 30A – 40A Heavy-Duty Relay |
Images References
Looking for more diagnostic guides? Explore our complete Air Conditioner Troubleshooting 1 section for step-by-step troubleshooting solutions.
