Introduction
A normally functioning air conditioner creates condensation as it cools your home. This condensation collects and drains outside through a drain line, resulting in a steady drip on warmer days. If you’ve noticed that your air conditioner isn’t dripping water outside as it usually does, it could indicate a problem. This isn’t always an emergency, but it’s important to investigate. Lack of dripping could be due to simple issues like cooler weather, but it can also signal more serious problems that could lead to decreased cooling efficiency or even damage to your system. Let’s troubleshoot!
Common Causes of Air Conditioner Not Dripping Water Outside
Here are several reasons why your AC might not be dripping water:
- Low Humidity: On drier days, your AC simply won’t produce as much condensation.
- Cooler Weather: If it’s not very hot outside, the AC won’t run as intensely, reducing condensation.
- Clogged Drain Line: This is the most common culprit. Dirt, algae, and debris can block the drain line.
- Frozen Evaporator Coils: Frozen coils prevent proper cooling and condensation.
- Leaking Refrigerant: Low refrigerant levels can reduce cooling capacity and condensation.
- Disconnected Drain Line: The drain line might have become detached from the AC unit.
- Improper Installation: Incorrectly sloped drain lines can prevent water from draining properly.
- Dirty Air Filter: A clogged air filter restricts airflow and can cause the evaporator coils to freeze.
Symptoms Checklist
Check for these symptoms to better understand the problem:
- No water dripping outside at all.
- Reduced cooling performance (house not cooling as well).
- Ice buildup on the air conditioner unit (especially around copper pipes).
- Water stains or leaks inside your home near the indoor unit.
- Musty odor coming from your vents.
- AC unit runs constantly without shutting off.
- Blowing warm air when AC is on.
How to Fix Air Conditioner Not Dripping Water Outside Step-by-Step Guide
Follow these steps to troubleshoot the issue:
- Check the Weather: Is it unusually cool or dry outside? If so, the lack of dripping may be normal. Wait for a hotter day to see if the dripping resumes.
- Inspect the Air Filter: Turn off the AC. Locate the air filter (usually behind a grill on the indoor unit or in a wall/ceiling). If it’s dirty, replace it with a new one. A clean filter is vital for proper airflow.
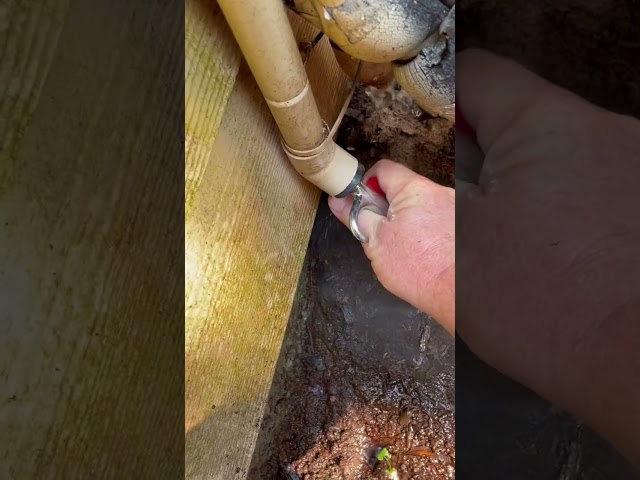
- Locate the Drain Line: Find the PVC drain line exiting your outdoor AC unit (usually a 3/4 inch pipe).
- Check for Obvious Obstructions: Visually inspect the drain line opening for visible clogs, such as leaves, dirt, or insect nests.
- Try the Wet/Dry Vacuum Method: With the AC turned OFF, use a wet/dry vacuum to suck out any blockage. Place the vacuum hose tightly over the end of the drain line for a few minutes. This often dislodges clogs.
- Flush with Water (Carefully): If vacuuming doesn’t work, try carefully flushing the drain line with a garden hose. Use low pressure to avoid damaging the line. Disconnect the drain line from the AC unit and flush from the outlet. This is best done by disconnecting the pipe at the AC unit and flushing it away from the unit. Reconnect when done.
- Check the Drain Pan (Indoor Unit): Locate the drain pan underneath the indoor unit. Is it overflowing? If so, manually empty it and try to clear the drain line again.
- Look for Ice Buildup: Inspect the copper pipes connected to your outdoor unit for ice. If you see ice, turn off the AC and only run the fan to melt the ice. This usually takes several hours.
- Check the Thermostat: Make sure the thermostat is set to “Cool” and that the temperature is set lower than the current room temperature.
- Check the Breaker: Ensure the circuit breaker for your AC unit hasn’t tripped. Reset it if necessary.
- Clear Debris Around Outdoor Unit: Ensure the outdoor unit isn’t surrounded by plants or debris that could restrict airflow.
- Give It Time: After performing these checks, turn the AC back on and monitor it for a few hours. The dripping may take some time to resume.
Fix the Issue Without Buying Parts
Often, you can resolve the issue without spending any money:
- Reset the System: Turn off the AC at the thermostat and the breaker for a few minutes, then turn it back on. This can sometimes clear minor glitches.
- Regular Cleaning: Regularly clean the area around your outdoor unit to prevent debris buildup.
- Air Filter Maintenance: Replace the air filter every 1-3 months, depending on usage and air quality.
- Routine Inspection: Periodically inspect the drain line for clogs, especially during peak cooling season.
When Replacement Might Be Necessary
In some cases, replacement or professional help may be needed:
- Refrigerant Leak: If you suspect a refrigerant leak (poor cooling, ice buildup despite cleaning), a professional is needed. Refrigerant leaks are environmentally hazardous and require specialized equipment to repair. Repair cost: $200 – $1500, depending on the severity of the leak and the amount of refrigerant needed.
- Damaged Evaporator Coils: Severely corroded or damaged evaporator coils may require replacement. Evaporator coil replacement: $700-$2000.
- Faulty Compressor: If the compressor is failing, the entire AC unit might need replacing. AC unit replacement: $3,000 – $7,000.
- Drain Pan Damage: If the drain pain is cracked, it should be replaced to avoid leaks and moisture problems. Drain Pain Replacement $150-$500
Safety Warning
- Always turn off the power to the AC unit at the breaker before performing any maintenance.
- Be careful when working with water around electrical components. Avoid creating slip hazards.
- If you are uncomfortable working with electrical components, contact a qualified HVAC technician.
- Do not attempt to repair refrigerant leaks yourself. Refrigerant is a controlled substance and requires specialized handling.
Tools You May Need
- Screwdriver (Phillips and flathead)
- Wet/Dry Vacuum
- Garden Hose
- New Air Filter
- Flashlight
FAQ
Here are some common questions:
-
Q: Why is my AC dripping water inside my house?
A: This usually indicates a clogged drain line, causing the condensate to back up and overflow. -
Q: How often should I change my air filter?
A: Every 1-3 months, depending on usage and air quality. Check it monthly and replace it when dirty. -
Q: Is it normal for my AC to not drip water on a cool day?
A: Yes, it’s perfectly normal. Cooler temperatures mean less condensation. -
Q: Can I use bleach to clear a clogged drain line?
A: Yes, but use it sparingly. A cup of diluted bleach can help kill algae and clear minor clogs. Be sure to flush the line thoroughly afterward.
Conclusion
Troubleshooting your air conditioner when it’s not dripping water can often be done yourself. By following these steps, you can identify the problem and potentially save yourself a service call. Start with the easy fixes, like checking the filter and drain line. If the problem persists after trying these steps, it’s best to call a qualified HVAC technician. Remember, safety first!
Youtube Video:
Looking for more useful options?
Check out recommended resources that others find helpful.