Introduction
Discovering water pooling outside your Whirlpool refrigerator can be alarming and inconvenient. Not only is it a slipping hazard, but it can also lead to water damage to your floors and surrounding areas. The leak often occurs unexpectedly, leaving homeowners puzzled about its origin and how to resolve it. Addressing this issue promptly is essential to prevent further damage and maintain the efficient operation of your refrigerator.
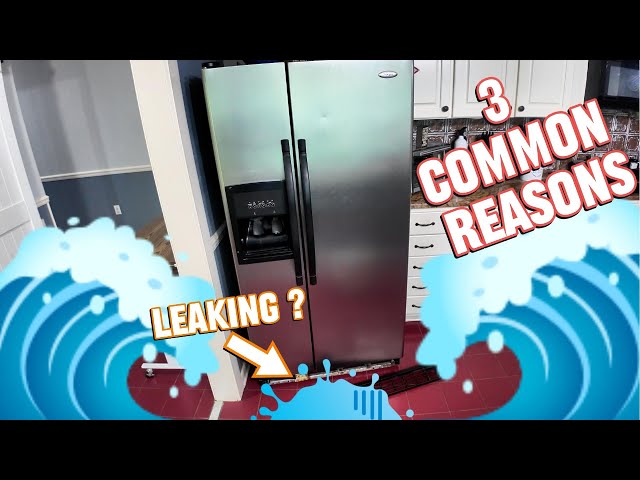
Common Causes of Whirlpool Refrigerator Leaking Water Outside
Here are some of the most frequent culprits behind water leakage from your Whirlpool refrigerator:
- Clogged Defrost Drain: This is the most common cause. The defrost drain carries melted frost from the freezer to a pan under the fridge, where it evaporates. If clogged, water overflows and leaks.
- Frozen Water Line: If your fridge has an ice maker or water dispenser, the water line can freeze, causing a blockage. When the ice melts, it can lead to a leak.
- Cracked or Loose Water Line: The water line itself can develop cracks or become loose at the connections, causing a constant drip.
- Full Drip Pan: The drip pan under the refrigerator, which collects water from the defrost drain, might be full and overflowing.
- Damaged Door Seals (Gaskets): Worn or damaged door seals allow warm air to enter the fridge, causing excessive condensation and water buildup.
- High Humidity: In particularly humid environments, the refrigerator may struggle to manage the moisture, leading to condensation and leaks.
- Tilted Refrigerator: If the refrigerator isn’t level, water may not drain properly into the drip pan and could overflow.
- Faulty Water Filter Housing: Cracks in the filter housing or improper filter installation can lead to water leaks, especially after a filter change.
Symptoms Checklist
Use this checklist to accurately identify your specific issue:
- Puddle of water on the floor in front of the refrigerator.
- Water dripping from underneath the refrigerator.
- Ice buildup in the freezer compartment.
- Water accumulating inside the refrigerator (usually at the bottom).
- Water dispenser or ice maker not working properly.
- Visible cracks or damage to water lines.
- Unusual noises (e.g., dripping or running water) coming from the refrigerator.
How to Fix Whirlpool Refrigerator Leaking Water Outside Step-by-Step Guide
- Unplug the Refrigerator: For your safety, always disconnect the refrigerator from the power outlet before troubleshooting.
- Locate the Defrost Drain: Open the freezer and look for a small hole, usually located at the back wall near the bottom.
- Clear the Defrost Drain: Use a long, flexible object like a pipe cleaner, a straightened coat hanger, or a turkey baster with warm water to flush out the drain. Be gentle to avoid damaging the drain. You might have to use a hairdryer to thaw it too.
- Check the Water Line (if applicable): If your refrigerator has a water dispenser or ice maker, carefully inspect the water line for any visible cracks, kinks, or loose connections.
- Tighten Connections: If you find any loose water line connections, carefully tighten them using a wrench. Be careful not to overtighten.
- Inspect the Door Seals: Examine the rubber door seals (gaskets) around the refrigerator and freezer doors for any signs of damage, such as tears, cracks, or mold.
- Clean the Door Seals: Clean the door seals with warm water and mild soap. Dry them thoroughly.
- Level the Refrigerator: Use a level to check if the refrigerator is sitting level. Adjust the leveling feet (usually located at the bottom front corners) until the refrigerator is level.
- Check the Drip Pan: Locate the drip pan (usually under the refrigerator at the back) and remove it. Empty any water and clean the pan thoroughly. Ensure it’s properly positioned when you put it back.
- Inspect Water Filter Housing: Check the water filter housing (if equipped) for cracks or leaks, especially after a filter change. Ensure the filter is correctly installed.
- Monitor the Refrigerator: Plug the refrigerator back in and monitor it for a few hours to see if the leak has stopped.
- Check for Condensation: Observe the inside of the refrigerator for excessive condensation. If present, try adjusting the temperature settings slightly higher (less cold).
- Ensure Proper Airflow: Avoid overpacking the refrigerator, as this can restrict airflow and lead to condensation.
Fix the Issue Without Buying Parts
Before resorting to buying new parts, try these free methods:
- Refrigerator Reset: Unplug the refrigerator for 30 minutes, then plug it back in. This can reset the internal controls and potentially resolve minor issues.
- Deep Cleaning: A thorough cleaning of the refrigerator’s interior can remove mold and debris that might be contributing to the problem.
- Temperature Adjustment: Adjusting the temperature settings to a slightly warmer setting can reduce condensation.
- Regular Inspection: Periodically inspect the defrost drain, door seals, and water lines to catch potential problems early.
- Proper Loading: Avoid blocking vents with food items, which can disrupt airflow and lead to condensation.
When Replacement Might Be Necessary
In some cases, replacement of parts may be required. Here are some common parts that might fail and their estimated cost ranges (USD):
- Defrost Heater: (If the drain freezes repeatedly) $50-$150
- Water Inlet Valve: (If the water dispenser or ice maker isn’t working after checking the lines) $40-$120
- Door Seals (Gaskets): (If visibly damaged and cleaning doesn’t help) $30-$100 per seal
- Water Filter Housing: (If cracked or leaking despite proper filter installation) $50-$150
If youre not comfortable replacing these yourself, it may be time to call a qualified appliance repair technician.
Safety Warning
- Always unplug the refrigerator before performing any maintenance or repairs.
- Be cautious when handling water, as it can create a slipping hazard. Wipe up any spills immediately.
- Avoid using sharp objects to clear the defrost drain, as you could damage the drain.
- If you are unsure about any step, consult a qualified appliance repair technician.
Tools You May Need
- Screwdrivers (Phillips and flathead)
- Wrench (for tightening water line connections)
- Pipe cleaner or straightened coat hanger
- Turkey baster
- Warm water
- Clean cloths or towels
- Level
FAQ
Q: Why is my Whirlpool refrigerator leaking water only sometimes?
A: Intermittent leaking often points to a partially clogged defrost drain. The drain works when partially frozen and fails when fully blocked. Clean it thoroughly.
Q: My fridge is leaking but the drip pan is empty. What’s going on?
A: This suggests the leak isn’t from the defrost system. Check the water line connections and door seals for other sources of leakage.
Q: How often should I clean my refrigerator’s defrost drain?
A: It’s a good practice to clean the defrost drain every 6 months, or more often if you notice ice buildup in the freezer.
Q: Can a faulty water filter cause a leak even if it’s new?
A: Yes, if the filter isn’t properly seated in the housing or the housing itself is cracked, a new filter can still leak.
Conclusion
Fixing a Whirlpool refrigerator leak can often be achieved with some basic troubleshooting steps. By systematically checking and addressing the common causes outlined in this guide, you can potentially resolve the issue yourself and avoid the cost of a service call. If you’ve tried these steps and the leak persists, it’s best to consult a qualified appliance repair technician for further assistance.
Youtube Video:
Looking for more useful options?
Check out recommended resources that others find helpful.