Introduction
Discovering water leaking from the bottom front of your Whirlpool refrigerator can be concerning. It signifies a problem within your fridge’s water system, and if left unattended, it can lead to water damage to your floors, mold growth, and increased utility bills. This guide will help you identify the cause of the leak and walk you through troubleshooting steps to resolve the issue yourself. It is important to address this problem quickly to prevent further damage.
Common Causes of Whirlpool Fridge Water Leaking Bottom Front
Here are several common reasons why your Whirlpool fridge might be leaking water:
- Clogged Defrost Drain: Ice can build up and melt, but if the drain is blocked, the water overflows.
- Frozen Water Line: If the water line freezes, it can crack or burst as it thaws, causing leaks.
- Faulty Water Inlet Valve: This valve controls the water flow to the icemaker and water dispenser. A faulty valve might leak.
- Loose or Damaged Water Lines: Cracks or loose connections in the water lines leading to the dispenser or icemaker can cause leaks.
- Damaged Water Filter Housing: Cracks or improper seating of the water filter housing can lead to water leaks.
- High Water Pressure: Water pressure that’s too high can stress the fridge’s components and cause leaks.
- Icemaker Issues: Cracks in the ice maker itself, or issues with the fill tube can cause water to leak.
- Door Seal Problems: A damaged or improperly sealed door can cause condensation, which drips down and collects at the bottom front.
Symptoms Checklist
Use this checklist to help identify the specific symptoms you’re experiencing:
- Puddle of water accumulating at the bottom front of the refrigerator.
- Visible ice buildup inside the refrigerator, particularly near the back panel.
- Water dripping from the dispenser (even when not in use).
- Reduced or no ice production.
- Visible cracks or damage to water lines or the filter housing.
- Unusual noises coming from the refrigerator.
How to Fix Whirlpool Fridge Water Leaking Bottom Front Step-by-Step Guide
Follow these steps to troubleshoot and resolve the water leak:
- Unplug the Refrigerator: For safety, always unplug your fridge before attempting any repairs.
- Locate the Water Source: Try to pinpoint where the water is coming from. Check the front, sides, and back of the fridge.
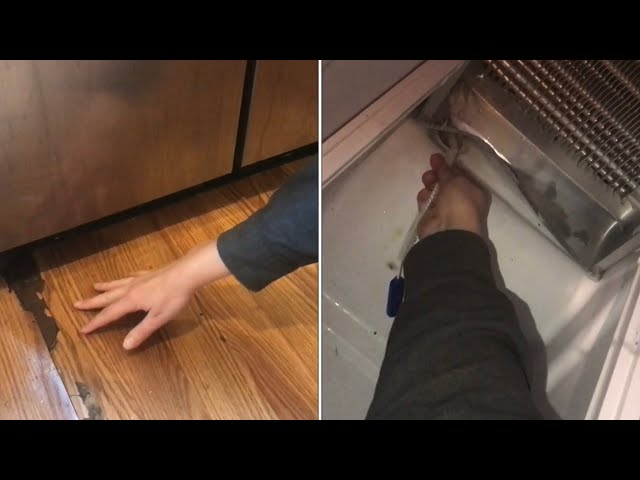
- Inspect the Defrost Drain: Locate the defrost drain (usually at the back of the freezer compartment, near the bottom).
- Clear the Defrost Drain: Use a turkey baster or a long, flexible object like a pipe cleaner or a thin piece of wire to clear any blockage in the drain. You can also pour warm (not hot) water down the drain to melt any ice.
- Check the Water Line Connections: Locate the water line connections at the back of the fridge. Make sure they are tight and not leaking. If a connection is loose, tighten it gently.
- Inspect the Water Lines for Damage: Examine the water lines for any visible cracks or kinks. If you find any damage, you might need to replace the line (although try the other fixes first).
- Check the Water Filter Housing: Remove the water filter and inspect the housing for cracks or damage. Make sure the filter is properly seated and tightened.
- Lower Water Pressure (if necessary): If you suspect high water pressure, you can install a water pressure regulator on the water line feeding your fridge.
- Inspect the Icemaker: Check the icemaker for any visible cracks or leaks. Also, check the fill tube for ice buildup or blockages.
- Clear Icemaker Fill Tube: Sometimes, the tube that fills the ice maker freezes over. Use a hair dryer on low setting to carefully melt the ice clog.
- Check the Door Seals: Inspect the door seals for damage or gaps. Clean the seals with warm, soapy water.
- Test the Refrigerator: Plug the refrigerator back in and observe for any leaks. Give it a few hours to run and monitor the bottom front for any accumulating water.
- Check the Drain Pan: Some refrigerators have a drain pan at the bottom. Pull it out to inspect for overflow or damage. Clean the pan to eliminate odors.
Fix the Issue Without Buying Parts
Here are some things you can try that don’t require new parts:
- Reset the Refrigerator: Unplug the refrigerator for 5-10 minutes, then plug it back in. This can reset some internal systems and potentially resolve minor issues.
- Clean the Condenser Coils: Dirty condenser coils can cause the refrigerator to work harder, leading to condensation. Clean them with a vacuum cleaner brush attachment. They are usually located at the back or bottom of the fridge.
- Check the Refrigerator’s Level: Ensure that the refrigerator is level. If it’s tilted forward, water may pool at the front.
- Adjust Refrigerator Temperature: Double check that the fridge and freezer temperatures are set properly. Too cold settings can cause excessive ice build up.
- Regular Maintenance: Clean the refrigerator regularly, including the interior, door seals, and condenser coils.
When Replacement Might Be Necessary
If you’ve tried all the troubleshooting steps and the leak persists, you might need to consider replacing a part. Here are some possibilities and estimated costs:
- Water Inlet Valve: $30 – $70
- Water Filter Housing: $20 – $50
- Water Lines: $10 – $30 (per line)
- Icemaker Assembly: $80 – $200
If the cost of multiple repairs becomes too high, consider whether replacing the entire refrigerator might be a more cost-effective solution.
Safety Warning
- Always unplug the refrigerator before performing any repairs.
- Be careful when working with water and electricity.
- Avoid getting water on electrical components.
- If you’re not comfortable performing the repairs yourself, contact a qualified appliance repair technician.
- Be careful when moving the refrigerator, as it can be heavy.
- Clean up any water spills immediately to prevent slips and falls.
Tools You May Need
- Screwdrivers (Phillips and flathead)
- Pliers
- Adjustable wrench
- Turkey baster or pipe cleaner
- Vacuum cleaner with brush attachment
- Warm water
- Towels
FAQ
- Why is my fridge leaking even though I just replaced the water filter? Make sure the water filter is the correct type for your fridge and that it’s properly installed and seated.
- How often should I clean the defrost drain? Ideally, clean it every 6 months or whenever you notice ice buildup in the freezer.
- Can high water pressure cause my fridge to leak? Yes, high water pressure can stress the components and cause leaks. Consider installing a pressure regulator.
- What if I can’t find the defrost drain? Consult your refrigerator’s owner’s manual or search online for your specific model to locate the defrost drain.
Conclusion
Troubleshooting a water leak in your Whirlpool refrigerator can seem daunting, but by following these steps, you can often identify and resolve the issue yourself. Remember to always prioritize safety and start with the simplest solutions first. If you’ve tried everything and the leak persists, don’t hesitate to call a qualified appliance repair technician for professional assistance. Addressing the problem quickly will help you avoid further damage and keep your refrigerator running smoothly.
Youtube Video:
Looking for more useful options?
Check out recommended resources that others find helpful.