
Introduction
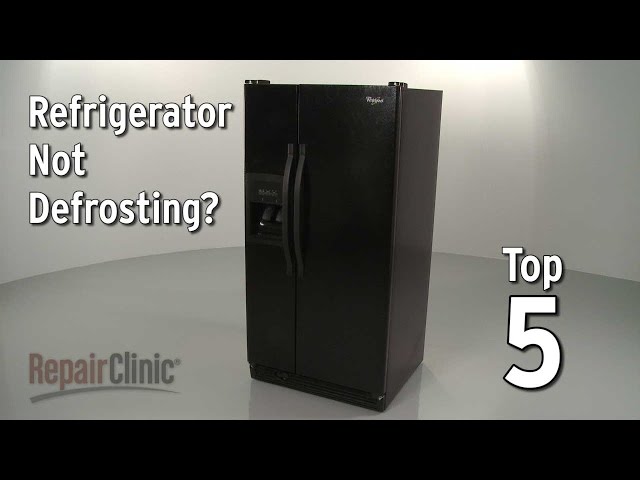
If you’ve noticed ice building up inside your Whirlpool refrigerator, especially on the back wall of the freezer compartment, you’re likely experiencing a defrosting problem. This means the refrigerator isn’t automatically melting away the frost as it should. This is important because excessive ice buildup can reduce the efficiency of your refrigerator, causing it to work harder, waste energy, and ultimately lead to food spoilage. Addressing this promptly can save you money and prevent bigger issues down the road. Explore more in our Refrigerator Problems 4 collection.
💡 Technical Key Takeaways:
- Core Focus: Diagnostic schematic and terminal connection layout for My Whirlpool Refrigerator Is Not Defrosting.
- Target Scope: Field technicians, automotive DIYers, and residential/commercial electricians.
- Safety Rule: Always disconnect the primary power source/battery terminal and verify zero voltage with a multimeter before touching wires.
Common Causes of My Whirlpool Refrigerator is Not Defrosting
Several things can prevent your Whirlpool refrigerator from defrosting correctly:
- Defrost Timer Malfunction: The timer controls the defrost cycle. If it’s faulty, the cycle might not initiate.
- Defrost Heater Failure: The heater melts the frost. If it burns out, ice will accumulate.
- Defrost Thermostat Issues: This thermostat monitors the temperature of the evaporator coils. If it fails, the heater won’t turn on.
- Faulty Defrost Sensor: Some newer refrigerators use a sensor instead of a thermostat. If the sensor is not working properly it cannot sense the temperature of the coil.
- Blocked Defrost Drain: Melted frost drains through a tube. If this tube is clogged, water can freeze and cause further problems.
- Damaged Door Seal: A worn-out door seal allows warm, moist air to enter, leading to excessive frost.
- Faulty Temperature Sensor: If the temperature sensor fails to read accurately, it can affect the defrost cycle.
- Electronic Control Board Failure: The electronic control board controls the entire defrost process. If it’s not working correctly, it can affect the defrost cycle.
- Overloaded Freezer: Too many items crammed into the freezer can restrict airflow and contribute to ice buildup.
Symptoms Checklist
Check for these signs to confirm a defrosting problem:
- Excessive ice buildup on the back wall of the freezer.
- Water pooling at the bottom of the refrigerator.
- Food spoiling faster than usual.
- The refrigerator running constantly.
- Unusual noises coming from the refrigerator.
- The freezer feels warmer than normal.
How to Fix My Whirlpool Refrigerator is Not Defrosting Step-by-Step Guide
Safety First: Unplug your refrigerator before starting any troubleshooting.
- Unplug the Refrigerator: This is crucial for your safety.
- Empty the Freezer: Remove all food items and store them in a cooler to prevent spoilage.
- Locate the Evaporator Coils: These are usually behind a panel in the back of the freezer.
- Remove the Back Panel: Use a screwdriver to carefully remove the panel.
- Inspect the Evaporator Coils: Look for heavy ice buildup.
- Manually Defrost the Coils: If there’s excessive ice, use a hairdryer (on a low setting, and keep it moving!) to melt the ice. Be careful not to damage any components. You can also use a steamer.
- Check the Defrost Heater: It’s usually at the bottom of the coils. Look for any signs of damage or burn marks.
- Check the Defrost Thermostat: It’s a small, round or rectangular component attached to the coils.
- Check the Defrost Sensor: Some models utilize this instead of a thermostat. It is located behind the evaporator panel as well.
- Clear the Defrost Drain: Locate the drain hole at the bottom of the freezer. Use a turkey baster or a long, flexible object (like a pipe cleaner) to clear any clogs. You can also pour warm water down the drain to help melt the ice clog.
- Inspect the Door Seal: Check the rubber seal around the refrigerator and freezer doors for any cracks, tears, or gaps.
- Reassemble the Refrigerator: Once everything is inspected and cleared, reassemble the back panel.
- Plug the Refrigerator Back In: Let it run for several hours and monitor its performance.
Fix the Issue Without Buying Parts
Here are some things you can try before buying replacement parts:
- Refrigerator Reset: Unplug your refrigerator for 30 minutes to reset the system. This can sometimes resolve minor electronic glitches.
- Door Seal Cleaning: Clean the door seals with warm, soapy water to ensure a tight seal.
- Defrost Drain Maintenance: Periodically pour a cup of warm water down the defrost drain to prevent clogs.
- Airflow Check: Ensure that food items are not blocking the vents inside the refrigerator and freezer, as this can restrict airflow and affect temperature regulation.
- Temperature Settings: Verify that the temperature settings are correct. Extreme settings can cause extra ice to form.
When Replacement Might Be Necessary
If you’ve tried all the troubleshooting steps and your refrigerator still isn’t defrosting, a replacement part might be needed. Common parts that fail include the defrost heater (estimated cost: $30-$70), the defrost thermostat ($15-$40), or the defrost timer ($20-$50). A faulty electronic control board could also be the culprit, costing from $100-300. While possible to replace these components yourself, consider consulting a qualified appliance repair technician, especially if you’re not comfortable working with electrical components. Repair cost can range from $100-$500+ based on the part and labor.
Safety Warning
- Always unplug the refrigerator before performing any repairs.
- Avoid using sharp objects to remove ice, as this could damage the evaporator coils.
- Be careful when using a hairdryer or steamer to melt ice. Keep the devices moving and avoid prolonged exposure to any one area.
- If you’re not comfortable working with electrical components, consult a qualified appliance repair technician.
- Make sure your floor is dry to prevent electrical shock.
Tools You May Need
- Screwdriver (Phillips and flathead)
- Hairdryer or steamer
- Turkey baster or pipe cleaner
- Multimeter (for testing electrical components optional)
- Gloves
FAQ
Q: How often should my Whirlpool refrigerator defrost?
A: Most Whirlpool refrigerators are designed to defrost automatically every 6 to 12 hours.
Q: How do I know if my defrost heater is working?
A: You can test the defrost heater using a multimeter to check for continuity. If there’s no continuity, the heater is likely faulty. Discover more free resources across our collection library.
Q: What happens if the defrost drain is clogged?
A: A clogged defrost drain can cause water to overflow and freeze at the bottom of the refrigerator, leading to ice buildup.
Q: Can a dirty condenser coil affect the defrost cycle?
A: Yes, dirty condenser coils can reduce the refrigerator’s efficiency and indirectly affect the defrost cycle. Clean the coils regularly.
Conclusion
Troubleshooting a defrosting problem in your Whirlpool refrigerator can seem daunting, but by following these steps, you can often resolve the issue yourself. Remember to prioritize safety and proceed carefully. If you’ve exhausted these options and the problem persists, don’t hesitate to call a qualified appliance repair technician. Taking a proactive approach can save you money and extend the life of your refrigerator!
Youtube Video:
Quick Wiring Specifications & Terminal Guide
| Component / Circuit | Standard Wire Gauge | Recommended Protection |
|---|---|---|
| Control & Trigger Signals | 18 – 20 AWG | 5A – 7.5A Inline Fuse |
| Standard Auxiliary Load | 14 – 16 AWG | 15A – 20A Circuit Breaker |
| Main Power Feed / Supply | 10 – 12 AWG | 30A – 40A Heavy-Duty Relay |
