Introduction
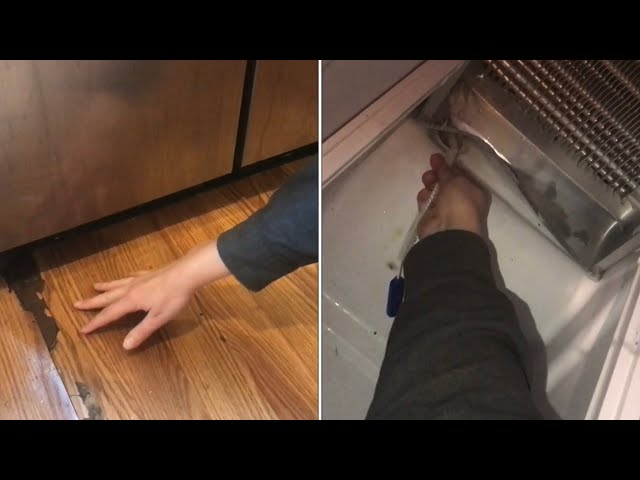
Finding water on the floor near your KitchenAid refrigerator can be a frustrating surprise. Not only is it a nuisance, but it can also lead to slippery floors and potential water damage to your home. This problem usually stems from issues with the water supply, drainage, or internal components. Identifying the source quickly is important to prevent further damage and potential mold growth. Let’s get to the bottom of this and get your KitchenAid fridge back to normal!
Common Causes of kitchenaid refrigerator water on floor
Here are some of the most common reasons why you might find water leaking from your KitchenAid refrigerator:
- Clogged Defrost Drain: Ice buildup can block the drain, causing water to overflow and leak.
- Frozen Water Line: If the water line freezes, it can burst, leading to a significant leak.
- Loose Water Line Connections: Connections to the refrigerator or water filter may loosen over time.
- Faulty Water Filter Housing: Cracks or leaks in the water filter housing can cause water to drip.
- Damaged Water Filter: An old or incorrect filter can fail, allowing water to leak.
- Cracked Water Tank: Some refrigerators have a small tank that can crack with age or temperature changes.
- Leaky Ice Maker: Problems with the ice maker’s water supply can result in leaks.
- Door Seal Issues: A damaged or dirty door seal can let warm air in, causing excessive condensation.
- High Humidity: External humidity can cause condensation on the refrigerator’s exterior.
Symptoms Checklist
Use this checklist to help pinpoint the problem:
- Water pooling at the base of the refrigerator (front or back).
- Ice buildup in the freezer.
- Reduced or no water flow from the water dispenser.
- Unusual noises from the refrigerator (dripping, hissing).
- Visible leaks from the water filter area.
- Dampness or condensation inside the refrigerator.
- Ice maker not producing ice, or producing less than usual.
How to Fix kitchenaid refrigerator water on floor Step-by-Step Guide
Follow these steps to troubleshoot and fix the leak:
- Safety First: Unplug the refrigerator from the power outlet before starting any work.
- Locate the Water Source: Carefully inspect around the refrigerator, looking for the origin of the leak. Is it near the front, back, or sides?
- Check the Defrost Drain: Locate the defrost drain, typically a small hole at the back of the freezer compartment near the bottom.
- Clear the Defrost Drain: Use a turkey baster or a long, flexible object (like a pipe cleaner or thin wire) to clear any blockages in the drain. Warm water can also help melt ice.
- Inspect the Water Line: Examine the water line running to the refrigerator for any kinks, cracks, or leaks. Pay close attention to connections.
- Tighten Water Line Connections: If you find loose connections, carefully tighten them with a wrench. Be careful not to overtighten.
- Check the Water Filter Housing: Locate the water filter housing (usually inside the refrigerator or in the base grille). Look for cracks or leaks.
- Inspect the Water Filter: Make sure the water filter is properly installed and is the correct type for your KitchenAid refrigerator. Replace it if it’s old or damaged.
- Examine the Door Seal: Check the rubber gasket around the refrigerator door for any damage or debris. Clean it with a damp cloth.
- Adjust Refrigerator Level: Ensure the refrigerator is level. Use a level to check and adjust the feet if needed. A slightly tilted fridge can cause water issues.
- Thaw Frozen Water Lines: If you suspect a frozen water line, unplug the refrigerator and let it thaw for several hours. You can also use a hairdryer on a low setting to gently warm the line (avoid direct heat).
- Clean Condenser Coils: Dirty condenser coils can cause the refrigerator to work harder and create more condensation. Clean them with a vacuum cleaner brush attachment. These are usually located at the back of the unit.
- Observe and Monitor: After completing these steps, plug the refrigerator back in and monitor it for a few days to see if the leak has stopped.
Fix the Issue Without Buying Parts
Many leaks can be resolved without spending money:
- Reset the Refrigerator: Unplug the refrigerator for 5-10 minutes and then plug it back in. This can sometimes reset internal systems and resolve minor issues.
- Regular Cleaning: Clean the interior of your refrigerator regularly, including shelves and drawers, to prevent food buildup that can contribute to drain clogs.
- Check Door Seal Cleanliness: A dirty door seal doesn’t seal. Clean with a damp cloth.
- Ensure Proper Ventilation: Make sure the refrigerator has adequate space around it for proper ventilation (usually a few inches on all sides).
When Replacement Might Be Necessary
If the leak persists after trying the above steps, a part might need replacing. Common culprits include:
- Water Filter Housing: $50 – $150 USD
- Water Inlet Valve: $40 – $100 USD
- Defrost Heater: $30 – $80 USD (rarely the direct cause of water on the floor but contributes to ice buildup)
Consider consulting with a qualified appliance repair technician to diagnose and replace the faulty part.
Safety Warning
- Always unplug the refrigerator before performing any maintenance or repairs.
- Be careful when working with water and electricity. Avoid getting water on electrical components.
- Wipe up any spills immediately to prevent slips and falls.
- If you are uncomfortable performing any of these steps, consult a qualified appliance repair technician.
Tools You May Need
- Screwdrivers (Phillips and flathead)
- Wrench (for tightening water line connections)
- Turkey baster or flexible wire (for clearing defrost drain)
- Vacuum cleaner with brush attachment
- Level
- Towels or rags
FAQ
Here are some frequently asked questions about refrigerator leaks:
- Why is my refrigerator leaking even after I replaced the water filter? It could be a faulty water filter housing or loose connections. Double-check the housing for cracks and ensure the connections are tight.
- How often should I replace my water filter? Typically every 6 months, or as recommended by the refrigerator manufacturer.
- What if I can’t find the defrost drain? Consult your refrigerator’s user manual for the exact location. If you still can’t find it, a technician can help.
- Is it safe to drink water from a leaking refrigerator? It’s best to avoid drinking the water until the leak is resolved, as it may be contaminated.
Conclusion
Finding water on your kitchen floor from your KitchenAid refrigerator can be alarming, but with a systematic approach, you can often diagnose and fix the problem yourself. Start with the simple solutions like cleaning the defrost drain and checking water line connections. If the issue persists, don’t hesitate to call a qualified appliance repair technician. Remember, tackling the problem early can prevent more serious and costly repairs down the road. Good luck!
Youtube Video:
Looking for more useful options?
Check out recommended resources that others find helpful.