How To Clean Carrier Air Conditioner: Easy Tips For Efficient Maintenance
To clean your Carrier air conditioner, follow these steps: 1. Turn off the power: Disconnect the power supply to avoid any accidents. 2. Remove the filters: Take out the filters and clean or replace them if necessary. 3. Clean the exterior: Use a damp cloth to wipe down the exterior surfaces of the unit. 4. Clean the coils: Gently brush the coils to remove any dirt or debris. Avoid using excessive force. 5. Clear the drain line: Use a vacuum or a pipe cleaner to clear any clogs in the drain line. 6. Clean the condenser fins: Carefully clean the fins using a fin comb or a soft brush. 7. Reassemble and test: Put everything back together and turn on the unit to ensure it’s working properly. Remember to consult the specific instructions in your Carrier air conditioner’s manual for any manufacturer recommendations.
In the heat of summer, there’s nothing quite like the cool relief of a well-functioning air conditioner. But did you know that neglecting one crucial aspect of your Carrier air conditioner’s maintenance could be costing you more than just comfort? You see, when it comes to maximizing performance and longevity, regular cleaning is key.
Neglecting to clean your Carrier air conditioner can lead to reduced cooling efficiency, higher energy bills, and even potential damage if left unattended. As a homeowner or renter, taking the time to clean your Carrier air conditioner is a small yet impactful investment in its overall performance and your pocketbook.
By removing dirt, dust, and debris that accumulate over time, you can help ensure that your air conditioner operates at its peak efficiency, keeping your home comfortably cool while minimizing energy consumption. But where do you start? Fear not, for we have you covered. In this article, we will guide you through the step-by-step process of cleaning your Carrier air conditioner, from the basic tools you’ll need to the specific areas you should focus on.
Whether you’re a seasoned DIY enthusiast or new to home maintenance, our comprehensive guide will empower you to tackle this essential task with confidence. So, if you’re ready to unlock the full potential of your Carrier air conditioner, join us as we dive into the world of cleaning and discover how this seemingly simple task can make all the difference in maintaining optimal performance, energy efficiency, and cost savings.
Why Cleaning Your Carrier Air Conditioner is Important
Regularly cleaning your Carrier air conditioner is vital for several reasons. Let’s delve into why this maintenance task is so crucial:
The Benefits of Cleaning Your Carrier Air Conditioner
1. Improved Cooling Efficiency
Over time, dirt, dust, and debris can accumulate on your Carrier air conditioner’s components, such as the condenser coils and air filters. This buildup restricts airflow and hampers the cooling process, leading to reduced cooling efficiency. By regularly cleaning these components, you can remove the obstructions and allow the air conditioner to operate at its optimal capacity, ensuring your home stays comfortably cool even on the hottest days.
2. Lower Energy Bills
When your Carrier air conditioner is impeded by dirt and debris, it has to work harder to cool your home. This extra strain on the system leads to increased energy consumption, which, in turn, results in higher energy bills. By cleaning your air conditioner regularly, you can maintain its efficiency, allowing it to cool your home effectively without consuming excessive energy and driving up your monthly electricity expenses.
3. Extended Lifespan
A well-maintained Carrier air conditioner typically has a longer lifespan than one that is neglected. Regular cleaning removes the buildup of dirt and debris that can cause the system to overheat or put excessive strain on its components. By preventing these issues, you can extend the lifespan of your air conditioner, saving you money on costly repairs or premature replacement.
4. Enhanced Air Quality
Clean air filters and coils are essential for maintaining good indoor air quality. When your Carrier air conditioner is dirty, it circulates pollutants, allergens, and other airborne particles throughout your home, potentially exacerbating respiratory conditions and allergies. By regularly cleaning your air conditioner, you can ensure that the air circulating in your home is clean and free from contaminants, promoting a healthier living environment for you and your family.
Tools and Materials You Will Need
Before you dive into cleaning your Carrier air conditioner, gather the following tools and materials:
- Protective gloves
- Face mask
- Screwdriver
- Soft brush or vacuum cleaner with a brush attachment
- Diluted mild detergent
- Water sprayer or hose
- Clean cloth or microfiber towel
- Fin comb
- Coil cleaner
- Condensate pump
Step-by-Step Guide to Cleaning Your Carrier Air Conditioner
Now that you have your tools and materials ready, let’s walk through the step-by-step process of cleaning your Carrier air conditioner:
Step 1: Turn Off the Power
Before beginning any work on your air conditioner, it’s essential to turn off the power to ensure your safety. Locate the circuit breaker or switch that controls the air conditioner’s power supply and switch it off.
Step 2: Remove the Air Filters
The air filters in your Carrier air conditioner play a crucial role in filtering out dust and other particles from the air. Start by locating the air filter compartment, which is usually positioned near the return air grille. Carefully remove the filters and set them aside.
Step 3: Clean the Air Filters
Using a soft brush or a vacuum cleaner with a brush attachment, gently remove the dust and debris from the air filters. If the filters are heavily soiled, you can wash them with a diluted mild detergent and rinse them thoroughly. Allow the filters to dry completely before reinstalling them.
Step 4: Clean the Condenser Coils
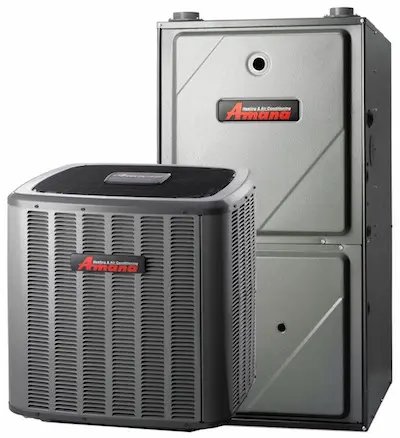
The condenser coils, located in the outdoor unit of your Carrier air conditioner, are responsible for releasing heat absorbed from your home. Over time, these coils can become clogged with dirt and debris, hindering their ability to function efficiently. To clean the condenser coils:
- Use a fin comb to straighten any bent fins on the coils.
- With a coil cleaner, spray the coils thoroughly to remove dirt and grime.
- Allow the cleaner to penetrate for the recommended time.
- Rinse the coils with a water sprayer or hose.
- Wait for the coils to dry completely before proceeding.
Step 5: Clean the Fan Blades
The fan blades inside the condenser unit can accumulate dirt and debris, affecting their performance. To clean the fan blades:
- Use a screwdriver to remove the top cover of the condenser unit.
- Gently wipe down the fan blades with a clean cloth or microfiber towel.
- Ensure that the blades are free from any obstructions.
Step 6: Check and Clean the Condensate Drain
The condensate drain is responsible for eliminating the moisture that accumulates during the cooling process. Over time, this drain can become clogged with algae, mold, or debris, leading to water leakage or even system damage. To check and clean the condensate drain:
- Locate the condensate drain pipe, usually positioned near the indoor unit.
- Use a diluted mild detergent to clean the drain pipe.
- Ensure that the drain pipe is free from any blockages.
- If the condensate drain has a pump, make sure it is functioning correctly.
Step 7: Reinstall the Air Filters
Once all the components are clean and dry, reinsert the air filters into their original position. Ensure that they are securely in place and that there are no gaps or misalignments.
Step 8: Restore Power and Test the Air Conditioner
After completing the cleaning process, restore power to your Carrier air conditioner by turning on the circuit breaker or switch. Set your thermostat to the desired temperature and allow the air conditioner to run for a few minutes. Check for any unusual sounds or odors and observe whether the cooling performance has improved.
Regularly cleaning your Carrier air conditioner is an essential maintenance task that offers numerous benefits. By improving cooling efficiency, reducing energy bills, extending the lifespan of your air conditioner, and enhancing indoor air quality, cleaning ensures that your system operates optimally and provides you with the comfort you deserve.
Follow the step-by-step guide outlined in this article to clean your Carrier air conditioner effectively. Remember to prioritize your safety by turning off the power before starting any work and using protective equipment such as gloves and a face mask.
By dedicating a small amount of time to clean your air conditioner regularly, you can enjoy a cool and comfortable home while saving money on energy bills and avoiding costly repairs or replacements. So, roll up your sleeves, gather your tools, and give your Carrier air conditioner the cleaning it deserves.
HVAC Technician | Carrier | Air conditioner | HVACWork
How often should I clean my carrier air conditioner?
What tools do I need to clean my carrier air conditioner?
Can I clean the filters of my carrier air conditioner?
Should I clean the coils of my carrier air conditioner?
Is it safe to clean my carrier air conditioner myself?
Final Thoughts: Importance of Cleaning Your Carrier Air Conditioner
In conclusion, cleaning your Carrier air conditioner is crucial for maintaining its efficiency and prolonging its lifespan. By removing dirt and debris from the condenser coils and air filters, you can improve cooling efficiency, lower energy bills, and enhance indoor air quality.
Regular cleaning also prevents overheating and excessive strain on the system, reducing the likelihood of costly repairs or replacements. To clean your Carrier air conditioner effectively, follow the step-by-step guide provided in this article.
Remember to turn off the power before starting any work and use protective equipment such as gloves and a face mask. Gather the necessary tools and materials, including a screwdriver, soft brush or vacuum cleaner with a brush attachment, diluted mild detergent, water sprayer or hose, fin comb, coil cleaner, and condensate pump. Once you have completed the cleaning process, reinsert the air filters securely and restore power to your air conditioner.
Test the system by setting the thermostat to the desired temperature and observing its performance. By dedicating a small amount of time to regularly clean your Carrier air conditioner, you can enjoy a comfortable and cool home while saving money on energy bills. Additionally, you will promote a healthier living environment by ensuring clean and contaminant-free air circulation.
