Introduction
A refrigerator’s ice maker is a convenience many of us rely on daily. When your GE double door refrigerator’s ice maker stops working, it can be frustrating, especially during hot weather or when you’re entertaining guests. Addressing this issue promptly is important to avoid food spoilage due to increased refrigerator temperature if the problem stems from something bigger, and to get your ice supply back on track quickly. This guide offers simple steps to diagnose and potentially fix the problem yourself.
Common Causes of GE Double Door Refrigerator Ice Maker Not Working
Here are some typical reasons why your GE ice maker might not be producing ice:
- Ice Maker is Turned Off: It sounds simple, but accidentally turning off the ice maker is a common mistake.
- Water Supply Issues: A kinked or frozen water line restricts water flow to the ice maker.
- Water Filter Clogged: A dirty water filter reduces water pressure, hindering ice production.
- Freezer Temperature Too High: If the freezer isn’t cold enough (ideally around 0-5F or -18 to -15C), the ice maker won’t function properly.
- Ice Jam: Ice clumps can block the ice maker’s ejection mechanism.
- Faulty Water Inlet Valve: This valve controls the flow of water to the ice maker; a malfunction prevents ice production.
- Defective Ice Maker Module: This component controls the ice-making cycle; failure can halt ice production.
- Frozen Ice Maker Fill Tube: The tube that delivers water to the ice maker can freeze, preventing water flow.
Symptoms Checklist
Use this checklist to pinpoint the issue:
- No ice production at all.
- Ice maker is producing small or misshapen ice cubes.
- Ice maker is making a buzzing or humming noise, but no ice is produced.
- Water is leaking from the ice maker area.
- Ice dispenser is not working, even though ice is present.
- The ice maker arm (if applicable) is stuck in the “up” or “off” position.
How to Fix GE Double Door Refrigerator Ice Maker Not Working Step-by-Step Guide
Follow these steps to troubleshoot your ice maker:
- Check the Power: Ensure the refrigerator is plugged in and receiving power. Check the breaker if necessary.
- Verify the Ice Maker is On: Most GE refrigerators have a switch or setting to turn the ice maker on or off. Make sure it’s switched to the “on” position. It’s usually a wire arm that you lower to enable the ice maker.
- Check the Freezer Temperature: Use a thermometer to verify the freezer temperature is between 0-5F (-18 to -15C). Adjust the temperature setting if needed. Allow several hours for the temperature to stabilize.
- Inspect the Water Line: Locate the water line behind the refrigerator. Ensure it’s not kinked or bent. Straighten any kinks to allow for proper water flow.
- Check the Water Filter: Locate the water filter (usually inside the refrigerator or in the base grille). Replace it if it’s been longer than six months, or if the water pressure seems low. Refer to your refrigerator’s manual for the correct filter type and replacement instructions.
- Listen for the Water Valve: After replacing the filter, listen for the water valve to open and fill the ice maker when it cycles. If you don’t hear it, the valve may be faulty.
- Check for Ice Jams: Open the ice maker compartment and inspect for any ice blockages. Remove any ice clumps manually. A plastic utensil is useful to avoid damaging the ice maker.
- Try a Reset: Some GE refrigerators have a reset button on the ice maker module. Press and hold it for a few seconds to reset the ice maker. Refer to your owner’s manual for the location of the reset button.
- Check the Ice Maker Fill Tube: Locate the fill tube that dispenses water into the ice maker tray. If it’s frozen, use a hairdryer on a low setting to gently thaw the ice. Do not use excessive heat!
- Manually Cycle the Ice Maker: Some models allow you to manually cycle the ice maker. This can help dislodge stuck ice or confirm if the motor is functioning. Consult your owner’s manual for instructions on manually cycling the ice maker.
- Inspect the Ice Level Sensor: This sensor tells the ice maker when to stop producing ice. If it’s blocked or malfunctioning, the ice maker may overfill or not produce ice at all.
- Defrost the Freezer (If Necessary): If you suspect a frozen water line or fill tube, unplug the refrigerator and allow the freezer to defrost completely for 24 hours. This will melt any ice obstructions.
- Clean the Ice Maker: Periodically clean the ice maker with a solution of baking soda and water to prevent mold and bacteria growth.
Fix the Issue Without Buying Parts
Many ice maker problems can be resolved without replacing any parts:
- Resetting the ice maker is often the first and easiest solution.
- Cleaning the ice maker and water lines can remove blockages and improve performance.
- Ensuring the freezer temperature is correct is crucial for proper ice production.
- Inspecting the water line for kinks and the fill tube for ice buildup are simple visual checks.
- Regularly replacing the water filter prevents future problems.
When Replacement Might Be Necessary
If troubleshooting steps fail, a part replacement might be needed:
- Water Inlet Valve: If the valve doesn’t open when the ice maker cycles, it may need replacement. (Estimated cost: $30-$70 USD)
- Ice Maker Module: If the module is faulty, the ice maker won’t cycle properly. (Estimated cost: $80-$150 USD)
- Ice Maker Assembly: Complete ice maker assemblies can be replaced if multiple components are failing. (Estimated cost: $150-$300 USD)
These are just estimates and prices can vary depending on the model and vendor.
Safety Warning
- Always unplug the refrigerator before performing any repairs.
- Avoid working with wet floors to prevent electric shock.
- Be careful when handling sharp objects or tools.
- If you’re uncomfortable with any repair, consult a qualified appliance technician.
Tools You May Need
- Screwdrivers (Phillips and flathead)
- Pliers
- Adjustable wrench
- Thermometer
- Clean cloth or sponge
- Hairdryer (optional)
FAQ
Here are some frequently asked questions:
-
Q: My ice maker makes ice, but it’s small and hollow. Why?
A: This is usually due to low water pressure or a partially clogged water filter. Replace the filter and check the water line. -
Q: How often should I replace my refrigerator’s water filter?
A: GE recommends replacing the water filter every six months. -
Q: My ice maker is overflowing with ice. What’s wrong?
A: This could be a faulty water inlet valve or a malfunctioning ice level sensor. -
Q: Can I use a generic water filter instead of a GE brand?
A: While generic filters can be cheaper, it’s generally recommended to use a GE-approved filter to ensure proper fit and performance.
Conclusion
Don’t let a non-working ice maker ruin your day! By following these troubleshooting steps, you can often resolve the issue yourself and save money on repair costs. If you’ve tried everything and your ice maker is still not working, it might be time to call a qualified appliance technician. But always try the DIY approach first!
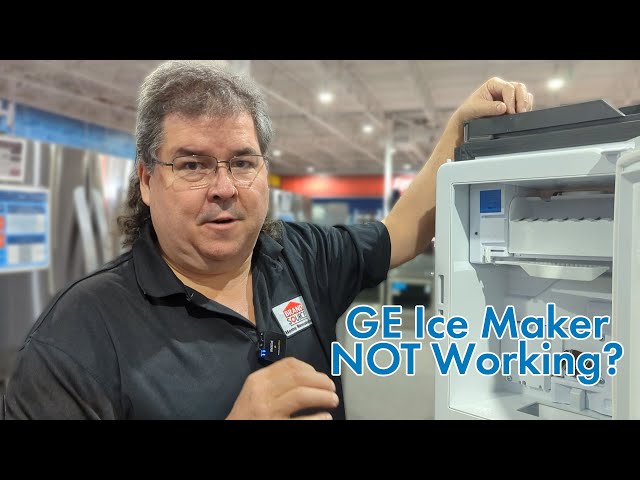
Youtube Video:
Looking for more useful options?
Check out recommended resources that others find helpful.