
Introduction
Is your AC stubbornly refusing to cooperate with your Nest thermostat? You’re not alone! This is a common issue that can be frustrating, especially on a hot day. A Nest thermostat is designed to seamlessly control your home’s temperature, but sometimes things don’t go as planned. Whether your AC simply isn’t turning on, isn’t cooling properly, or is turning on and off repeatedly, it’s essential to address the problem quickly to restore your comfort and prevent potential damage to your HVAC system. Let’s get your cooling back on track!
💡 Technical Key Takeaways:
- Core Focus: Diagnostic schematic and terminal connection layout for Ac Not Working With Nest Thermostat.
- Target Scope: Field technicians, automotive DIYers, and residential/commercial electricians.
- Safety Rule: Always disconnect the primary power source/battery terminal and verify zero voltage with a multimeter before touching wires.
Common Causes of AC Not Working with Nest Thermostat
Several factors can cause your AC to ignore your Nest thermostat. Here are some of the most common:. For more related activities, check out our Ac Outside Compressor Not Turning On.
- Incorrect Wiring: The wires connecting your Nest to your HVAC system might be loose, improperly connected, or in the wrong terminals.
- Nest Compatibility Issues: Although Nest thermostats are widely compatible, older or less common HVAC systems might present challenges.
- Power Problems: Your Nest thermostat needs sufficient power to operate correctly. A weak battery or insufficient voltage from the HVAC system can cause problems.
- Faulty Nest Thermostat: Though rare, the thermostat itself could be malfunctioning.
- HVAC System Problems: The AC unit itself could have issues, such as a tripped breaker, a clogged air filter, or a refrigerant leak.
- Software Glitches: Like any electronic device, your Nest thermostat can experience software glitches that interfere with its operation.
- Incorrect Nest Settings: The thermostat might be set to “heat” instead of “cool,” or the target temperature might be set too high.
- Blown Fuse: A blown fuse either in the Nest thermostat itself or in your HVAC system can interrupt the signal.
- Clogged Condensate Drain: A clogged condensate drain line in your AC unit can trigger a safety shut-off, preventing the AC from turning on.
Symptoms Checklist
Use this checklist to help pinpoint the issue:
- The Nest thermostat screen is blank or unresponsive.
- The Nest thermostat shows an error message (e.g., “no power,” “delayed”).
- The Nest thermostat is set to “cool,” but the AC unit isn’t turning on.
- The AC unit turns on but doesn’t blow cold air.
- The AC unit cycles on and off frequently (short cycling).
- The Nest thermostat says the AC is running, but you don’t hear the outdoor unit.
- You notice ice forming on the AC unit’s coils.
- You recently installed the Nest thermostat, and the AC hasn’t worked since.
How to Fix AC Not Working with Nest Thermostat Step-by-Step Guide
- Check the Power: Ensure your Nest thermostat is getting power. If the screen is blank, charge it using a USB cable (usually micro-USB or USB-C). Let it charge for at least 30 minutes.
- Restart Your Nest: A simple restart can resolve software glitches. Go to Settings > Restart and select “Restart.”
- Verify the Wiring: Carefully inspect the wires connected to the Nest thermostat base. Make sure they are securely inserted into the correct terminals. Consult your Nest installation guide or the Nest app for wiring diagrams.
- Confirm Cooling Mode and Temperature: Double-check that the thermostat is set to “Cool” mode and that the target temperature is lower than the current room temperature.
- Check the Breaker: Locate the circuit breaker for your AC unit in your electrical panel. Make sure it’s switched to the “on” position. If it’s tripped (switched to the “off” or middle position), flip it fully to the “off” position and then back to “on.”
- Inspect the Air Filter: A clogged air filter restricts airflow and can cause the AC to overheat. Replace the air filter with a clean one.
- Check the Condensate Drain Line: Locate the condensate drain line (usually a PVC pipe) near your indoor AC unit. Check for clogs or obstructions. You can try clearing it with a wet/dry vacuum or a stiff wire.
- Review the Nest App and Settings: Use the Nest app to verify that there are no conflicting schedules or settings that might be preventing the AC from turning on.
- Test with the Old Thermostat: If you still have your old thermostat, reconnect it temporarily to see if the AC works. This will help you determine if the problem is with the Nest thermostat or with your AC unit itself.
- Look for Error Codes: Check your AC unit’s control panel for any error codes. Consult your AC unit’s manual or search online for the meaning of the code and potential solutions.
- Check the C Wire: The “C” wire, or common wire, provides continuous power to the Nest thermostat. Ensure it’s properly connected and functioning. If you don’t have a C wire, consider using a Nest Power Connector.
- Factory Reset: As a last resort, try a factory reset of your Nest thermostat. Go to Settings > Reset > Factory Reset. This will erase all your settings, so you’ll need to set it up again.
Fix the Issue Without Buying Parts
Many AC/Nest issues can be resolved without immediately buying new parts:
- Nest Thermostat Reset: Restarting your thermostat often fixes minor software problems.
- Wiring Inspection: Ensure wires are snug in their terminals. Loose wires are a common culprit.
- Air Filter Cleaning/Replacement: A clean filter improves airflow, preventing overheating.
- Condensate Drain Cleaning: Clear clogs in the drain line.
- System Recalibration (Nest): Recalibrate your Nest by running a heating/cooling cycle to ensure correct settings.
- Basic HVAC Inspection: Look for ice buildup, debris blocking the outdoor unit, or unusual noises.
- HVAC Unit Breaker Reset: Reset the breaker if tripped.
When Replacement Might Be Necessary
If you’ve exhausted all troubleshooting steps and your AC still isn’t working with your Nest thermostat, it might be time to consider replacement. This includes:
- Nest Thermostat Failure: If the Nest thermostat itself is faulty and unresponsive, replacement is necessary. Estimated cost: $200-$300.
- HVAC Control Board Failure: If the control board in your AC unit is malfunctioning, it can prevent the Nest thermostat from communicating properly. Estimated cost: $200-$600 (including labor).
- Wiring Harness: Occasionally the wiring harness between the Nest and the AC may become damaged causing a failure in communication. Estimated cost: $50-150 (including labor).
Safety Warning
- Always turn off the power to your AC unit at the breaker before working on any wiring.
- If you are uncomfortable working with electrical components, consult a qualified HVAC technician.
- Avoid touching any bare wires or terminals to prevent electrical shock.
- Ensure your hands are dry when handling electrical components.
- If you suspect a refrigerant leak, evacuate the area immediately and contact a professional.
Tools You May Need
- Screwdriver (Phillips and flathead)
- Wire stripper/cutter
- Pliers
- Multimeter (for testing voltage)
- Wet/dry vacuum (for cleaning condensate drain)
- Flashlight
FAQ
- Q: Why is my Nest thermostat showing a “delayed” message? A: This usually means the Nest is waiting for the AC to cool down before restarting to prevent damage. Check your compressor delay settings.
- Q: My AC runs constantly with the Nest. What’s wrong? A: This could indicate a wiring issue, an incorrect temperature setting, or a problem with your AC unit’s thermostat.
- Q: The Nest says my AC is on, but nothing is happening. What should I do? A: Check the breaker, the wiring, and the AC unit itself for any obvious problems.
- Q: Can a low Nest battery cause AC problems? A: Yes! A low battery can lead to erratic behavior. Ensure it’s properly charged.
Conclusion
Troubleshooting your AC issues with your Nest thermostat can seem daunting, but by following these steps, you can often identify and resolve the problem yourself. Remember to prioritize safety and consult with a professional HVAC technician if you’re uncomfortable with any of the steps or if the problem persists. Getting your AC working smoothly with your Nest thermostat will restore comfort to your home. Good luck!
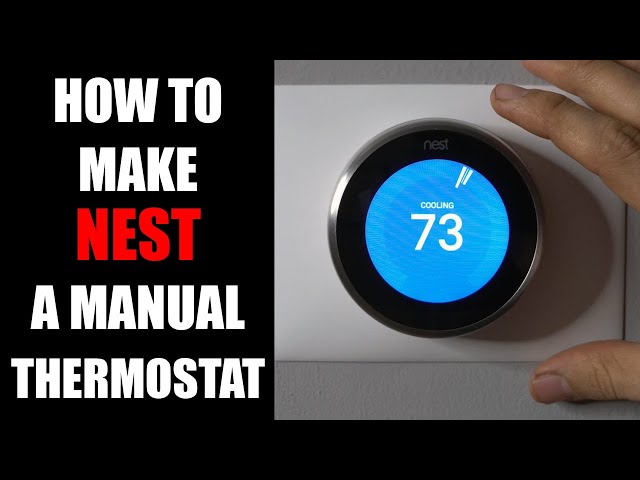
Youtube Video:
Quick Wiring Specifications & Terminal Guide
| Component / Circuit | Standard Wire Gauge | Recommended Protection |
|---|---|---|
| Control & Trigger Signals | 18 – 20 AWG | 5A – 7.5A Inline Fuse |
| Standard Auxiliary Load | 14 – 16 AWG | 15A – 20A Circuit Breaker |
| Main Power Feed / Supply | 10 – 12 AWG | 30A – 40A Heavy-Duty Relay |
Images References
Looking for more diagnostic guides? Explore our complete Air Conditioner Troubleshooting 3 section for step-by-step troubleshooting solutions.
